Posted on

Exploring Screen-Free Robotics With KUBO

Kubo Robotics Birds eye view on carpet

Finding the right Digital Technologies resources for your classroom can be tricky, especially when there are so many to choose from. This blog post is going to put a special spotlight on one resource that may help to support your curriculum and engage your young learners. Let me help you take the guesswork out of selecting a robotic resource to support your early years classroom!

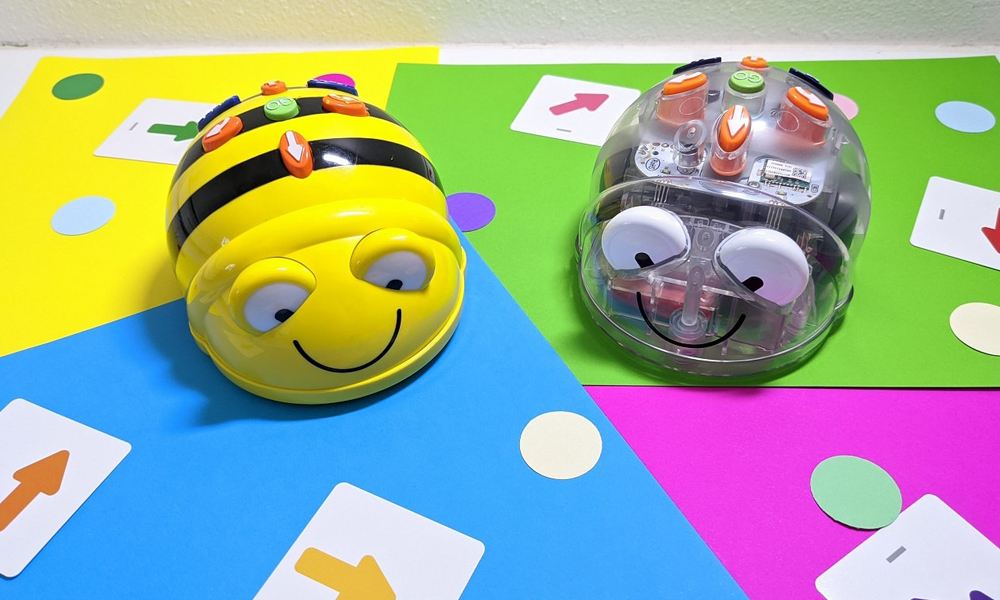
Directional sequencing is an important step towards more abstract coding and programming that develops in the higher bands of the Digital Technologies curriculum. The concept of directional sequencing can quite easily be coupled with the Mathematics discipline and the Numeracy General Capabilities. Finding meaningful ways to integrate approaches to learning is a key indicator of working smarter, not harder. But how can we make this meaningful and relevant in an everyday classroom?

Introducing Kubo!

Kubo Robotics Kit on Floor Birds Eye View


Kubo is not only a fantastic support for directional sequencing, but it can also be used to extend basic sequencing skills to include iteration. Plus, he’s super cute. Kubo uses unique technology, puzzle-like TagTiles® and colour activity maps to provide playful access to the Digital Technologies curriculum and engaging activities for students.

In my specialist Digital Technologies lessons, I use a range of digital and unplugged resources to approach the concept of sequencing. Providing a range of activities builds comfortability in the discrete skills and capabilities we intend to pass on to students. Kubo is quickly becoming a crowd-favourite activity!

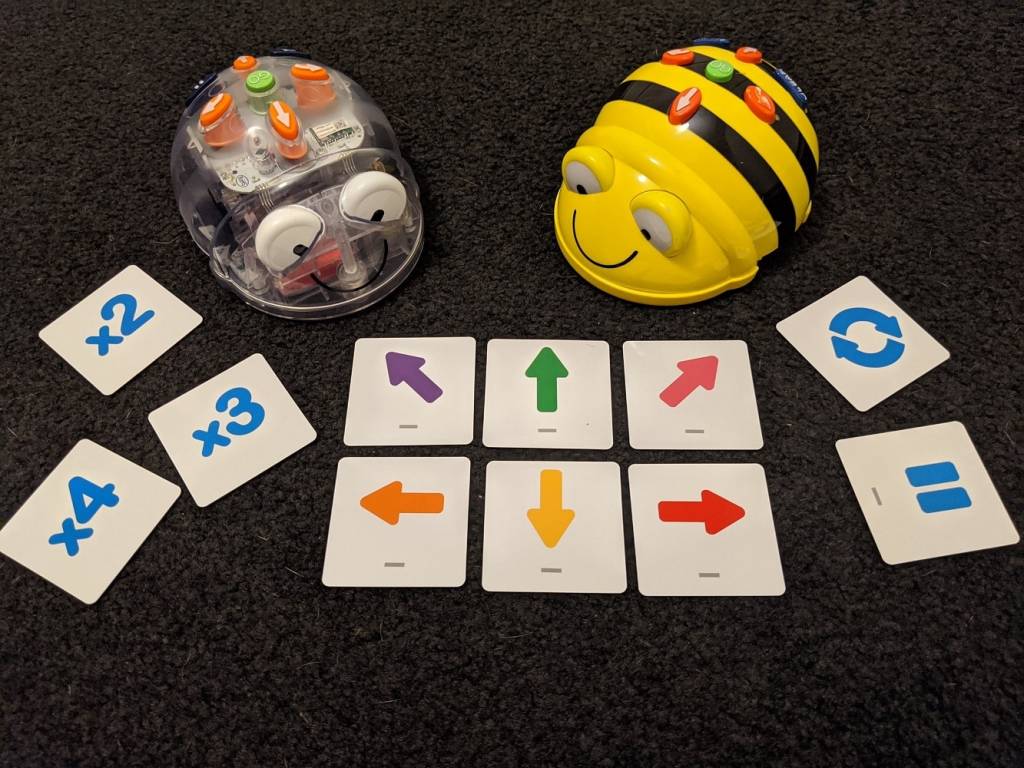
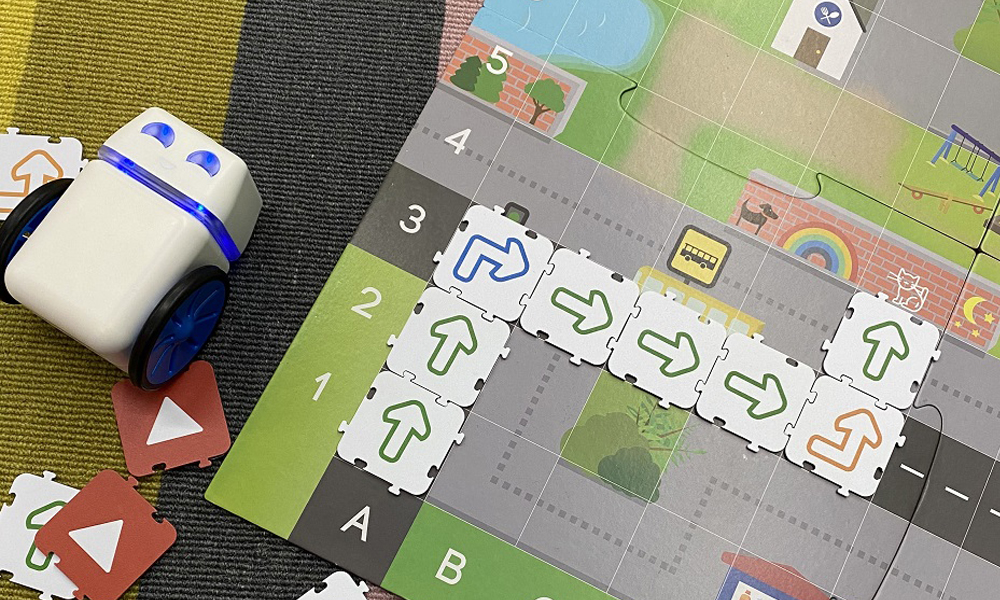
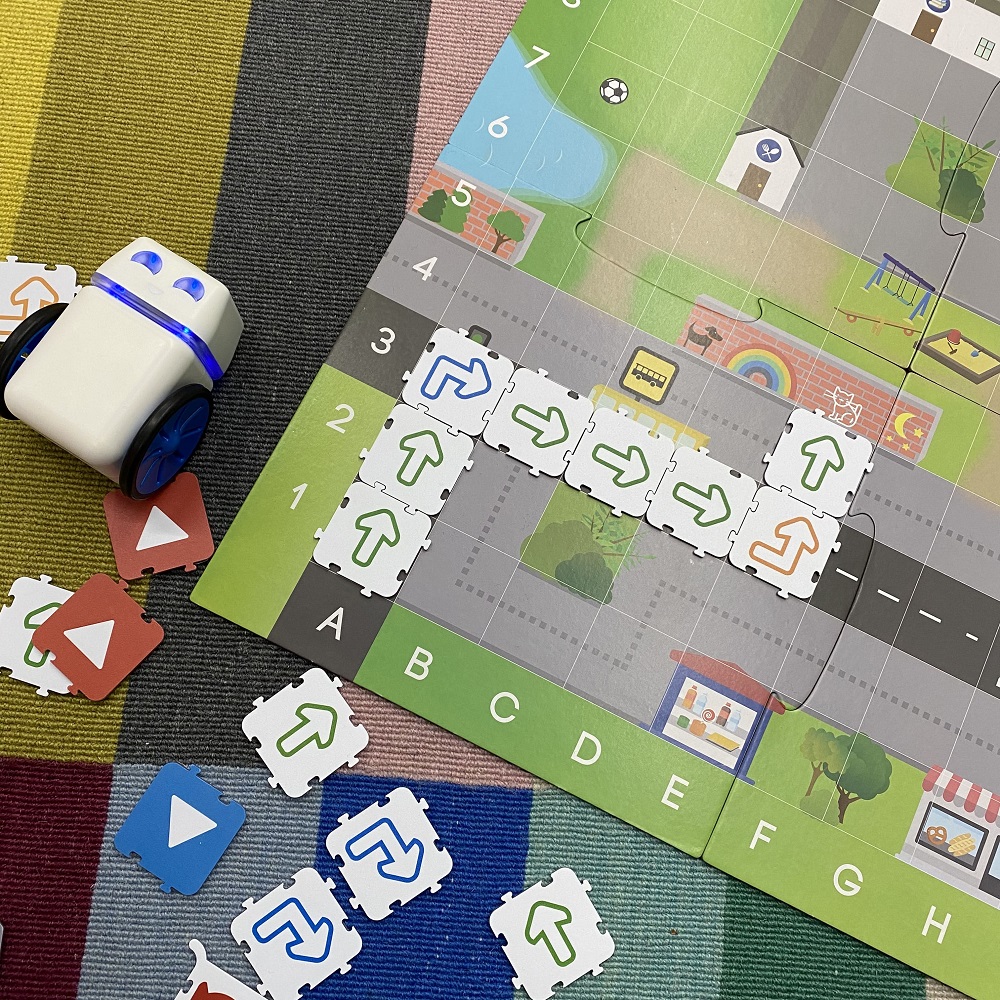
In particular, the ability to record and play back sequences of code has maintained high engagement in our lessons. The activity shown below illustrates a sample line of code that has been created and recorded by the robot. It’s as simple as building the line of code, placing the ‘record’ TagTiles® at the beginning and end and allowing Kubo to roll over the top to memorise the code. Then, simply move your Kubo onto the mat and discover the successes of the sequence. This activity has flexible differentiation, where students can begin with simple lines of code and then continue to extend as their skillset increases to lengthen the code or to include iterations.


Kubo Robotics Tagtiles birds eye view


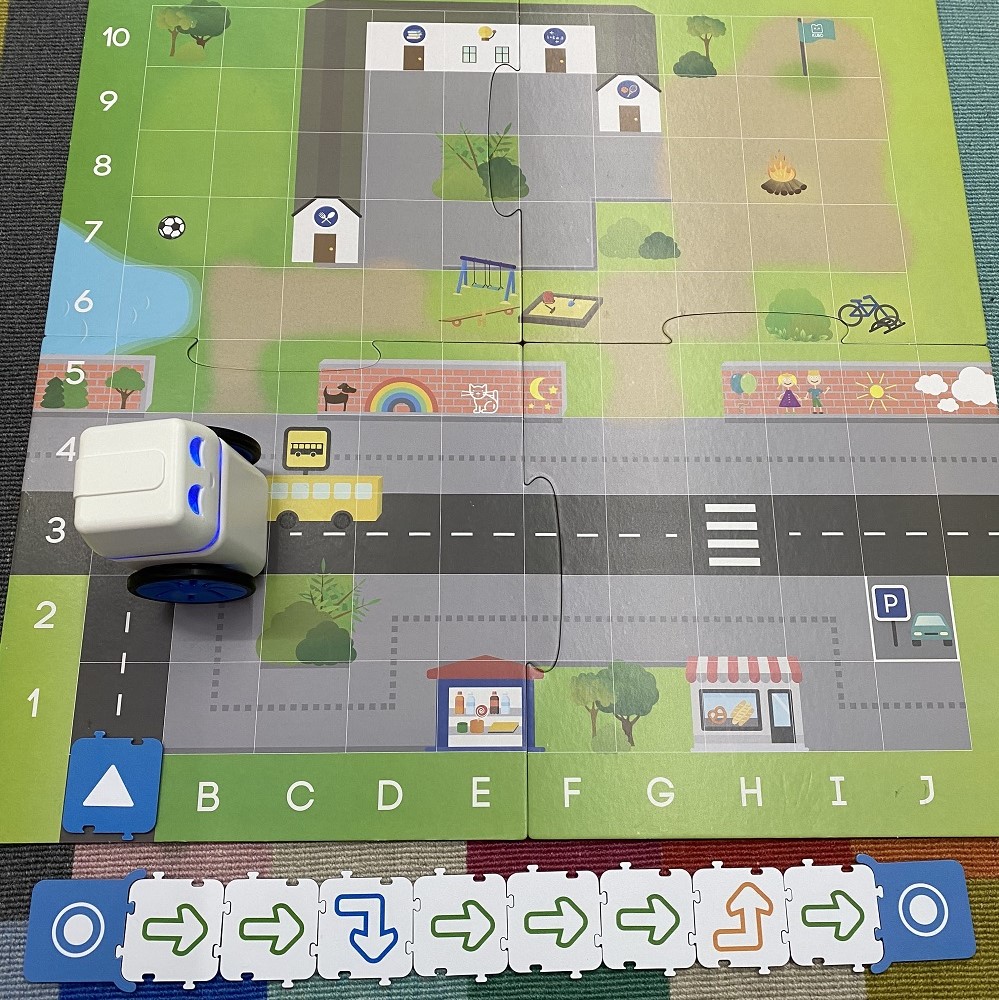
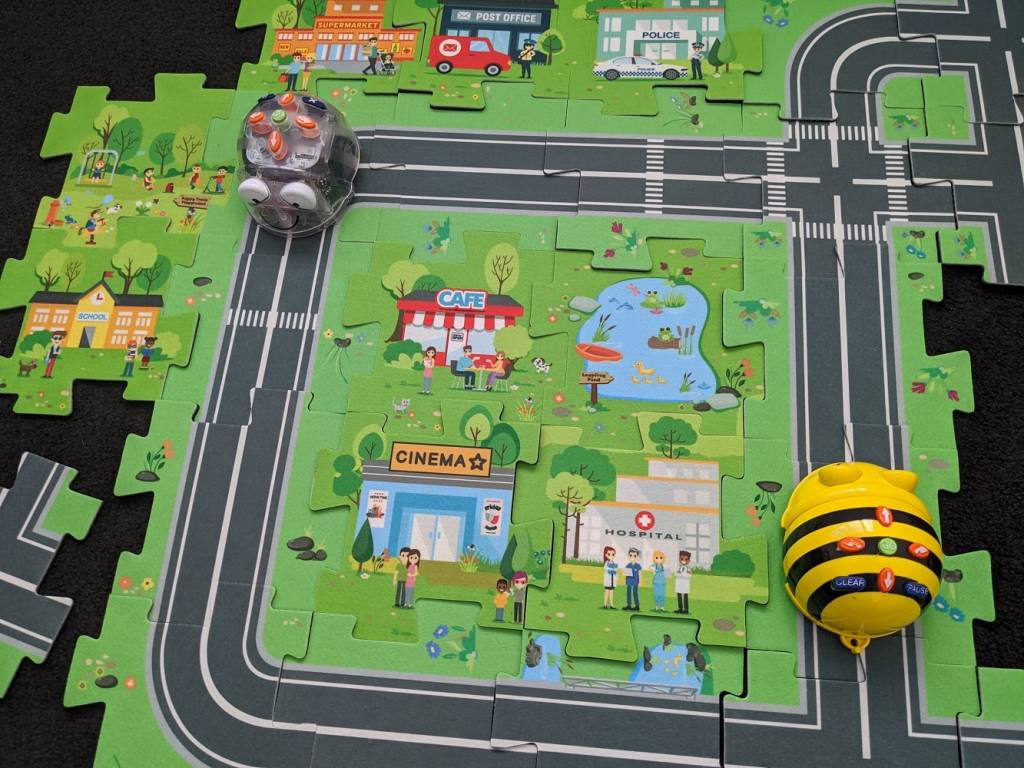
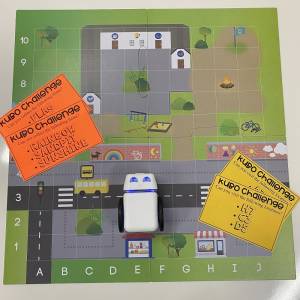
A new rotational activity that I’ve been incorporating with my Year 2 classes is called ‘Kubo Challenges’. This includes students using challenge task cards to sequence their Kubo robots to ‘collect’ various items on the town map or reach various alpha-numeric grid references. Students use their iPads and digital portfolios to take video evidence of them completing each challenge task card. This is increasing student ICT General Capabilities and providing an easy way for myself to flick through the various work samples of a large number of students within a cohort. Additionally, publishing this evidence to a digital portfolio provides students with a platform to reflect and build on previous learning experiences.

Incorporating the alpha-numeric grid referencing is also a great way to add value to the lesson by touching on the Numeracy General Capability. Students can refine their understanding of location and transformation and activate prior knowledge of concepts within the Mathematics curriculum. Click here to download a free copy of the challenge cards I use.


Kubo Challenge Birds Eye ViewKubo Challenge -side on view


I like to partner students up for these Kubo Challenges to encourage teamwork, peer support and resilience. This is an enjoyable rotation for the students to participate in and, better yet, it’s super simple and resourceful to set up each lesson. After investing in a few ‘training lessons’ for the students to understand the procedures, techniques and expected behaviours, this rotational activity now simply runs itself.

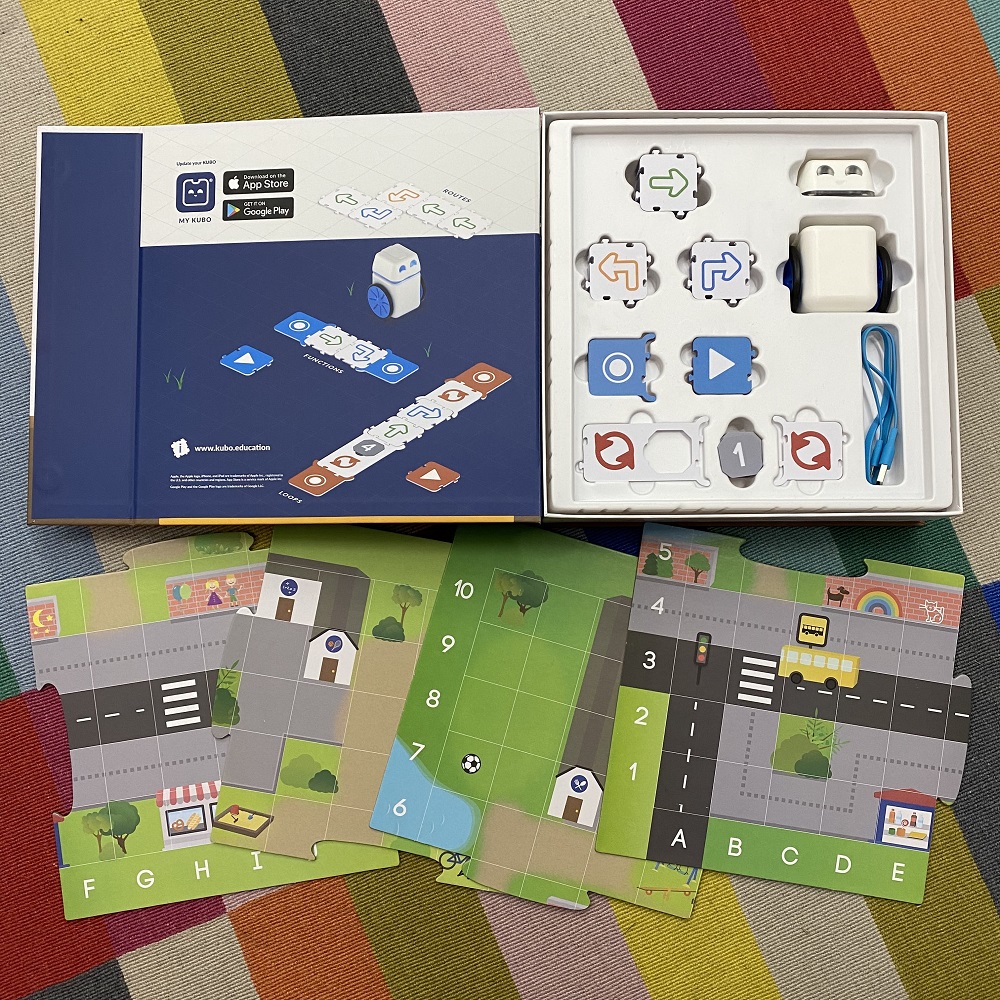
Inside the Kubo product box you will receive a range of TagTiles®, Micro-USB charging cord, easy-to-store coloured activity map and the Kubo robotic device. The Micro-USB attachment makes storage while charging very simple and compact. Kubo also have a YouTube channel  with plenty of tutorials for setting up, implementing and extending on coding concepts.


Kubo Robotics inside box content


Robotics resources may be difficult for schools to fund and in any sense, the robotics need to be respected by all users. A few rules I have my students practise when using the Kubo are:

    • Hold the Kubo with two hands (one on top, one underneath).
    • Walk, don’t run! You might knock over, drop or step on a robot.
    • Do not push and pull the Kubo like a toy car.
    • Always count and place the TagTiles® back in the container neatly.
    • Sharing is caring.
    • Always charge the robot when finished.

Having rules in place for the use of robotics in the classroom will also boost student ownership of the learning experience. Students will develop a respect and appreciation for the resources they are accessing and will show a higher level of focus on the activity in front of them.

Selecting the right robotic device for your classroom can be overwhelming. I recommend checking out the Kubo information and videos available on the MTA website  if you’re interested in giving Kubo a go! Finding resources that support meaningful engagement within the field of Digital Technologies is key for the effective implementation of the curriculum. Find what works for your classroom and I challenge you to find further cross-curricular links you can make with the technology you have. I’m confident you’ll find the best way that works for you, allowing you to share the passion you have for your lessons with your students.

Featured Product

Kubo Coding Core Kit


About the Author

Taylor is a Specialist Digital Technologies Teacher in a primary school setting. In her five years of teaching, she has found a passion for integrating a range of technologies into her classroom and strives to share these experiences with those around her. Follow Taylor along in her teaching journey on Instagram @taylorteachestech


Blog Home>

Shop MTA>

Posted on

Introduction to the Bee-Bot and Blue-Bot in the Classroom

Beebot Bluebot on directional coding mat

I have been using Bee-Bots and Blue-Bots in my classroom for several years to introduce junior primary students to computational thinking and coding. I love how the versatility of these amazing robots enables me to design learning experiences that focus on the digital technologies curriculum and also integrate literacy and mathematical concepts.

I am often asked what the difference is between the Bee-Bot and the Blue-Bot and which robot would be more suitable to purchase. Yes, they are similar, but there are some differences that could help determine which robot is more suitable for your school. Whether you are using the Bee-Bot or the Blue-Bot, both robots support students in developing their understanding of directional language and basic coding algorithms.

Beebot and Bluebot Robots on colourful directional mat


Bee-Bot
The Bee-Bot is a yellow bee-shaped robot that can remember a sequence of up to 40 commands. Users can direct it to move forwards and backwards in 15 cm increments, and to turn 90 degrees left and right using the four directional buttons, and has go, pause and delete buttons. After each command is performed, the Bee-Bot beeps and blinks, which allows students to count its movements and follow the sequence of code they developed to ensure its accuracy. This enables students to create simple algorithms while developing their problem-solving skills in a fun learning environment.


Blue-Bot
The Blue-Bot is a clear robot, allowing students to view the hardware within. It is the same size as the Bee-Bot and has the same command buttons, but the difference is the addition of its Bluetooth capability, which allows it to connect to the Blue-Bot app. Using the app, the Blue-Bot has the added functionality to turn 45 degrees and use repeats and loops in the development of code. The Blue-Bot app also works without a Blue-Bot, making it a great resource in itself for schools that don’t have the robot.

When introducing any new technology, I am a big advocate of allowing students the opportunity to play and explore the functionality and possibilities of the device. After this exploration time, a more structured approach of creating activities to engage and challenge students can be undertaken. Here are some ideas on how to introduce the Bee-Bot or Blue-Bot to your students.


Road Maze Tile Kit
The Road Maze Tile Kit provides students with roads, buildings and park puzzle pieces they connect together to create an individual mat for their robot. A total of 27 pieces include many landmarks that can be arranged in any order so students can design their very own little city. Once assembled, students can program their Bee-Bot or Blue-Bot to manoeuvre to each landmark.

Beebot Road Maze Kit and Beebot Robot


Robotics Coding Cards
The Robotics Coding Cards pack includes 60 double-sided directional instruction cards. Each card’s instruction command corresponds with the Bee-Bot and Blue-Bot’s buttons of forwards, backwards, left and right. On the reverse of the cards are more advanced commands of repeats, loops and turning degrees. These cards are a fantastic visual that students can use individually or collaboratively in small groups to structure the sequence of commands they will use to program their robot.

When the program has been entered into the robot and is ready to begin, students can follow both the robot and the coding cards to ensure their program is correct or to find where there may be an error in their program to help them understand what changes may need to be made to achieve success.

Beebot and Bluebot with Robotics coding cards


Mats – Variety
There are a variety of mats designed for both the Bee-Bot and Blue-Bot that can link student learning across curriculum areas. The Alphabet, Australia, Money, Shapes and many more themed mats are available to support cross-curricular learning as students program their robot to manoeuvre to specific locations on the mat being used.

Example: The Alphabet Mat is a great resource as students can program their robot to manoeuvre across the mat to develop letter recognition, link sounds and create words or names.

Alphabet coding mat with Beebot and Bluebot


Pen Holders

The Pen Holder is a shell that attaches to the Bee-Bot or Blue-Bot that allows students to use the robot as a drawing tool.

Pen Holder helmets on Beebot and Bluebot sitting on white paper

This is the perfect addition to the robot as students can program the robot to draw two-dimensional shapes or to trace a route the robot has travelled, giving them immediate feedback of their program.

Pen Holder Beebot and Bluebot drawing circle on white paper

View video of Blue-Bot in action here


How have you introduced Bee-Bots or Blue-Bots into your classrooms? We’d love the hear from you!

I have previously written posts on how I integrate these robots into literacy and mathematics. Here are 10 ideas that can be used in your classroom.

Five Literacy Bee-Bot Lesson Ideas for the Classroom
https://blog.teaching.co.nz/5-literacy-bee-bot-lesson-ideas-for-the-classroom


Five Mathematics Bee-Bot Lesson Ideas for the Classroom
https://blog.teaching.co.nz/5-mathematics-bee-bot-lesson-ideas-for-the-classroom


About the author

Eleni Kyritsis is an award-winning Year 3 teacher and Leader of Curriculum and innovation from Melbourne, Australia. Eleni facilitates professional learning workshops around the world that focus on unleashing creativity and curiosity in classrooms. You can contact her at elenikyritis.com and @misskyritsis


Shop MTA>


Blog Home>