Posted on

Explicit Instruction – What Does This Mean?

Children reading in classroom

I started my career as an occupational therapist. My job was to help people relearn how to do things in their everyday life after experiencing an illness or disability. To do this I had to do two things: firstly, I had to analyse the task to establish exactly what the person needed in order to be able to carry out the task and secondly I had to find out what they could and could not do. Only then could I develop a plan to help them master the task. I have applied this same approach – task analysis and assessment of skills and knowledge – to the process of teaching and learning literacy skills.

Mastering a skill of any sort usually involves learning strategies and techniques with lots of practice to hone the skill so that it can be used in different situations. Think about how we teach young children to play a sport. Children who want to play football for example, spend a lot of time learning the skills of ball handling, working with others and understanding the rules of the game. With those skills in place, they are then ready to start playing a game of football.

Whether children start playing football as pre-schoolers or come to the game later, they still have to master these skills and learn the rules of the game. Practice sessions continue to teach and refine these skills and budding footballers spend a lot of time honing their skills so that they can use them automatically and efficiently in a game.

This approach to teaching a sport works well when teaching literacy. Writing and reading are complex processes. Just like a game of football, they require the ‘player’ to master a range of skills and knowledge and to understand how to use them. Just like in football, some children pick up the skills effortlessly and master them with only a small amount of practice. Others take longer, and some decide that football is not for them because the skills required seem too hard to master. Being able to read and write is not like football – playing football is optional, learning to read and write is not. The way we teach children to read and write has to be successful. We need to explicitly teach the skills and knowledge they need to learn if they are to become successful readers and writers.


So what does explicit instruction mean for literacy?

It means understanding what is involved in learning to read and write. It means finding out what skills and knowledge students already have and where they have gaps. It means using assessment to drive instruction – to teach the skills and knowledge students have not mastered but need to learn. Sometimes this means whole class instruction and sometimes it means giving students the extra instruction and practice they need in small groups or individually.


Explicit instruction to close the gaps

I wrote Catch Up Your Code’ and Sort Out Your Syllables’ to address gaps in literacy knowledge for students in upper primary and secondary classrooms. From Year 5 and beyond, students are required to read more and more complex texts in subject areas that are often new to them. The language is more formal, and many words are multisyllabic, abstract and technical. Students who have not mastered the ability to decode automatically and efficiently will struggle. It is estimated that the average fifth year student encounters about ten thousand new words – described as an “orthographic avalanche” that overwhelms most of those without adequate decoding skills.


Teach decoding explicitly

If decoding is not automatic, the skills and knowledge needed must be taught explicitly. First and foremost, students need an in-depth knowledge of how the alphabetic code of English works. ‘Catch Up Your Code teaches this. To decode efficiently, students must recognise graphemes and be able to pronounce them in different ways. Once they have a conscious understanding of the diverse nature of grapheme-phoneme relationships, they can use this knowledge as a foundation for learning to decode unfamiliar multisyllabic words.

That’s where Sort Out Your Syllables’ comes in. Students use their knowledge of the code for the vowel sounds of English, to find and pronounce syllables in unfamiliar words. These two areas of knowledge and skill – alphabetic code knowledge and strategies for decoding multisyllabic words – will dramatically improve decoding skills in the upper years. If decoding isn’t efficient by Year 5, it will not become so, without explicit instruction that targets gaps in knowledge and skills.


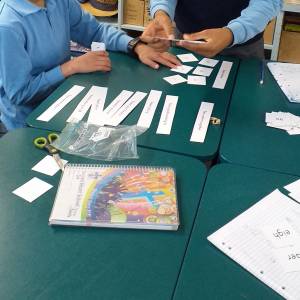
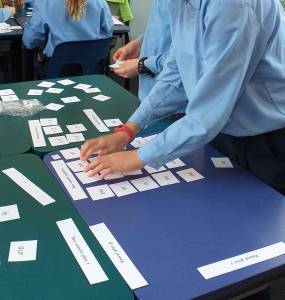
Sorting vowel spelling patterns – the key to finding syllables in words

These Year 7 and 8 students are working collaboratively to learn about the nine types of vowel spelling patterns they will find in syllables.

Sorting spelling patterns activity on classroom deskSorting vowel patterns activity on classroom desk


Teach the skills for writing explicitly

From Year 5 onwards, students are required to write longer, more complex scripts in different writing genres. The expectation is that they should have mastered the foundation skills for writing: to write speedily and legibly, to spell most high-frequency words correctly, to use spelling strategies to spell most words close to correctly, to write in paragraphs, to use punctuation correctly, to proofread their writing for spelling and punctuation errors, to revise and edit their work to improve the content. Unfortunately, many students who find handwriting and correct spelling a challenge will struggle to master the other higher-order skills of writing, regardless of their potential to write as well as they can speak.

The way to improve writing skills is to explicitly target the areas that need improvement, starting with the foundation skills. If handwriting is a major challenge by Year 5, students may be best to use a digital device to avoid illegible handwriting hindering their writing progress.

If they struggle to spell words correctly, a range of strategies are needed. Firstly, students need to be able to write every sound of English in at least one way and they also need knowledge of the diversity of the code. ‘Catch Up Your Code’ teaches this. They need to know how to write multisyllabic words they can say but not spell. Sort Out Your Syllables’ teaches this.

They then need to learn about the spelling system of English – the rules and conventions that affect why words are written the way they are. Once they are fluent in getting words on the page in a form that can easily be read – even if they are not all spelt correctly – they can then be taught strategies for punctuation and paragraphing, authorship, proofreading and editing. All the skills for writing need to be taught explicitly, starting with those that build the foundation for authorship.


Summary

Explicit instruction for literacy is simply targeting the knowledge and skills that research has shown to be essential for students to learn to read and write, and ensuring they are taught in a logical, sequential and direct way. It doesn’t matter whether students have just started school or have been at school for a while – everyone benefits from explicit instruction.

Use assessments to find out what students know and can do. Teach what they need to learn.
Check they have learned it. Leave nothing to chance.


The way we teach has to ensure all students become successful readers and writers. Teaching skills and knowledge explicitly is the best way to ensure this happens.


Featured Products:

Catch Up Your Code

Sort Out Your Syllables


About the Author
Joy Allcock (M.Ed). Independent Literacy consultant, facilitator of teacher professional
development throughout New Zealand and internationally. Presenter at NZ and international literacy conferences (IRA, ASCD/ACEL). Author of a range of literacy resources for teachers and students (
www.joyallcock.co.nz). Leader of Shine Literacy Research Project (designed and evaluated by Massey University – www.literacysuccess.org.nz)


Blog Home>

Shop MTA>

Posted on

Loose Parts: An Invitation To Play

Loose parts activity on table BIV

‘Open-ended’, ‘sustainable’, ‘creativity’ and ‘infinite possibilities’ are just some of the words that come to mind when we think about loose parts in play. Loose parts are becoming increasingly popular in early childhood settings and it’s not surprising to consider why. Here at Explore & Develop Narraweena, we have looked to the principles of Reggio Emilia to inspire and guide some of our practices. Their use of loose parts provides many wonderful ideas on how to incorporate them into the learning environment and thus our journey into the use of loose parts began.

“The wider the range of possibilities we offer children, the more intense will be their motivations and the richer their experiences.”

-Loris Malaguzzi, Founder of the Reggio Emilia Approach

Wooden bowl with jewels stones and shell with child hand square

So what exactly are loose parts? Loose parts are objects or materials that have no particular intended purpose or use. They can be used in a multitude of ways and often rely on the imagination of the individual who is using them. They are usually strategically placed in different areas of the learning environment and are often accompanied by a provocation for learning. When engaging with loose parts, children are encouraged to be creative, inventive, resourceful, innovative and imaginative. Loose parts work well for both individual and group experiences and can be explored both indoors and outdoors. It is important to consider the ways in which you store loose parts to ensure that they are inviting, organised and can be easily packed away for the next use.

Sorting trays full of various loose parts square

Our preschool rooms were some of the first to begin exploring loose parts. We began to recognise that there were a range of loose parts that could be incorporated into play spaces that particularly focused on opportunities for creative expression. Items such as shells, corks, buttons, feathers, bottle tops and leaves were placed in small divider boxes near the art area. These small parts were separated to highlight each individual resource and so that children could easily see what was on offer. The potential for creativity was evident as educators observed the children utilising the same parts to create an array of different masterpieces. This supported our philosophy that art should not necessarily have a defined end but instead be open-ended to encourage children to experiment and explore the possibilities of art. We continue to offer art experiences in this way, and over time have refined the process, at times adding provocations that provoke ideas and imagination. To support this, educators will carefully select items that support this provocation.

It is important to note that the way in which loose parts are placed can make a distinct difference to their use. Having carefully selected resources that are placed in divided or separate spaces ensures that they are visually appealing and do not overwhelm children. This can encourage the notion that each resource possesses its own unique properties and promotes a child’s respect for individual resources. They should also all have a space or place where they belong, as loose parts are designed to be assembled and pulled apart. Having a designated space allows these loose parts to be easily packed away, not only by educators but also by the children, thus empowering them further.

Sensory play activity set up on table Square

Natural objects became a frequent feature of loose part play. These resources were not only easily accessible and sustainable, they also offered many opportunities in play. Natural loose part resources could be collected on a simple nature walk and then added to small world play, used as a point of investigation, used in art experiences or even incorporated into construction. Beyond creativity, we also then began to see these resources as a wonderful way to explore STEM concepts in play. Exploring sticks, stones, shells, leaves and pine cones encouraged children to think about size, shape, matter, volume and even patterning. This also opened up the opportunity to explore transient or ephemeral art; an art system that encourages resources to be assembled into patterns, designs, symmetry, lines or shapes and then pulled apart to create again. Children could spend time considering their creations and then piecing together a design with similar or opposing attributes. We then began to add these to construction which meant our children who love construction would be more likely to use them.

Reaching a wider audience makes a resource more valuable and something we truly believe in at our service. Loris Malaguzzi suggests that children have a hundred languages in which to explore, create and express themselves; open-ended resources such as these encourage children to do exactly that. Through construction, children could use rocks, shells, coloured stones and more to add depth, balance and imagination to their designs. All the while, these children were also using measurement, balance and one-to-one correspondence to extend and build upon mathematical concepts.

Giant Shiny Pebbles In Child's Hands Square

Blocks and jewels standing on mirrored surface square

“A ‘loose-parts’ toy, as Nicholson defined it, is open-ended; children may use it in many ways and combine it with other loose parts through imagination and creativity . . . Nature, which excites all the senses, remains the richest source of loose parts.”

Richard Louv

Pine cones and tree bark in wooden tray with open book display ocean behind square

seashells in wooden tray

While the benefits of loose parts indoors became evident for art, then construction and other forms of creativity, the outdoors soon became a place where loose parts could also be incorporated. When looking to add loose parts items to the outdoors we looked to collaborate with our families and bring along carefully selected items for play.


natural loose parts in children's hands Square


We invited our families and educators to source pipes, tyres, wood and old pots and pans. This again highlighted the sustainable benefit of using old parts which may otherwise end up in landfill. There were many areas of the outdoor space that these could be added to and they became carefully placed around the yard. The sandpit became a hive of activity with pipes and sieves being added. This challenged the children’s thinking and we observed them being used to fill, tip pour and dig.


In other areas of the outdoor space we saw loose parts incorporated into play. Pipes became binoculars, tunnels or robot arms. Pieces of material turned into pirate ship sales, cubby houses, forts and butterfly wings. Pots and pans turned into an entire instrumental band with drums and cymbals, or were added to the mud kitchen for hours of muddy exploration. Loose parts became permanent structures in our outdoor garden as we added old pots and combined pieces of wood to create new garden beds. It was now evident that loose parts were here to stay and they continue to feature in all areas of our learning spaces, used and reused for different experiences.

Pots and pans hanging from wooden frame in garden

If you are beginning your journey into loose parts, you will not look back. One word of advice would be to introduce them slowly and carefully. Find a space for each new item before including another and have the children become familiar with using them. Before long, you will realise the endless potential of loose parts and observe the many ways they can be used over and over again to create open-ended, imaginative play spaces.


How do you explore loose parts in your learning environment? We’d love to hear from you!


About the Author:

Mel Ishkhanian has over 15 years experience in the early childhood industry and is currently employed at Explore & Develop Narraweena. She has a bachelor degree in Early Childhood education and engages in frequent professional development in order to keep up to date with current theory and research within the industry. As Educational Leader of the service, she applies current research into practice and strives to connect the service to both the local and wider communities. With a passion for treating children as capable and confident beings, she applies theories of play, the 8 ways of Learning Pedagogy and is also influenced by the Reggio Emilia principles. Check out regular social posts by Mel @explore&developnarraweena.


Featured Products

Round Sorting Tray

Wooden Counting Tray

Mirrored Pebbles


Shop MTA>

Posted on

Mirrors And Reflections In The Learning Environment

Mirrors and Reflections Preview

We see reflected and mirrored images wherever we go. From our own reflections looking back at us in the bathroom mirror or a shop window to the reflections of nature on a still lake or in our car’s rear-view or side mirrors – we are surrounded by reflections! Mirrors and reflections can bring curiosity, fascination and discovery for all of us, including children.

You’ll likely remember the look of surprise when a baby recognises themselves in the mirror, or the look of wonder and concentration as toddlers examine the details of their facial expressions or the happy giggles of pre-schoolers as they dress up and march past the mirror in their fancy and creative costumes. Mirrors and the reflections they make can be a source of fun, intrigue, inquiry and experimentation and have so many incredible learning opportunities. Let’s have a look at some mirrors and reflections activities ideal for the early childhood learning environment.


Mirrors + Nature

The great outdoors is filled with an endless supply of beautiful and interesting objects. Leaves, pebbles, sticks and twigs, flowers, feathers, pinecones, seedpods and grass to name but a few! You might even be fortunate enough to find an old birds’ nest on the ground after a windy day. It’s a wonderful opportunity for a nature treasure hunt, and the children are able to bring back their treasures to place on the mirrors ready for further exploration. There are all sorts of shapes, textures, colours and shades to investigate. With so many incredible reflections happening, many questions can arise and conversations can take place, welcoming further inquiry and exploration. This is also an ideal activity for magnifying glasses, opening the door for even more opportunities for reflective surface exploration.

Mirrors and Reflections, natural loose parts in mirrored tray

Featured Product:

Reflective Mirror Tray


Mirrors + Art

Mirrors are a great addition to the art space. They allow children to experiment and explore all the angles of their painting subjects, from still life paintings of fruit and flowers to exploring light and shapes in multiple dimensions. Mirrors can also be a fun way to combine art with the exploration of a child’s self-image by using their own face as the painting subject. Children are able to look at their reflection in the mirror and, using a brush with paint, they can apply the paint directly onto the mirror to create a portrait of themselves using the mirror as the painting surface. Simply wipe the mirror clean and it’s ready to go again.


Mirrors and Reflections portrait activity featuring childs painting on a mirror and paint pots

Featured Product:

Non- Spill Paint Pots

Reflective Mirror Tray

Mirrors + Loose Parts

Mirrors and loose parts go so well together. Loose parts play is all about the open-ended possibilities to use loose items to make and mould, to tinker around, to build and construct, to form shapes and patterns, to transport and carry loose items around or to use as visual representations for children’s imaginings. There’s really no limit to loose parts play. With loose parts, each day becomes a new way. Adding in mirrors provides even more possibilities for wonder and discovery, bringing mirrored images and reflections to the learning space for an extra added dimension to loose parts play.

Mirrors and Reflections buttons and jewels reflecting on Mirrored table

Featured Products:

Mirrored Sensory Tray

Mosaic Pieces

Buttons

Marbles

Omni Wooden People


Mirrors + Rainbows

So often children are fascinated by rainbows. The giant presence of a rainbow in the sky when the sun comes out after a rainy day is truly spectacular. There are bright colours to explore, all nesting neatly into each other in gradually increasing arches. When rainbows are reflected over a still lake there are even more opportunities for wonder and exploration. Recreating the magic of rainbows in the learning environment can be done using mirrors combined with colourful wooden rainbows. The rainbows can be rearranged in so many combinations of colour and size and can also be combined with all sorts of resources for building, loose parts exploration or small world play. The only limit is their imaginations!

Mirrors and Reflections rainbow arch refelcting in mirrored tray

Featured Products:

Three Panel Folding Mirror

Large Wooden Rainbow

Reflective Mirror Tray


Mirrors + Print Making

Another creative way to use mirrors in the learning environment is with paint as a print-making surface. Paint is added onto the mirror, ready to be smoothed out with brushes or sponges, or, for an, even more, fun hands-on sensory exploration, use hands and fingers to smooth the paint across the mirror. Your print-making surface is now ready for the design process to begin. Simply use brushes, or fingers, to make a pattern or picture in the paint. Place a piece of paper onto the paint-covered mirror and gently smooth the paper down. Then, carefully peel and lift the paper off the mirror to reveal the picture or print that has been transferred over. It’s a wonderful way to explore the concept of reflections and mirror images through hands-on art.

Mirrors and Reflections pink paint printing activity

Featured Products:

Pink Finger Paint

Non- Spill Paint Pots

A3 Cover Paper

Reflective Mirror Tray


Mirrors + Sensory Exploration

Mirror trays along with sensory exploration are also a wonderful addition to the learning environment, allowing all sorts of fun and discovery to take place using sand, slime, goop or foam. Hands-on sensory exploration has so many developmental benefits, from allowing children to get a ‘feel’ of their fingers and hands and all the things they can do, to building strength and coordination of motor skills. This all allows children to carry out so many everyday activities and tasks including drawing and writing, brushing teeth, self-feeding, dressing and undressing, building and construction or working on fiddly and tricky manipulation objects. Children are able to use their hands and fingers to make lines and patterns in the sand or other chosen sensory material, drawing and even experimenting with making the form and shapes of numbers and letters.

Mirrors and Reflections_mirrored tray filled with sand and sandcastles

Featured Products:

Magic Sand

Reflective Mirror Tray


Mirrors + Construction

A mirror added to building and construction adds another level of interest and intrigue. Mirrors can be used as a building surface, or placed in and around the building space, allowing children to explore and experiment with the shapes and forms of their chosen building materials as their structure builds up into the sky. The best part of construction is knocking it down afterwards! We all know that happy sound of shrieking and laughter as a child knocks down their building when they’ve finished with it. Mirrors multiply the merriment, providing many angles of reflection as buildings go up as well as down. And when mirrors are added with more mirrors, they reflect children’s constructions infinitely. It’s an activity-rich in exploration and learning!

Mirrors and Reflections LEGO Duplo on mirrored table

Featured Products:

LEGO Duplo Brick Set

Reflective Mirror Tray


How do you use mirrors in your learning environment? We’d love to hear from you!


About the Author

Penny Groen is an Early Childhood Teacher who has been working in Early Childhood Education and Care settings around Sydney for 17 years. She has a passion for working in meaningful partnerships with families and communities, providing a responsive and engaging curriculum where everyone feels welcome to contribute. You can see Penny’s interest in the natural world with all the weird and wonderful experiments the growing both inside and outside the classroom. Penny’s also known for equipping children with the tools to explore their interests and celebrate the discoveries each day brings


Shop MTA>

Blog Home>

Posted on

Creating Real World Solutions With The Micro:bit

microbit sleeve on kids arm

The BBC Micro:bit is a favourite Digital Technologies tool of mine that allows our students to design solutions to problems, create games, make music and respond to the surrounding environment.

The small handheld micro-controller can be coded by students using Block Code, Python, Javascript or Scratch 3.0, making it a versatile tool that can be adapted for students in primary and secondary classrooms.

The features of the Micro:bit are;

  • USB connector: Connects to a computer for power and to load programs onto the Micro:bit
  • 25 LED lights: Can be individually programmed to show shapes, text or numbers
  • 2 buttons (A and B): Programmable input buttons
  • Light sensor: The LEDs on the Micro:bit can also act as a light sensor to detect ambient light
  • Edge Connector: 25 external connectors, called Pins, on the edge of the Micro:bit allow you to connect to other input and output electronic hardware, including LEDs, motors and sensors
  • Battery socket: Power the Micro:bit using batteries
  • Reset button: Restarts the Micro:bit
  • Radio: Communicates with other Micro:bits
  • Bluetooth antenna: Wirelessly sends and receives signals to Bluetooth enabled PCs, smartphones, or tablets
  • Processor: Where the program is stored and executed
  • Compass: Detects the direction (north, south, east, west) the Micro:bit is facing
  • Accelerometer: Detects if the Micro:bit is being moved, tilted, shaken or in free-fall and at what acceleration
  • Temperature sensor: Detects the current temperature of the Micro:bit in degrees Celsius

microbit stepcounter

Introduction to the Micro:bit

The Makecode platform, developed by Microsoft, allows students to code using Block Code and Javascript. It has a great range of project tutorials for students to work through to develop their understanding of, and familiarity with, the Micro:bit.

Website: https://makecode.microbit.org/

My favourite tutorials:

Rock, Paper, Scissors
Name tag
Step counter

Step Counter

microbit stepcounter code blocks

Extension: Have students personalise and/or make enhancements to the code.

Step counter – Enhanced with a message displayed on the Micro:bit when the user reaches 1,000, 5,000 and 10,000 steps.

microbit stepcounter blocks

Once students have developed a basic understanding of how the Micro:bit works, they can be given a range of projects or challenges to solve individually or in small groups. These challenges will allow students to use their imagination and creativity to design their end product.

BOSON – Starter Kit for Micro:bit

microbit in box

Micro:bit is a simple micro-controller that can be enhanced with a range of add-on resources to allow students to achieve even more. The Boson Kit comes packed with easy-to-attach modular blocks to further empower student creativity and projects.

The Boson Kit features:

  • Micro:bit expansion board
  • Push button
  • Motion sensor
  • Rotation sensor
  • Sound sensor
  • LED light
  • Mini fan
  • LED strip
  • Mini servo

microbit fan sensor with button and childs hand
Incorporating the features of the Boson Kit into their designs allows students the opportunity to create solutions that can respond to a variety of inputs or sensors and respond or act with a desired output.

microbit sensor circuit setup

Micro:bit Pets

Students create their own Micro:bit Pet. The pet must react to different Micro:bit movements by using the LEDs and sounds to showcase the pet’s emotions. Students use art and craft materials to design and create their pet, integrating the Micro:bit to act as their pet’s face.

microbit pet green, faeturing laptop in background

microbit pet pink on classrom desk


microbit pet orange on classroom desk


microbit pet yellow with laptop in backgroundMaterials:


UN Sustainable Goals

There are a total of 17 goals that make up the UN Sustainable Goals. I focus on two or three that connect to the current learning themes taking place in our classroom when undertaking this project. This provides students with a real-life scenario to develop a solution using the Micro:bit.

UN Sustainable goals vector table

Students need to apply their content knowledge from our units of work in class, to generate ideas, code a solution and create a prototype.

Examples created by students aged 11-13 years old.

Automated Street Lights
Goal 7 – Affordable and Clean Energy
As pedestrians walk on the footpath at night, the light above sensors their presence and switches on. This provides light where it is needed, saving energy as they are not on all night long.

microbit automated street lights


Class Countdown
Goal 4 – Quality Education
This device will be installed in every classroom and every student wears a synced watch. As students enter the classroom they press button A to automatically mark the roll. If students require teacher assistance, they press button B on their watch. If the teacher wants all students’ attention on the floor, they get a countdown timer to appear on the LED screen of their watch. This was designed to save time in the classroom so teachers and students can work more efficiently.

microbit class countdown


Tree Cut Down Warning System
Goal 13 – Climate Action
Goal 15 – Life On Land
Trees in forests have sensors attached. When a tree is cut down it notifies the rangers, so they can then locate where the tree is and stop deforestation before it occurs.

microbit tree cut down warning system


Turtle to Clean the Ocean
Goal 14 – Life Below Water
The turtle swims in the ocean collecting rubbish. It was designed to appear like other animals in the ocean so as not to scare others.

microbit turtle to clean ocean


Wellbeing Watch
Goal 3 – Good Health and Wellbeing
This wellbeing watch helps fight mental health issues. When button A is pressed, either a joke, funny emoji or funny sound will play at random to cheer the person up. When button B is pressed, it notifies authorities of the location and that this person is in trouble and needs urgent attention.

microbit wellbeing watch


The Micro:bit and Boson Kit allow students to work through the design process to prototype and solve real-life problems. These resources give students the creative freedom to explore and generate ideas through hands-on learning experiences. How are you using these tools in your classroom?

Featured Product:

Boson Start Kit for Micro:Bit & MicroBit


How do you use Micro:bit in your classroom? We would love to hear from you!

About the author

Eleni Kyritsis is an award winning Year 3 teacher and Leader of Curriculum and innovation from Melbourne, Australia. Eleni facilitates professional learning workshops around the world that focus on unleashing creativity and curiosity in classrooms. You can contact her at elenikyritis.com and @misskyritsis

Shop MTA>

Posted on

How To Incorporate Natural Resources Into The Classroom – Part Two

Natural Resources World With Figurines Pine Cones And Furniture

There are so many ways nature can be brought into the classroom as part of children’s learning, and I shared lots of ideas in Part One of How to incorporate Natural Resources Into The Classroom Many of you really enjoyed the simple and effective ways I have managed to bring bits of nature into my classroom, which inspired me to share more of these ideas. Read on to find out how I incorporate more natural resources in the classroom.


Nature patterns

Flower Sorting Tray With Natural Resources In Each Petal Shaped Container


Can you create a pattern? One of my favourite times to incorporate natural items is during maths. Natural items extend themselves beautifully to teaching mathematical concepts, especially through hands-on learning. Whenever I am teaching my students about repeating patterns, I love presenting them with natural items for them to explore patterning with. In this activity, students were free to use natural materials to create and label their own patterns.

Featured Product:
Flower Sorting Tray


Can you make a leaf letter?

Letters On Leaves With Autumn Theme Scattered On Desktop


Leaves are just one of the most amazing natural resources to use in teaching and learning because they’re free, readily available and there are a plethora of ways they can be used! A few years ago, I had this learning space set up in my kindergarten classroom as an opportunity for literacy development. We read the book ‘We’re going on a leaf hunt’ and went on our own leaf hunt in the playground to collect the leaves we needed for this learning space. When children engaged with this stimulus, they created letters using the leaves and developed letter recognition skills and their understanding of letter formation.

Featured Products:
Nesting Wooden Trays – Set of 3
Three Way Mirror


Using flowers

Flower Sorting Tray Filled With Natural Resources


Is it just me or does anyone else get really excited when they’re given flowers? And not just because flowers are amazing and incredibly thoughtful, but also because they can be used for activities once you’ve finished enjoying them! One of my favourite ways to use flowers in the classroom is for ‘potion-making’. Simply provide an ‘invitation to create’ for your students with flowers, water, leaves, glitter, bowls, wooden spoons and jars and watch them create and explore. Other activities you can do with flowers include nature-cutting, colour matching, threading and flower pressing.

Featured Product:
Flower Sorting Tray


Counting with twigs

Twig Counting Numbered Wooden Tiles With Twigs And Pincers


As I mentioned before, I love using natural resources during maths lessons, particularly when we are engaging in hands-on rotations. Counting using one to one correspondence, recognising numerals, and matching collections to numerals are all crucial mathematical skills that are taught in the early years. Students developed all of these skills as they engaged with this activity where they had to select and recognise a number and then make a matching collection to represent that number using twigs. The addition of the tongs enabled students to develop they’re fine motor skills also.

Featured Products:
Tweezers
Natural Wooden Bowls
Hessian Sheets Natural
Matching Wooden Number Discs


Transient art with nature

Transient Art Face Using Leaves Twigs And Stones


Have you heard of the term ‘transient art’? Basically, it’s just a fancy term for moveable art – art that is not ‘fixed’. Transient art is continuously evolving and the focus is on the process, not the final product. When children engage in transient art experiences, they are able to manipulate, explore and experiment with materials and let their creativity and imaginations run wild.


Transient Art Animal Leaves And Sticks Framed


Natural resources are perfect for transient artworks because of their open-ended nature. Items that I like using in transient art include leaves, pebbles, gemstones, small pinecones, circle branch cuts, rocks, small twigs, gum nuts and flowers. In this particular transient art experience, my students created artworks inside a frame using nothing but sticks, rocks and leaves. I was amazed at their creativity!


Natural Tree Blocks

Natural Tree Block House With Fabric Figurines


These Natural Tree Blocks are my absolute favourite construction resource that encourages children to design, create and build. The blocks are absolutely stunning and are perfect if you’re looking for a straightforward way to integrate more natural items into your classroom.


Natural Tree Block Farm With Horse Figurines


We use these blocks a lot for both construction activities and in small world set-ups. We have even used them for building on our light-box panel! My students and I particularly enjoy using these blocks in small world play set-ups because their natural look makes the play space more realistic, especially once you add a couple of mossy stones, branch cuts and rocks!


Natural Tree Block Fairy Tale Scene Setup On light Table


Featured Products:

Wooden Tree Blocks
Bendable Wooden Family
Natural Wooden Living Room
Natural Wood Kitchen
Natural Wood Bedroom
Explore and Discover Light Panel
Wooden Fairytale Figures
Mossy stones – Set of 8
Active World Tray

Leaf crowns

Green Leaf Crowns


Have you ever used contact paper to create crowns before? If you haven’t, I highly recommend it! It was an activity I learnt at university and I have used it many times in my teaching career because it’s such an easy (and mess-free!) way to make crowns. We made these ‘leaf crowns’ when I taught kindergarten several years ago. Simply stick your leaves and any other collage items you want to the contact paper, fold together, place around your head and voila! Your crown is ready to go!

Creating small worlds

Small World Creation Table & Chairs With Figurines


One of the most common ways I incorporate natural items into my classroom is through small world set-ups. Whether it be presenting resources as an ‘invitation to create’ or setting up a small world play tray, I always include natural resources to make it ‘life-like’.


Natural Resources And Figurines In Baskets And The Flower Tray


Can you imagine a jungle without trees, leaves and rocks? …Exactly! So by adding these natural pieces, the play space ‘comes to life’ and children are able to use these items in their play. My favourite natural resources to use in small worlds are; rocks, twigs, leaves, branch cut circles for stepping stones, sticks and pine cones. It is always interesting to see how children use these items creatively during their play.


Natural Resources Jungle Scene With Elephant Figurines

Featured Products:
Flower Sorting Tray
Wooden Australian Trees
Bendable Wooden Family
Natural Wooden Living Room
Natural Wood Kitchen
Natural Wood Bedroom
Natural Wood Tunnel
Natural Wood Slices – Set of 3

Counting with Bud Cones

Pine Cones Six With Pincers And Six Compartment Sorter


How sweet are these mini Bud Cones? I fell in love with them the first time I saw them and have been using them in my classroom ever since. A few years ago, I set up this really simple numeracy activity using these bud cones to encourage children to develop their one to one correspondence, counting skills and numeral recognition. In this activity, children were encouraged to make a matching collection using Bud Cones to represent each number. The addition of tweezers enabled children to develop their fine motor skills also.

MTA has lots of different types of sorting trays that could also be used…

Featured Products:
Nesting Wooden Trays – Set of 3
Tweezers
Active World Tray

What is your favourite natural resource to use in the classroom? We’d love to hear from you!

ABOUT HEIDI:
Heidi Overbye from Learning Through Play is a Brisbane based, Early Years Teacher who currently teaches Prep, the first year of formal schooling in Queensland. Heidi is an advocate for play-based, hands-on learning experiences and creating stimulating and creative learning spaces. Heidi shares what happens in her classroom daily on her Instagram page, Learning Through Play. See @learning.through.play for a huge range of activities, play spaces and lesson ideas.

Shop MTA>