Posted on

Keep Children Active While At Home

Staying Active at Home_ girl and boy crossing midline on floor

To help children to achieve their 180 minutes of physical activity per day (as recommended by the Department of Health), spread out their active play and gross motor activities across small time increments throughout the day.

In this blog, written by Robyn Papworth, an accredited Exercise Physiologist, Masters qualified Development Educator and mother of three we show you a few ways on how to keep children active while indoors.
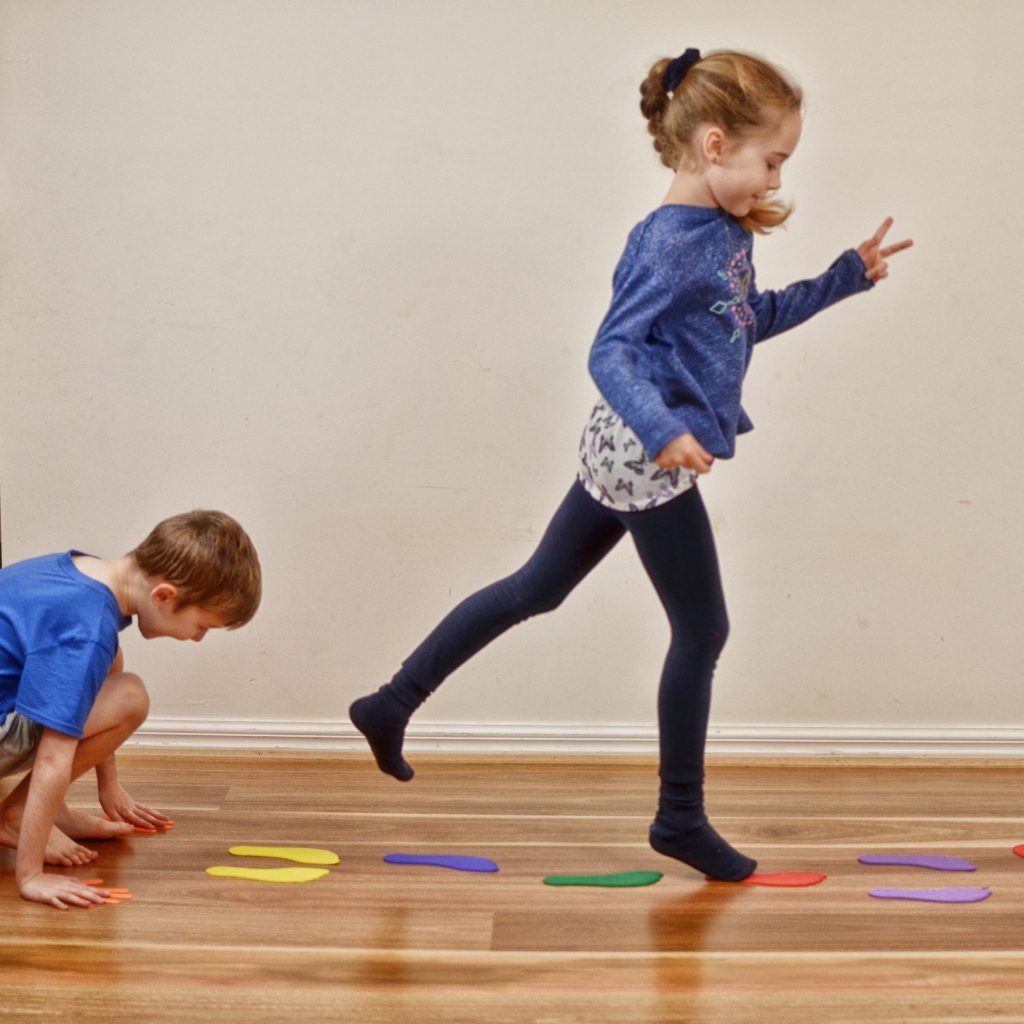
Staying Active at Home Girl following numbered path activity

My oldest daughter set out this path (as pictured above) and challenged her brother to join in. The motor skills that both children mastered during this obstacle path included:

    • leg strength;
    • core strength;
    • balance;
    • spatial awareness;
    • fundamental movement skills;
    • coordination, and;
    • fitness.

Other activities that you can do at home to increase children’s physical activity include:

Throwing and catching a ball on the spot
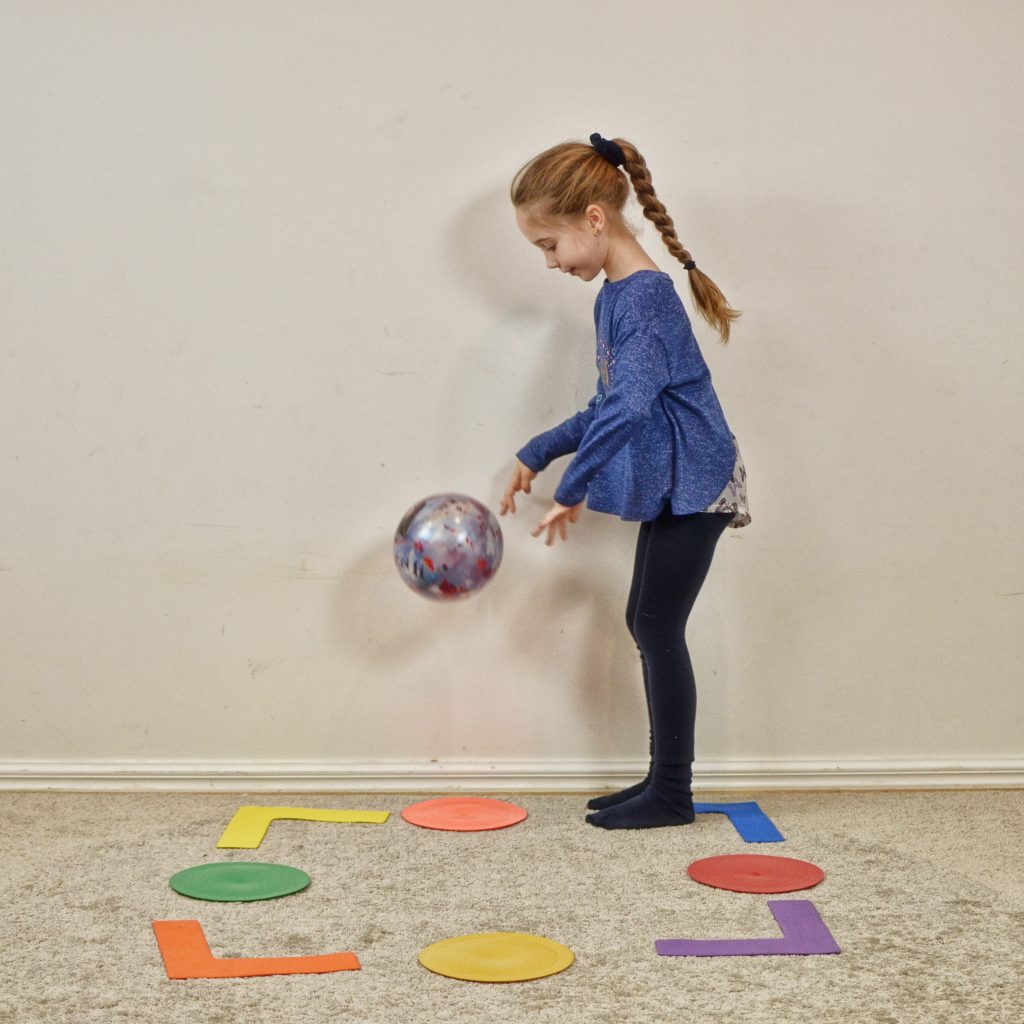
Staying Active at Home girl on obstical course throwing large ball

In these images you can see my daughter throwing and catching with a large ball, while my son was throwing and catching with one hand using a tennis ball.
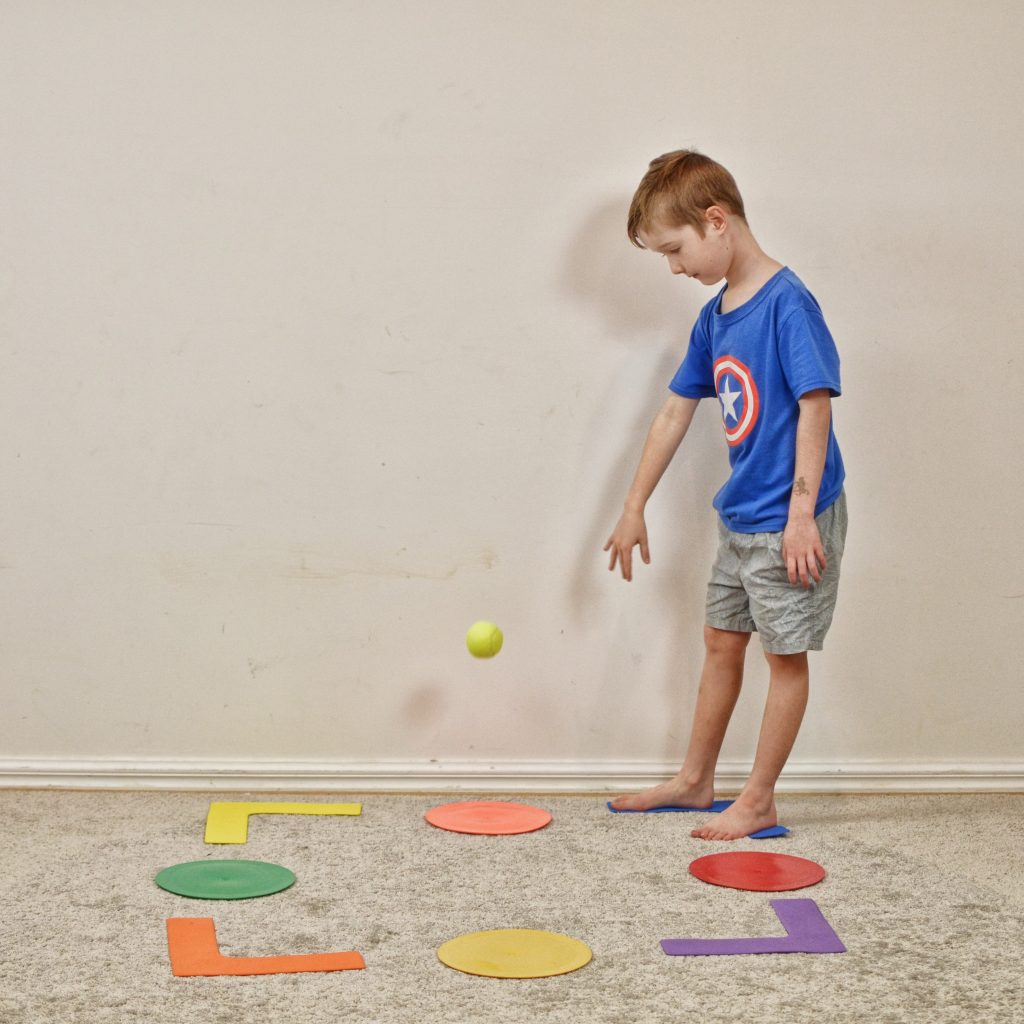
Staying Active at Home boy on obstical course throwing small ball

Start children with throwing and catching a large ball using two hands. Once they master this skill and become confident with throwing and catching, then progress children to throwing and catching a tennis ball with two hands, to next progressing to throwing and catching a tennis ball with one hand.


Walking heel-to-toe along the line
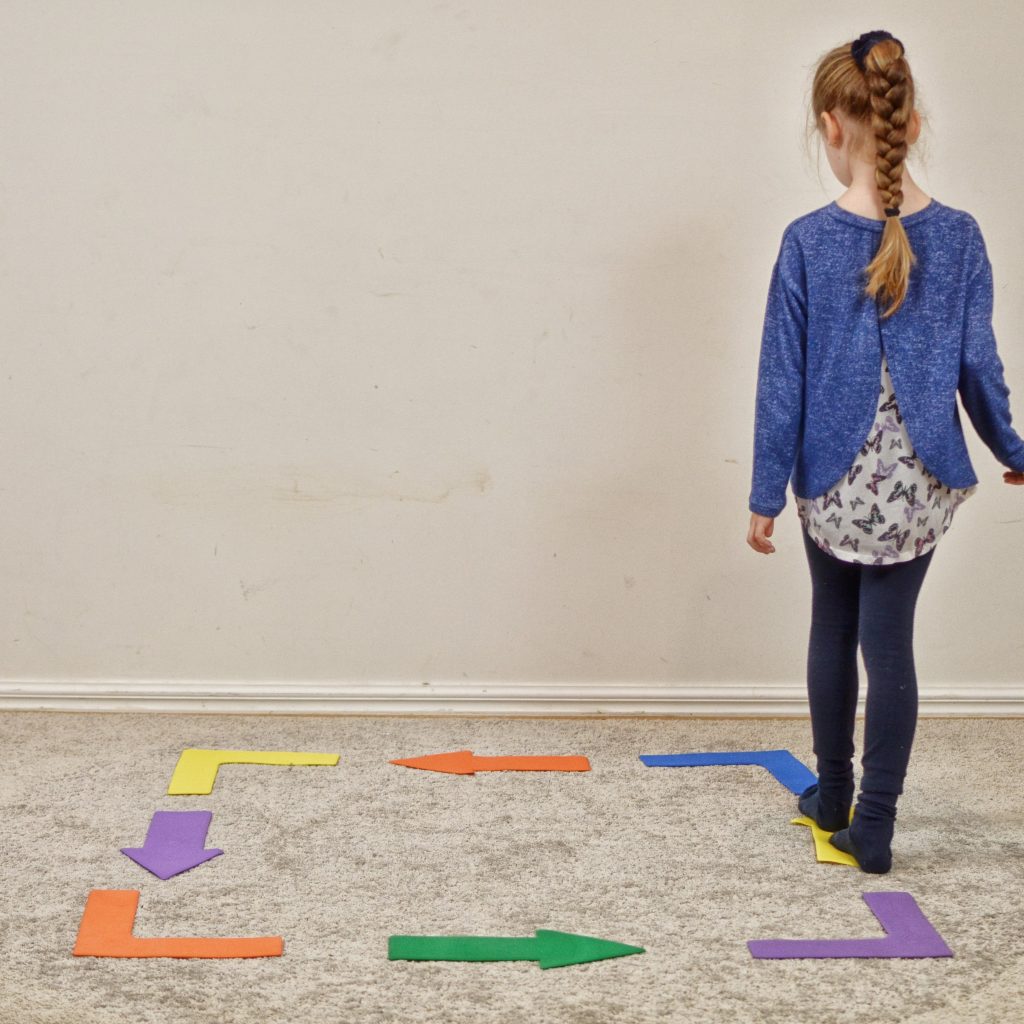
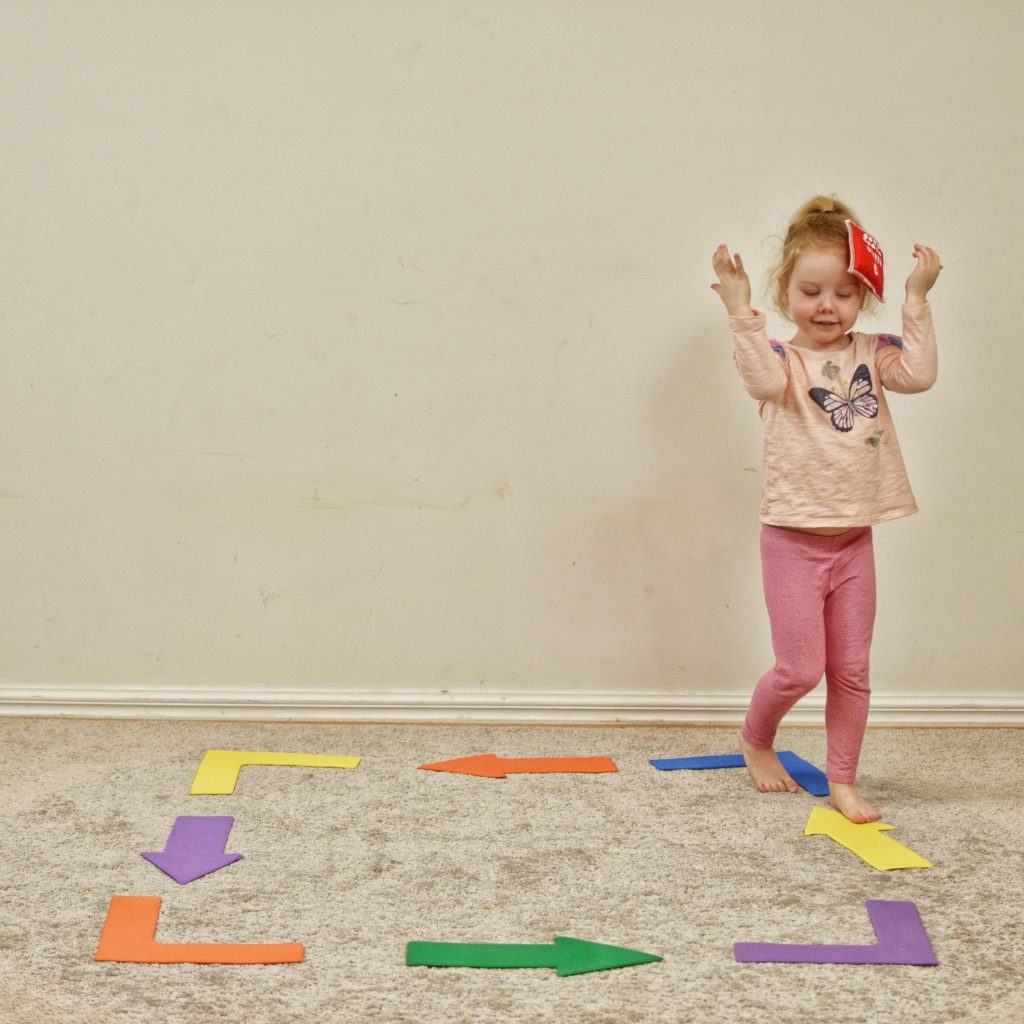
Staying Active at Home. Girl walking heel toe along arrows on floor

Set up a track using these floor markers (as pictured) or use masking tape. Encourage children to firstly walk in a heel-to-toe (tight rope) action along the line. Then, once children become confident with walking heel-to-toe along the line, increase the challenge by:

        • Hopping along the line
        • Jumping with both feet along the line
        • Side stepping along the line
        • Walking along the line while balancing a bean bag on your head (as pictured)

Combining physical and numeracy skills
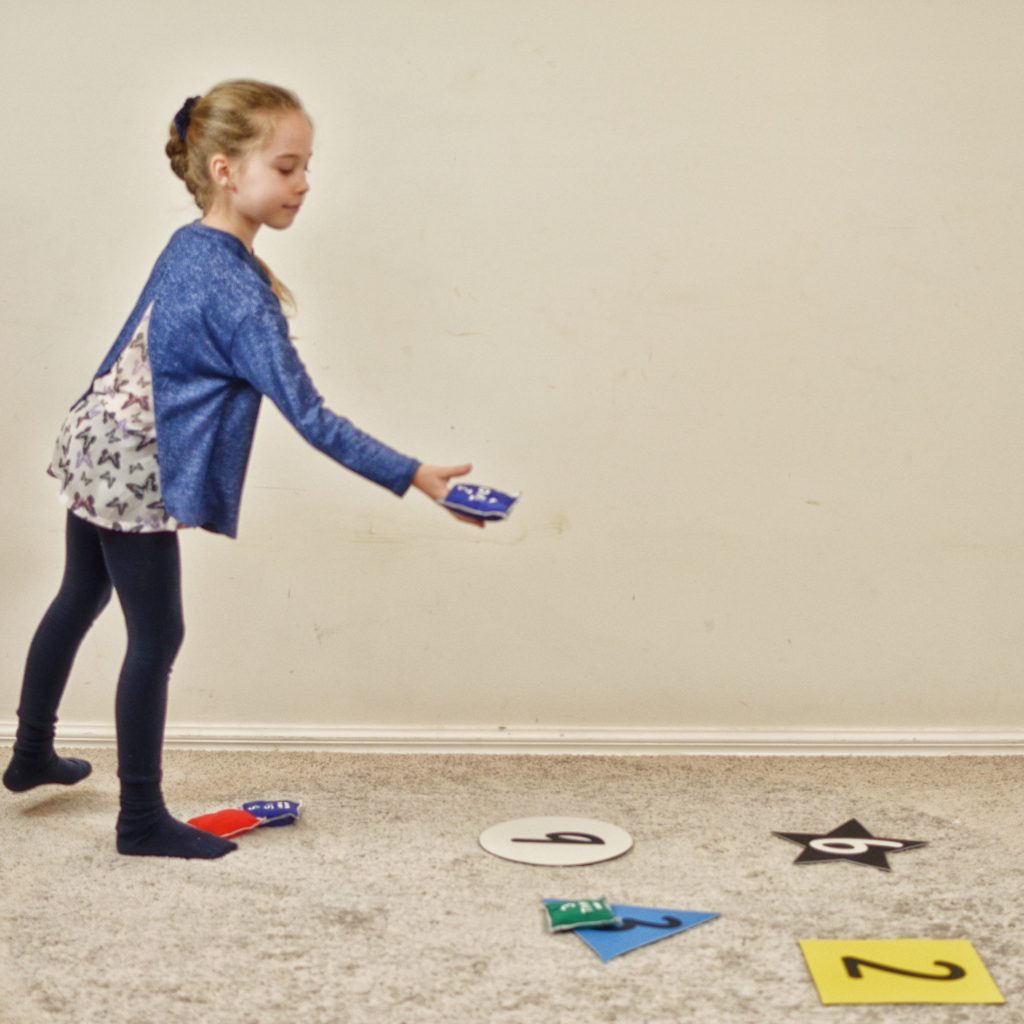
Staying Active at Home. Girl exploring numeracy activity throwing numbered beanbags on numbered squares

      • In the activity shown above, you can encourage children to throw a numbered bean bag onto the matching numbered floor marker. This activity is great for improving children’s number recognition as well as throwing skills.
      • I extended this activity further for my older Grade 2 children by giving them a bean bag activity called ‘Friends of 10’. For example, children looked at the number that was on their numbered bean bag (e.g. 8), and then they had to throw the bean bag at the number 8’s ‘friend’ to make the number 10, which is the number 2 floor marker.
      • The children enjoyed this numeracy bean bag activity far more than just sitting at the table doing a maths worksheet.


Crossing the midline challenge

  • An important motor skill that we all need is called ‘crossing the midline’. Crossing the midline skills give our body the ability to coordinate one side of our body while being positioned on the opposite side of the body. For example, we use crossing the midline skills to write our name with our right hand on the left-hand side of a piece of paper. We also use crossing the midline skills when we hit a ball with our left hand on the right-hand side of our body, or when we pull our jumper on and off, using our right hand to help our left arm get out of our jumper.
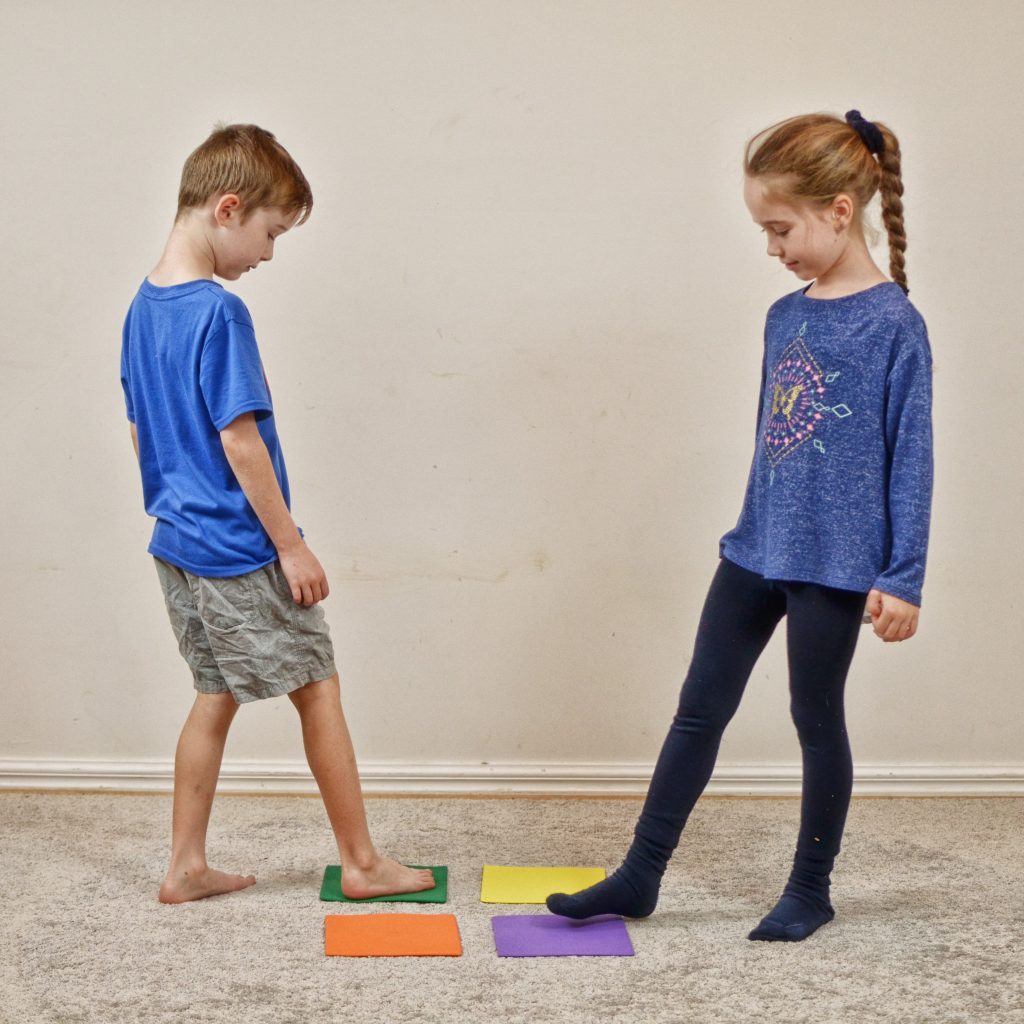
Staying Active at Home_girl and boy crossing midline

  • These two crossing the midline exercises help children to practise moving one side of the body to the opposite side of the body by tapping their right foot onto the coloured square floor marker on the left-hand side of their body, then tapping their left foot onto the coloured square floor marker on the right-hand side of their body.
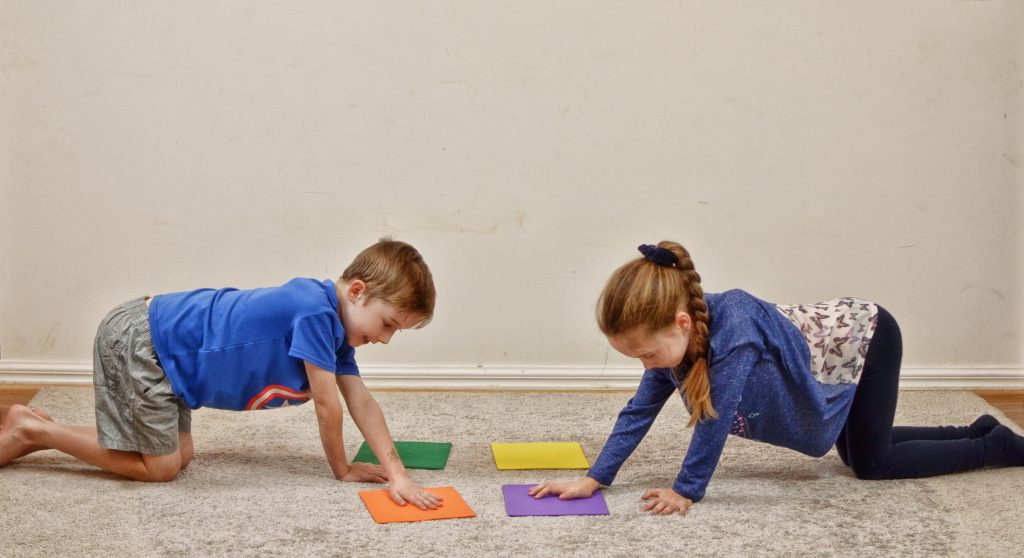
Staying Active at Home_ girl and boy crossing midline on floor

  • We increase the challenge for children by having them cross the midline with their hands, while holding a ‘plank position’ as pictured above. During this activity children need to use their core strength to keep their torso straight. Their knees are under their hips and their hands are under their shoulders so that they have a straight back (like a table).
  • Ask children to tap their right hand onto the marker that is on the left-hand side of their body, then tap their left hand onto the marker that is on the right-hand side of their body.
  • The children will be strengthening their crossing the midline skills, as well as their shoulder stabilisation, wrist extension and hip stabilisation skills. All of these skills are important for developing their gross motor skills, as well as their fine motor skills.


Hopscotch
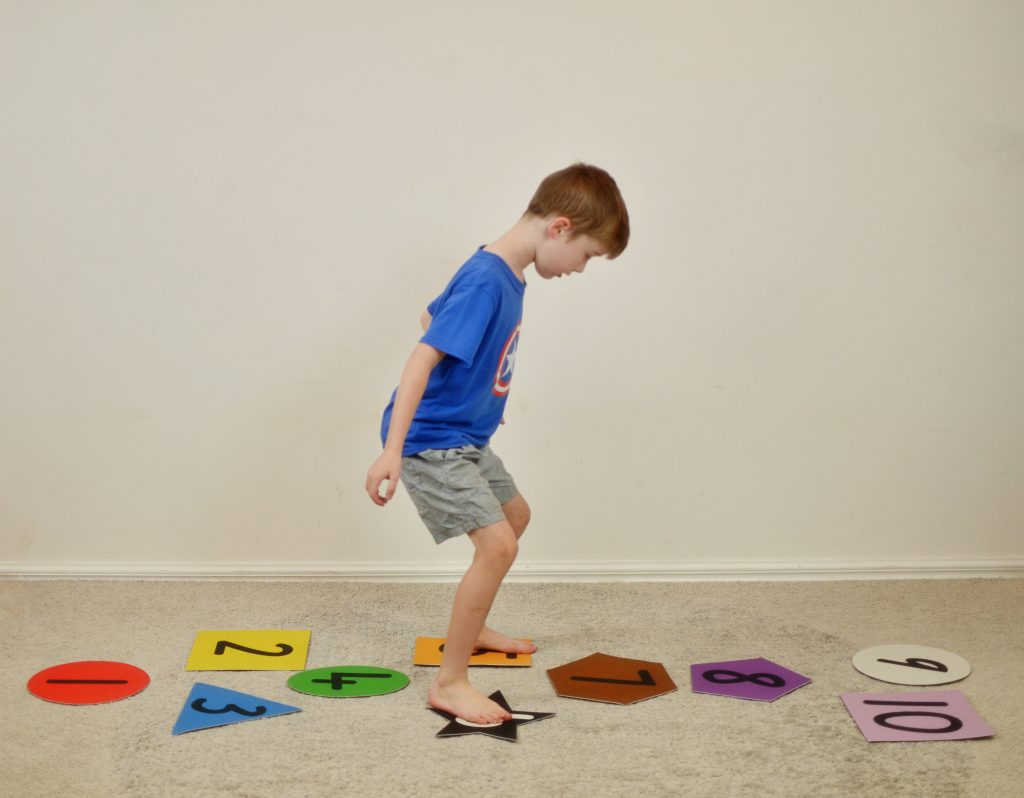
Boy playing numbered hopscotch on carpet

      • Every child loves hopscotch. Even us big kids love hopscotch!
      • Encourage the children to set out the numbered floor markers into the hopscotch configuration.
      • Have children complete the hopscotch path as normal. Or add a bean bag throwing element into this activity by having children throw a bean bag onto a number, then skip that number as they jump and hop past.
      • You can also place the numbered floor markers further apart to increase the jumping and hopping challenge for older children.
      • If you don’t have the numbered floor markers, simply draw the hopscotch configuration on concrete with chalk.


How do you keep kids active at home, we’d love to hear from you?


Featured products:

Shapes & Numbers Toss Mat & Bean Bag Kit

Floor Markers Set


About the Author
Robyn Papworth is an accredited Exercise Physiologist, Masters qualified Development Educator, mother of three children, and a passionate advocate for children who have learning difficulties and developmental delay. When you follow Robyn on her social media challenges, you will quickly be introduced to her son Hugh who was born with developmental delay and has been Robyn’s motivator for establishing her business Play Move Improve.
With more than 10 years of experience as an Exercise Physiologist, Robyn designs and implements play strategies and motor skills programs that help children achieve developmental milestones, such as rolling, crawling, manipulating objects, walking, skipping and balancing.
Through valuable play strategies and movement routines, Robyn uses her expertise and creativity to ensure children work towards mastering the crucial skills that lay the foundation for participation in both school and life, such as handwriting, doing up buttons, participating in physical activity and other fine motor skills.

 

Shop MTA>

Blog Home>

Posted on

Screen-free STEAM Games

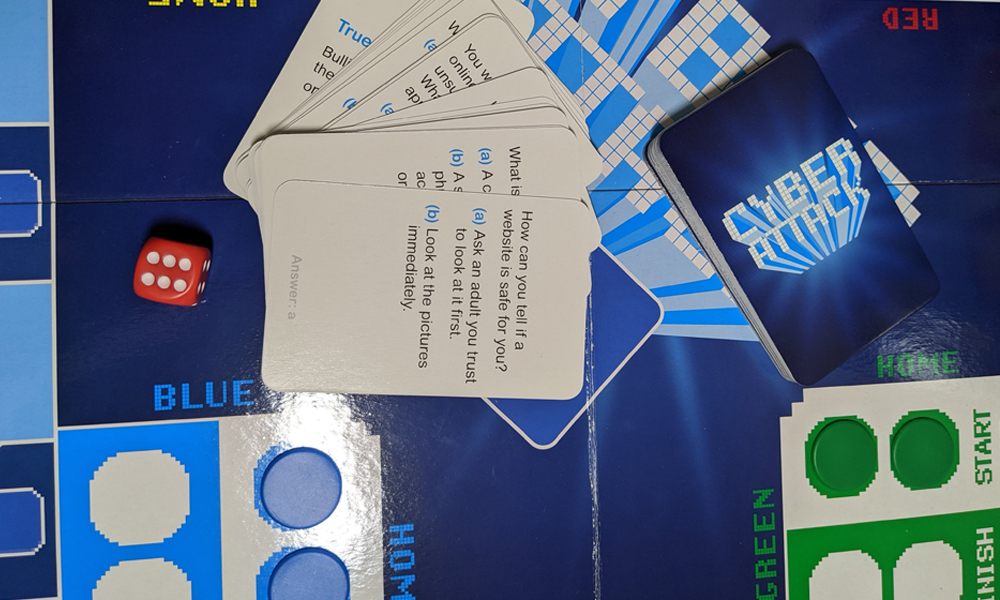
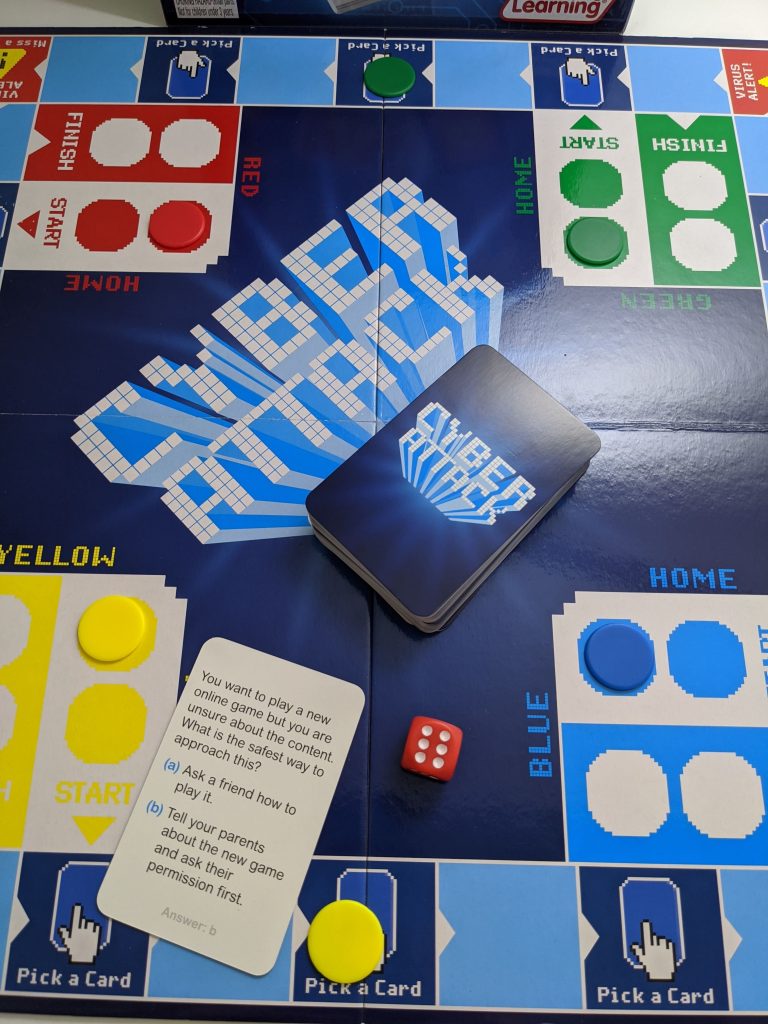
Cyber Attack game close up of board and playing cards

The skills of problem solving, critical thinking and creativity can be taught through STEAM learning experiences using robots, apps and technological gadgets, but how can we continue to provide children with opportunities to develop these STEAM skills without needing to use these technologies?

In this blog, we explore five games that support STEAM learning that can be conducted at home or school that do not involve technology or screen time.

ThinkFun – Code Programming Game Series

Age: 8+
Players: Single or collaborative game play
40+ challenges per game

The Code Programming Game Series contains three games that were created by Mark Engleberg, a teacher and former programmer for NASA. These games are designed to build the skills needed to learn key coding concepts. They allow students to work through over 40 challenges from beginner to expert level. Each of these games develops students’ understanding of problem solving and computational thinking. All three games in this collection are screen-free, unplugged coding experiences.

Featured Products:

ThinkFun – Code Programming Game Series


On the Brink

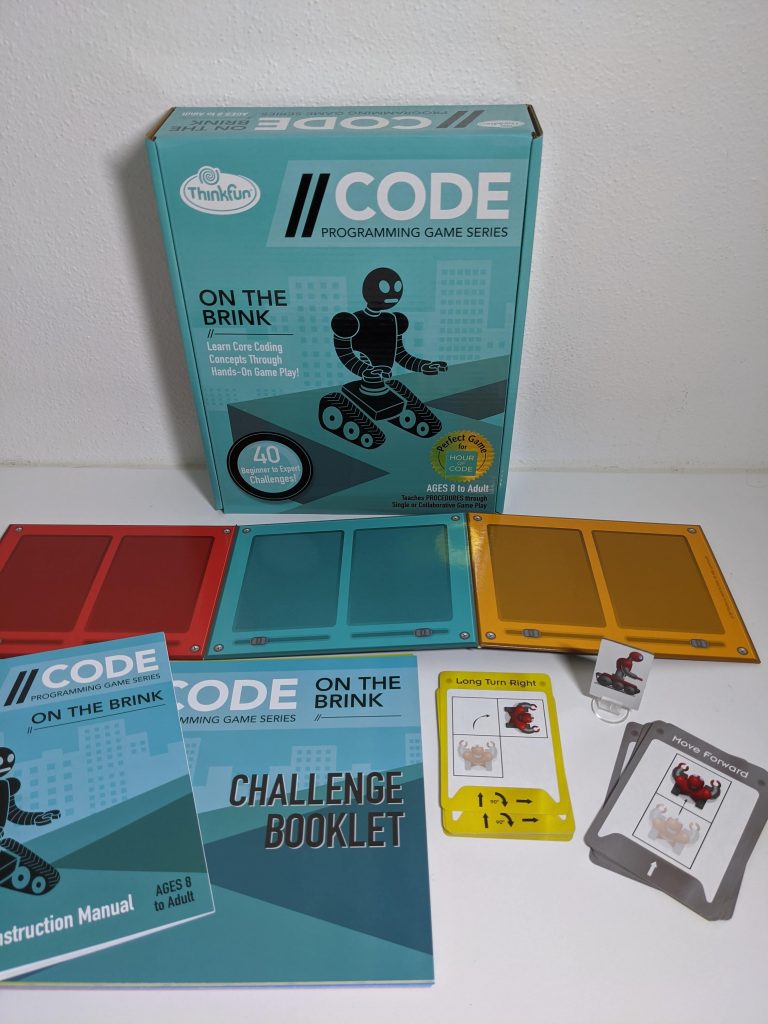
On the Brink Coding Game challenge booklet and box spead out on table

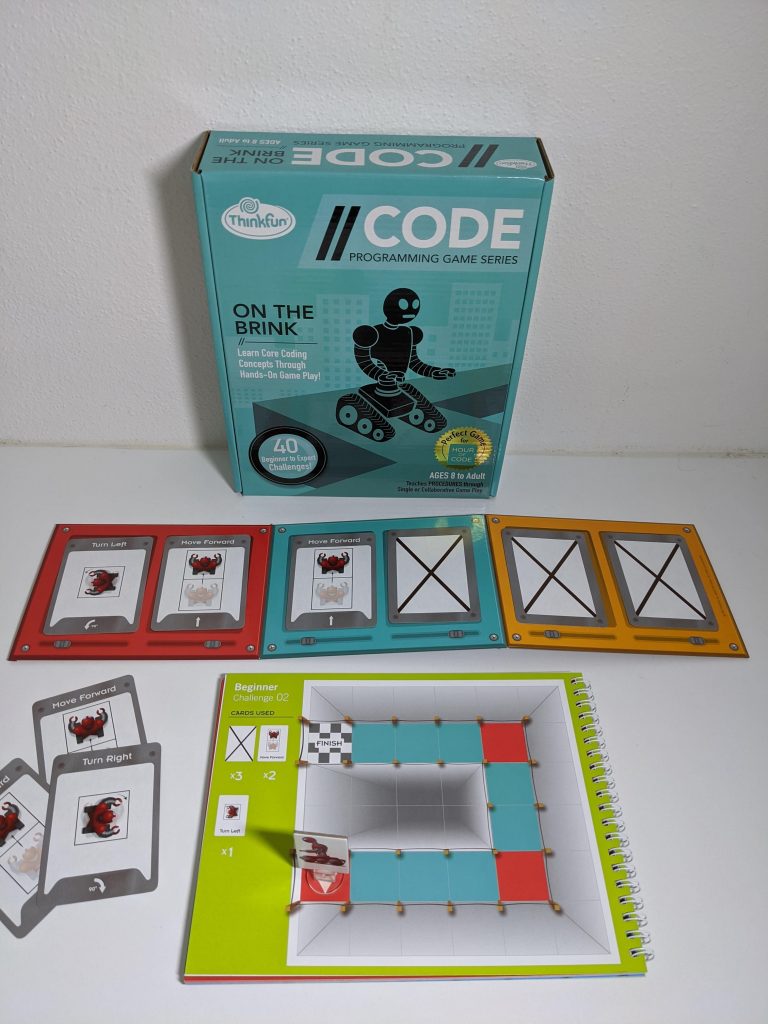
On the Brink teaches procedures and problem solving skills through its single or multi-player game. The aim of the game is to use your problem solving skills to program the robot to move along the different game boards using the coloured control panel and movement cards. Each panel on the control panel has space for two movement cards which you need to program to move the robot from start to finish.

On the Brink Coding Game. Movement Cards spread out on table

The game includes:

    • Challenge booklet
    • Instructions booklet
    • Movement cards (grey = beginner, yellow = advanced)
    • Control panel
    • Robot character


Featured Product:

On the Brink

ThinkFun – Code Programming Game Series


Rover Control

Rover Control game spread and box on table

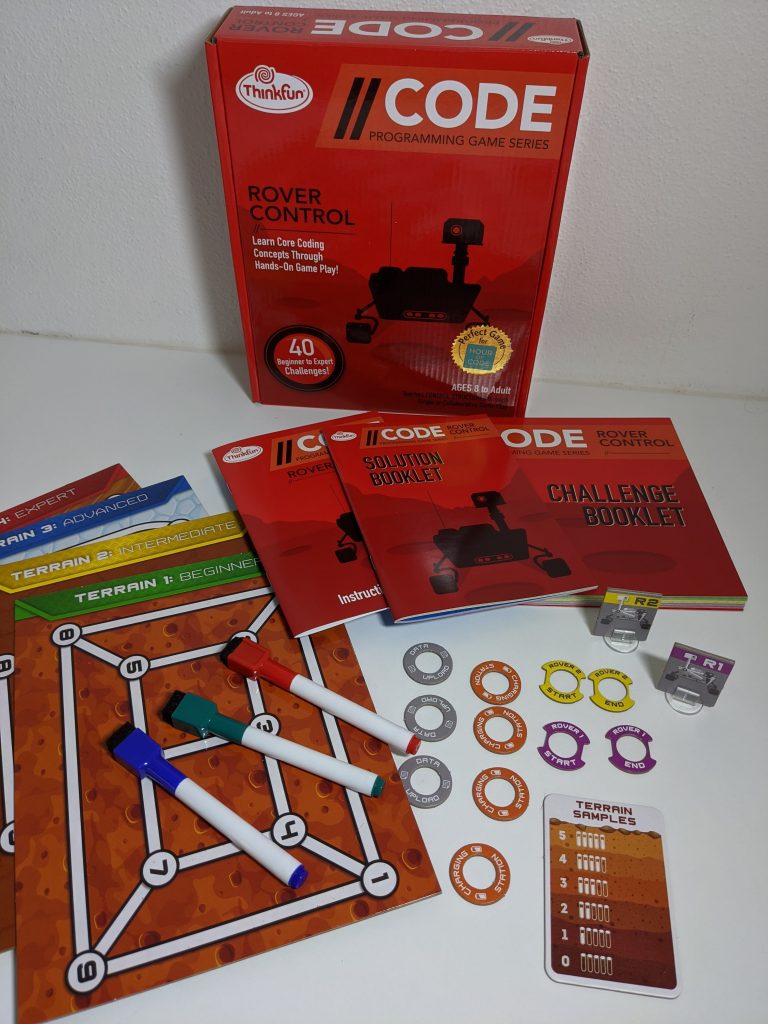
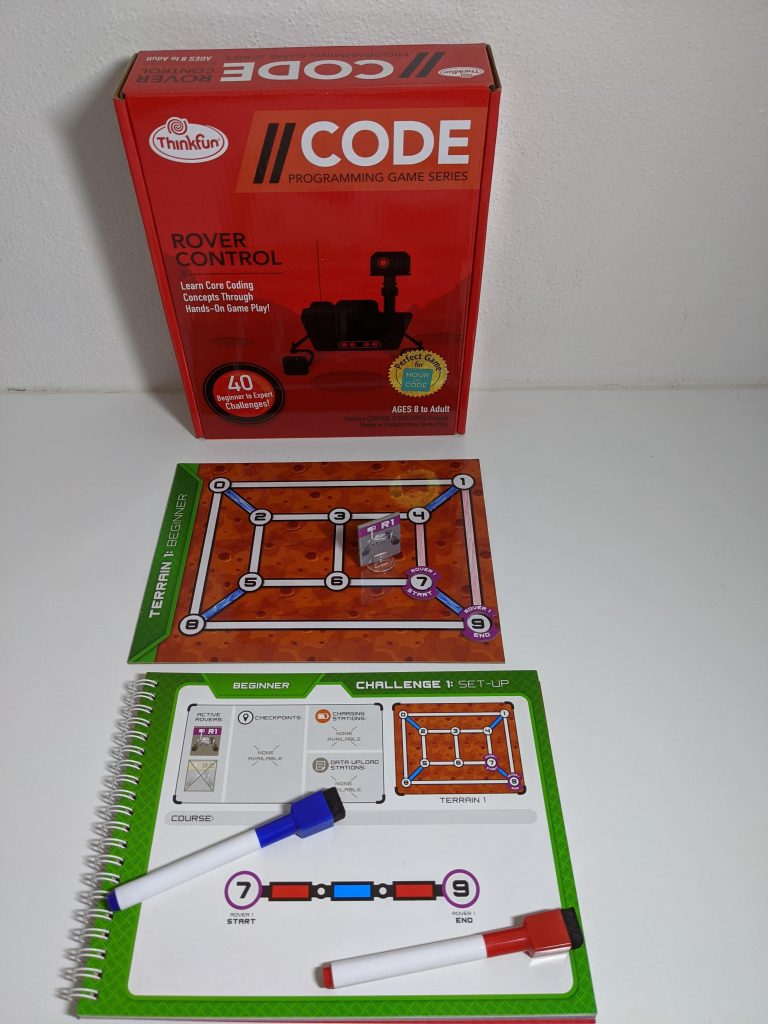
Rover Control teaches control structures and problem solving skills through its single or multiplayer game. The aim of the game is to move the rover from start to finish. The rover can only be programmed to travel on the coloured paths. The game board has been wiped off the coloured paths, and players must use the clues to redesign the path and program the robot character to move it from start to finish for each mission.

Rover Control Game on desk

The game includes:

    • Challenge booklet
    • Instructions booklet
    • Solution booklet
    • Game boards – Terrain cards x 4 (beginner, intermediate, advanced and expert)
    • Whiteboard markers with erasers (red, green, blue)
    • 2 x rovers (yellow, purple)
    • Tokens that include (charging station, data upload, and rover start and end discs)


Featured Product:

Rover Control

ThinkFun – Code Programming Game Series


Robot Repair

Robot Repair Game on on table

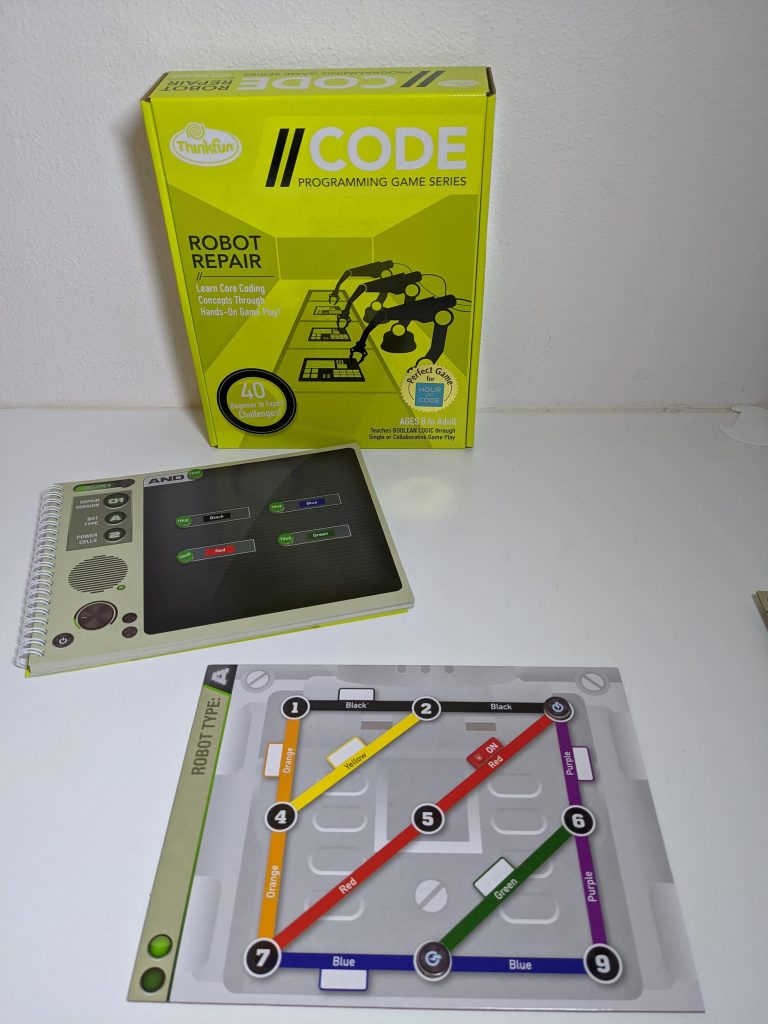
Robot Repair teaches logic principles which are a key part of programming. The aim of the game is to fix the four broken robots by connecting colours and wires on each of the game cards through the clues given on each mission challenge.

This game includes:

    • Challenge booklet
    • Instruction manual
    • Solutions booklet
    • Game boards
    • Tokens (power cells, on/off and true/false)

Featured Product:

Robot Repair Game

ThinkFun – Code Programming Game Series


Pixel Plezier

Pixel Plezier game box on table

Age: 5+
Players: Single or pairs

Pixel Plezier is a puzzle game that helps students develop their understanding of binary code by creating pixel characters. Binary code represents text, computer processor instructions and any other data using a two-symbol number system consisting of ‘0’ and ‘1’ from the binary number system.


Pixel Plezier game complete set on table

Within the kit there are 8 puzzles to create and solve. This is a great activity to have students complete on their own or working collaboratively in pairs. Each kit contains 8 puzzles and 4 coding mats (2 boards 7×7 and 2 boards 6×6).

Extension
Using this template, students can extend this game by creating their own Pixel binary code for others to solve.

Download: Pixel Plezier Template

Featured Product:

Pixel Plezier


Cyber Attack Board Game

Cyber Attack game box and board on table

Age: 6+
Players: 2-4

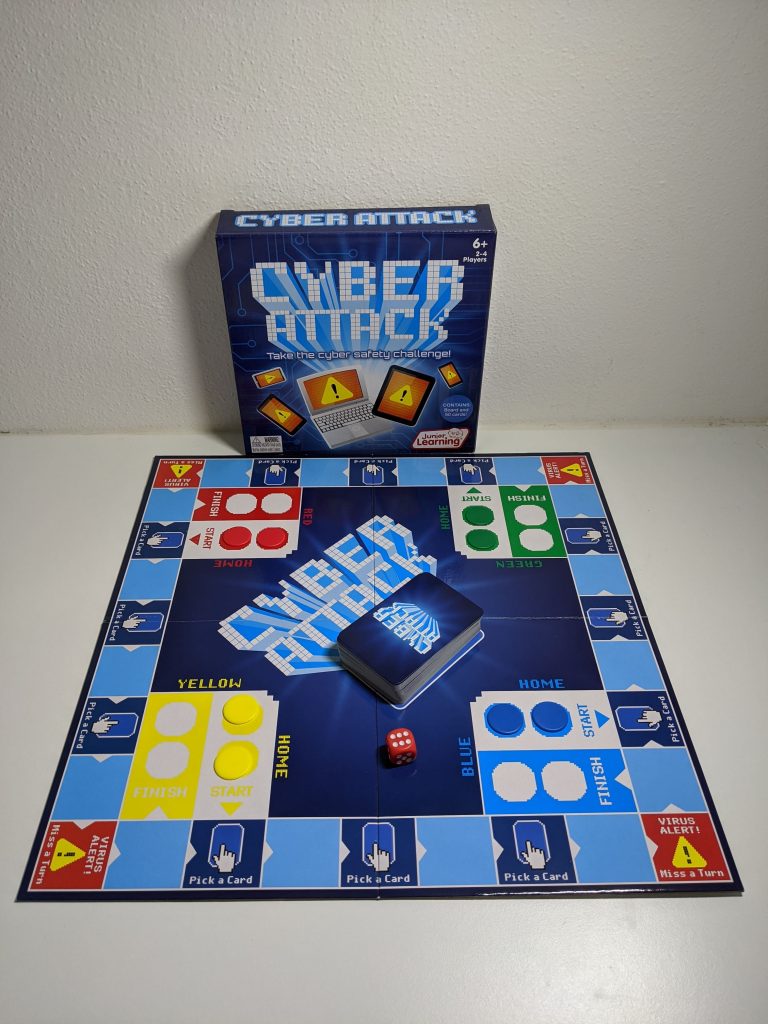
The Cyber Attack Board Game supports students in developing their understanding of cyber safety and how to act and behave online. It follows the format of traditional board games with question cards related to digital problems that students may encounter online. If students get the answer correct they can either proceed forwards two places in the game or can move an opponent back two places. If they get an answer incorrect they move two places back.

Cyber Attack game close up

Extension
This game can be extended by having students create their own question cards. This personalises the game, particularly if you have certain rules at school or home related to using a device and how to act and behave online.

Featured Product:

Cyber Attack Game


About the author

Eleni Kyritsis is an award winning Year 3 teacher and Leader of Curriculum and innovation from Melbourne, Australia. Eleni facilitates professional learning workshops around the world that focus on unleashing creativity and curiosity in classrooms. You can contact her at elenikyritis.com and @misskyritsis


Featured Products:

ThinkFun – Code Programming Game Series

On the Brink

Rover Control

Robot Repair Game

Pixel Plezier

Cyber Attack Game


Shop MTA>

Posted on

LEGO Education® SPIKE™ Prime Activities

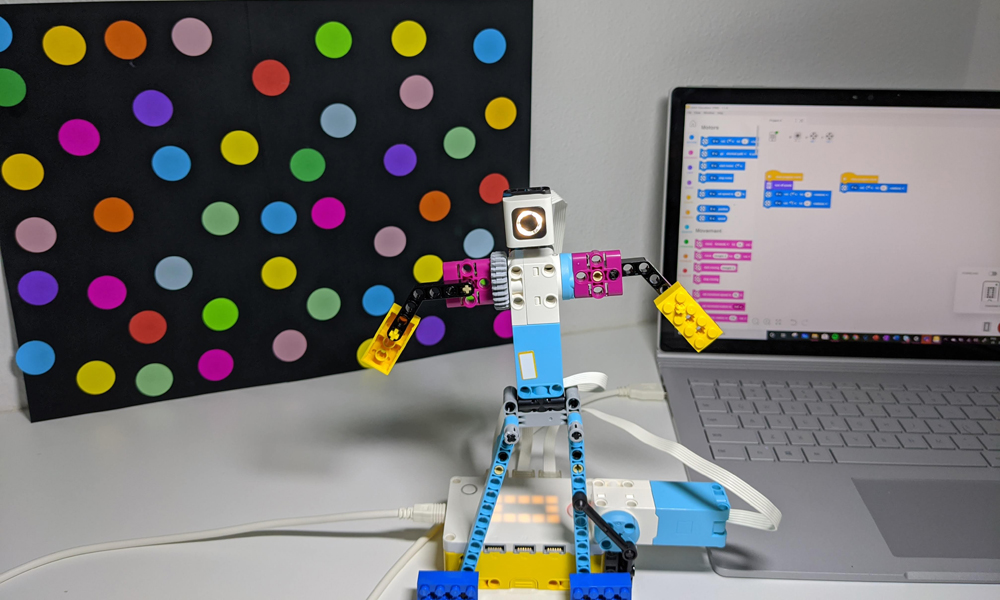
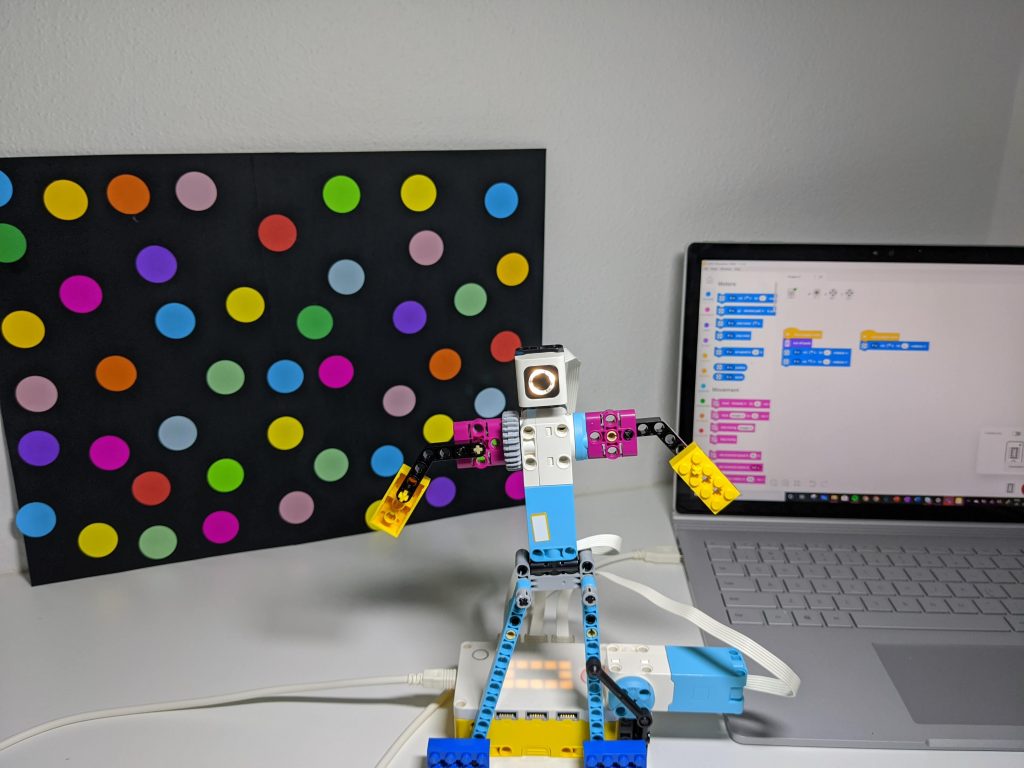
LEGO Education Spike Prime dancing robot with laptop in background

LEGO® bricks have been a staple resource in schools around the world since they were first manufactured in 1949. In recent years, the LEGO® Education team has continued to develop and support STEM learning experiences for our students by creating a range of products that incorporate technologies, robotics and computer programming. The LEGO product range is equipped with resources that will engage and empower students to learn to code from our youngest learners through to secondary school students.

LEGO Education provides a continuum of learning through its products:

Foundation / Prep / Kinder /Reception – Year 1
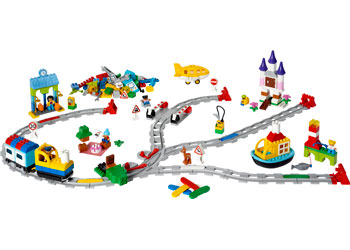
LEGO® Education Coding Express
LEGO Education Coding Express

Years 2 – 4
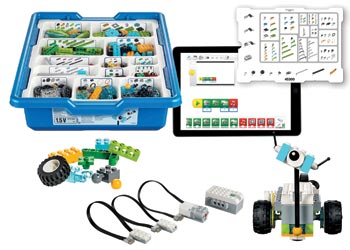
LEGO® Education WeDo 2.0

LEGO Education WeDO 2.0 Curriculum Solution

Years 5 – 8
LEGO® Education SPIKE™ Prime

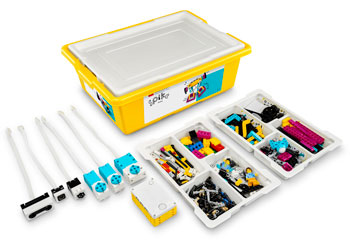
LEGO Education SPIKE Prime Set

Years 6 – 12
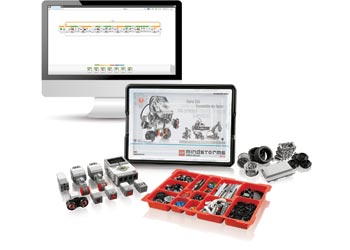
LEGO® Mindstorms® Education EV3


LEGO EV3 Core Set

The LEGO Education Website has a range of lesson plans and challenges for students to develop their engineering and programming skills.

LEGO Education’s most recent product launch is the LEGO Education SPIKE Prime. This kit supports students to develop the essential STEM and 21st century skills needed to become the innovative, confident and creative minds of tomorrow. SPIKE Prime forms part of the continuum that builds upon students’ prior knowledge of coding that they have developed through LEGO Education WeDo 2.0 block coding system.

Each SPIKE Prime kit can be used by a small group of students, preferably two to three students per group. The kit provides students with:

    • 528 pieces in a range of shapes and colours
    • 3 motors
    • 3 sensors
    • A series of data cables
    • Multi-port Hub that serves as the brain of the set
Multi-Port Hub Sensors Motors
6 x Input/Output ports
5 x 5 Light Matrix
6 x Axis Gyro
Speaker
1 x Colour/Light
1 x Distance/Ultrasonic
1 x Force/Touch
1 x Large
2 x Medium

The Hub connects to the LEGO Education SPIKE app via Bluetooth or USB. It is compatible across devices including iPad, computer and Chromebook, with the ability to carry multiple programs and be commanded to light up and play sounds. Extending the functionality of the Hub, there are six inputs/outputs to connect the motors or sensors to create movement, patterns and actions.

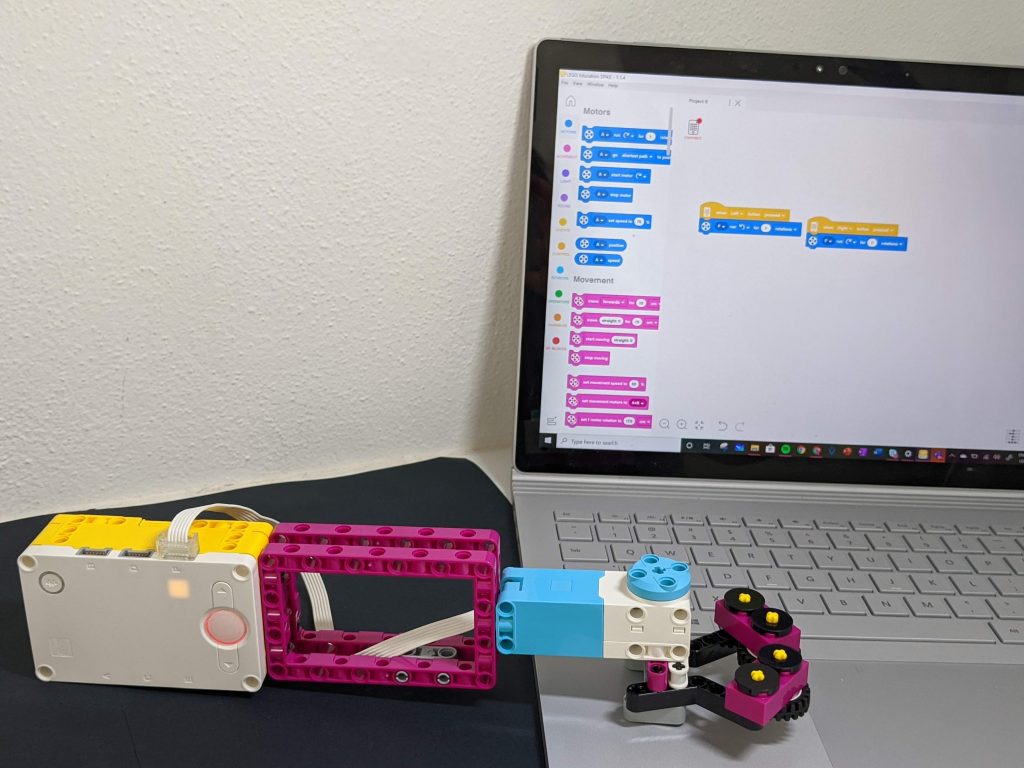
LEGO Spike Coding blocks on Laptop

The LEGO Education SPIKE app intuitively introduces students to coding and robotics. The four SPIKE Prime curriculum units engage students while developing design skills, problem solving and critical thinking skills. Each of these units can be implemented into classrooms with focus on real world relevance.

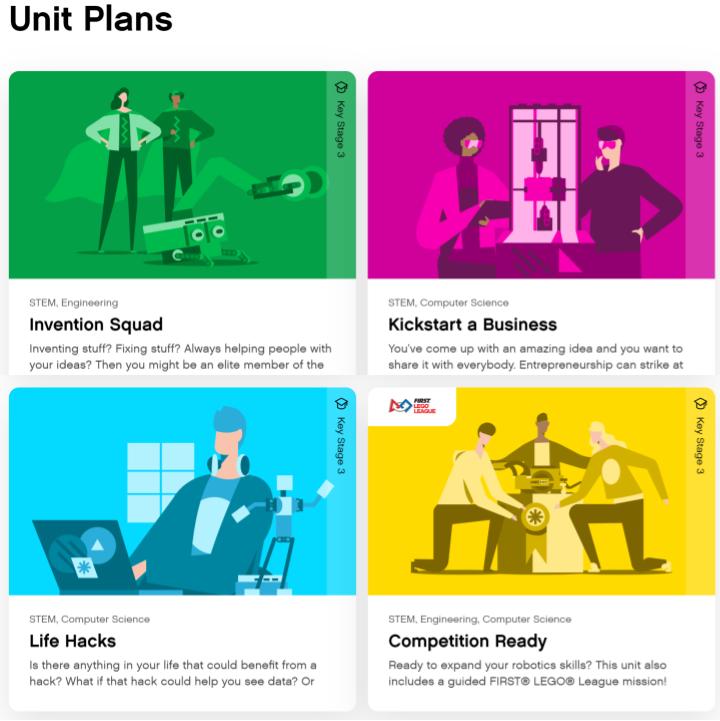
The four curriculum units are broken into:

Invention Squad

    • The Engineering Process

Kickstart a Business

    • Applying and Developing Computational Thinking Skills

Life Hacks

    • Working With Data Representation and Manipulation

Competition Ready

    • Getting Ready For Competitions and Challenges

LEGO Spike Curriculum Units

The LEGO Education SPIKE app includes a range of resources for both teachers and students, from lesson plans for teachers to templates that support students in building a range of creations using the kits.

Once students know the basic fundamentals of the kit, teachers can explore and integrate the skills learnt through the lesson plans and curriculum units to connect SPIKE Prime to other creative lesson ideas and challenges.


Six Lesson Ideas to Extend SPIKE Prime in the Classroom

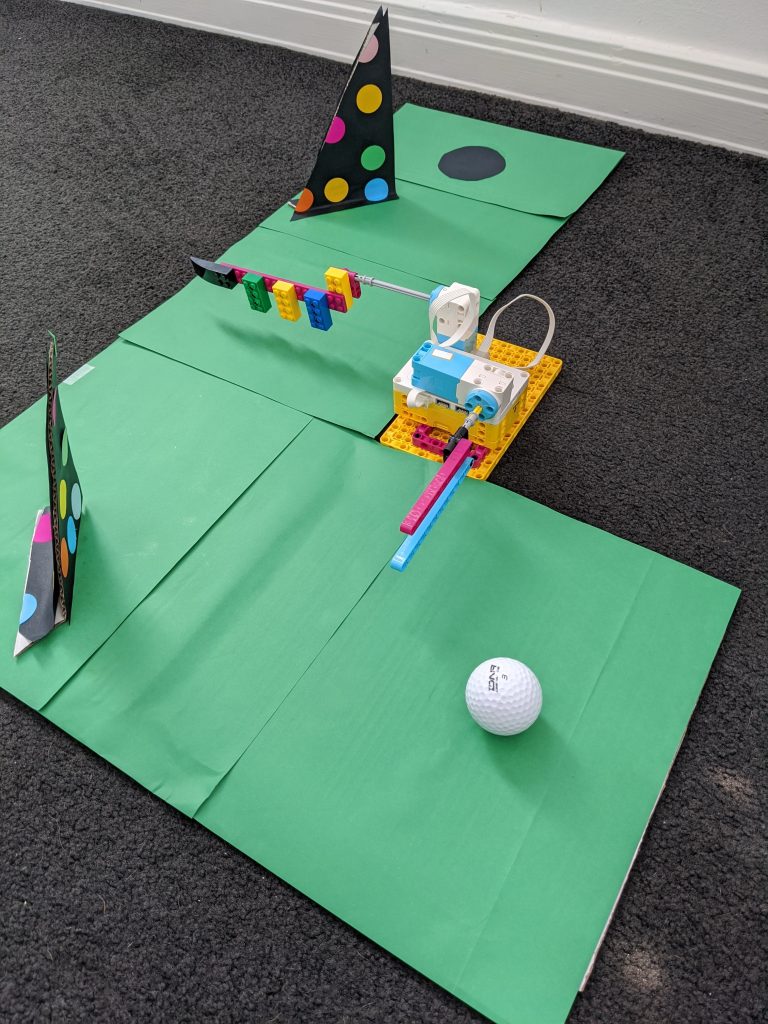
Design a Mini Golf Course

LEGO Spike Golf Course featuring Spike model grean card and golf ball on floor

Materials required:

    • Cardboard
    • Masking tape
    • Scissors
    • Various art and craft materials
    • 1 x SPIKE Prime kit per group
    • Toy golf kits (1 per group)
  • In small groups, students sketch and design their own mini golf hole with a moving obstacle and sound effects.
  • Combine the holes of each group to create the mini golf course.
  • Students play and give feedback on each hole.

The result….


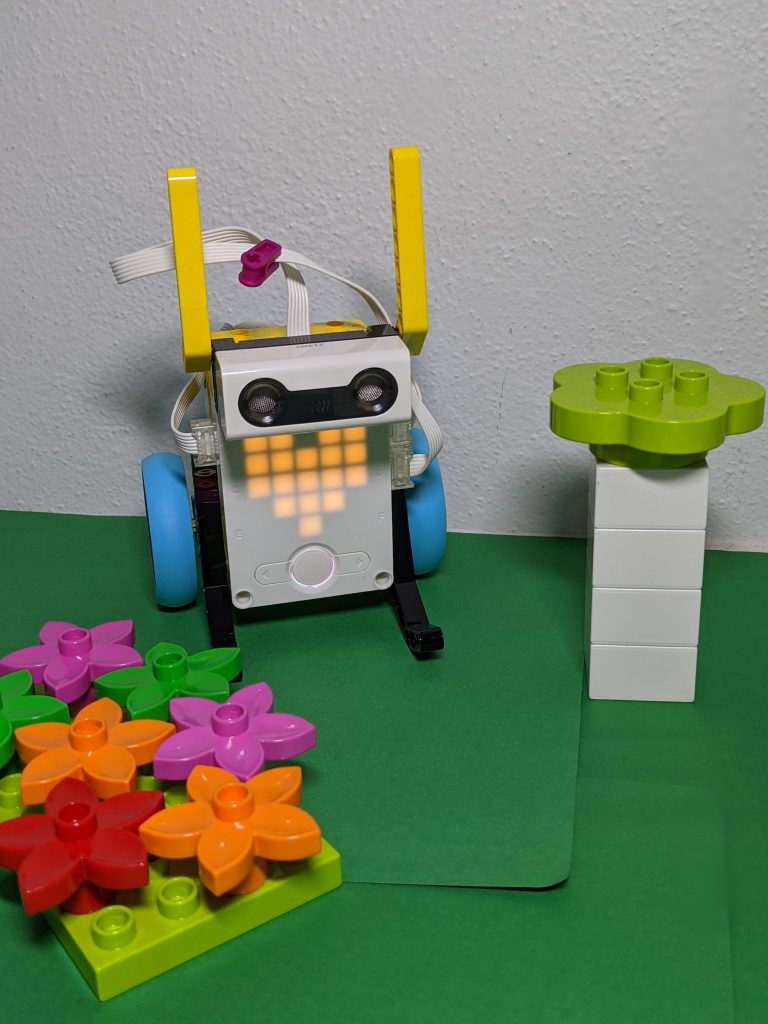
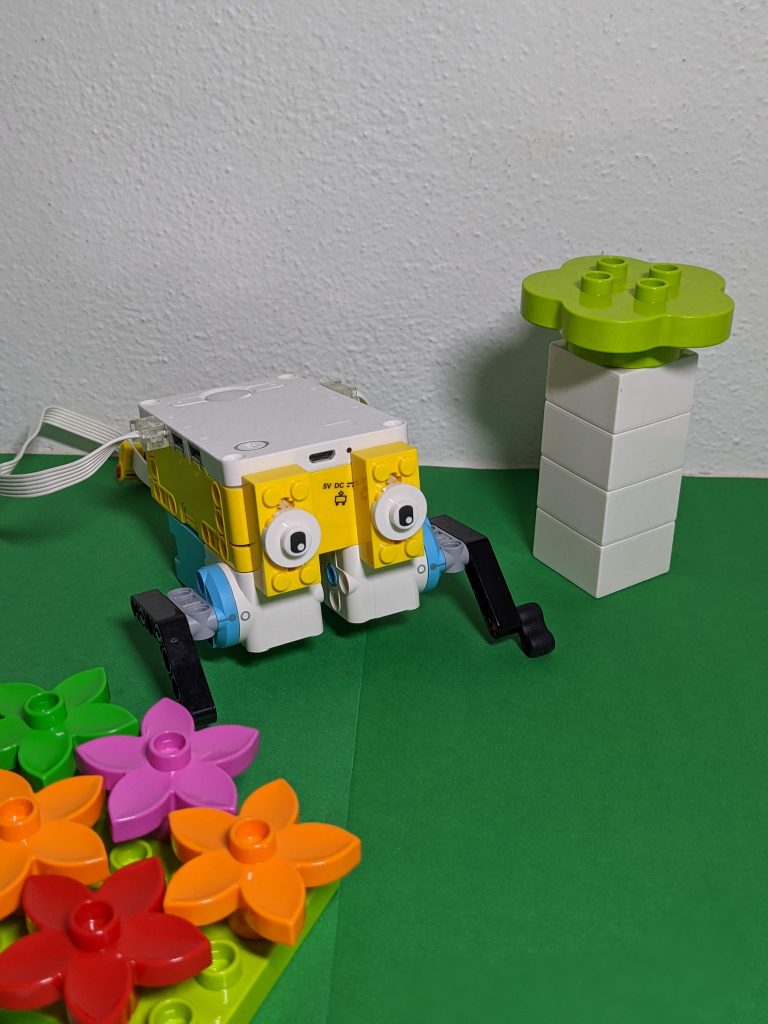
Create a Moving Animal

LEGO Spike Moving Animal on grass background

Materials required:

    • 1 x SPIKE Prime kit per group

Students work in pairs to create an animal of their choice.

    • Use the sensors to have the animal move away from different coloured LEGO blocks
    • Record animal sounds to play as the animal moves
    • Program their animal to move through a course

LEGO Spike Animal on grass background

Teachers can connect this challenge to various curriculum areas including endangered animals, ocean life, Australian animals etc.


Design a Sustainable House

Materials required:

    • Cardboard
    • Masking tape
    • Scissors
    • Various art and craft materials
    • 1 x SPIKE Prime kit per group

Students design and create a sustainable house.

    • Design a house using the SPIKE Prime kit
    • Include an object that moves or gives messages to support sustainability


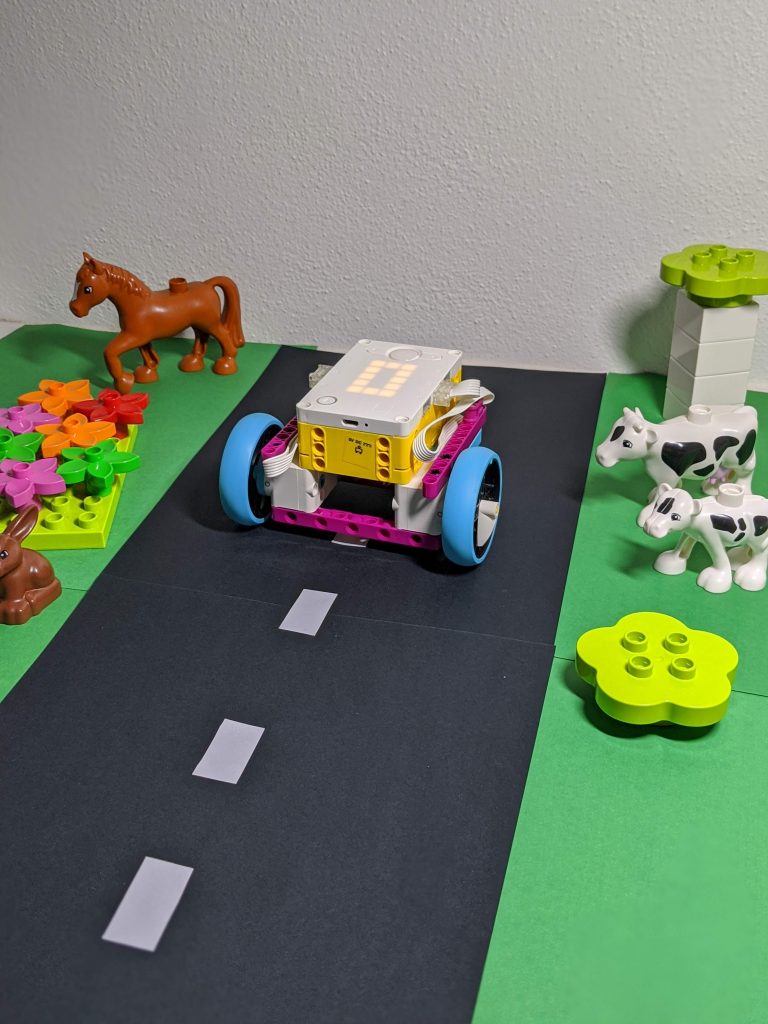
Create a Futuristic Car

LEGO Spike Futuristic Car on homemade roadside featuring LEGO Duplo trees and animals

Materials required:

    • 1 x SPIKE Prime kit per group

Students will work in small groups to create a futuristic car

    • Sketch and design the car prior to constructing it
    • Use the ‘Driving Base’ building template within the LEGO SPIKE App to help build the base of their car
    • Add Sensors to create a self driving car


Code a Car Through a Racing Track

Materials required:

    • 1 x SPIKE Prime kit per group
    • Masking tape

Create 2-3 race tracks (depending on the size of your classroom) on the floor using masking tape.

    • Students design, create and program a racing car
    • Work in pairs
    • Use the ‘Driving Base’ building template within the LEGO SPIKE app to help them build the base of their car
    • Program and code their car to move around the race track

Extension:
Creating Obstacles on the Racing Track.
Materials required:

    • Sensor added to car
    • Coloured LEGO blocks

Using coloured LEGO blocks as obstacles, students can program their car to move around the track by adding the sensor to their car.


Create a Dancing Robot Dance Routine

LEGO Spike Dancing Robot with laptop showing Coding blocks in background

Materials required:

    • 1 x SPIKE Prime kit per group

Students will work in pairs and design their own robot. (Any students who find this difficult can use the template in the LEGO SPIKE app under BUILD – ‘Break Dancer’ to help them build a basic robot.)

    • Program the robot to move and dance to their chosen song or music
    • Record an original song by recording directly within the app
    • Host a dance competition

The end result…


How do you use SPIKE Prime in your classroom? We would love to hear from you!


About the author

Eleni Kyritsis is an award winning Year 3 teacher and Leader of Curriculum and innovation from Melbourne, Australia. Eleni facilitates professional learning workshops around the world that focus on unleashing creativity and curiosity in classrooms. You can contact her at elenikyritis.com and @misskyritsis


Featured Products:

LEGO® Education Coding Express

LEGO® Education WeDo 2.0

LEGO® Education SPIKE™ Prime

LEGO® Mindstorms® Education EV3


Shop MTA>

Posted on

18 Tips And Tricks For Educators New To Remote Teaching

Remote Learning montage vector image including laptop clock think bubble and textbook

With much of the world under lockdown, schools closed, and parents and students working and learning from home, educators everywhere are finding alternative ways of teaching their classes remotely.

Many schools are set up for some kind of remote learning, but there are an equal number for whom this is a whole new world, especially for elementary educators. It’s also true that while teachers probably have lesson plans ready for the upcoming semesters, it’s a whole different ball game to suddenly put all these lessons online without disrupting any learning.


The most important thing for educators to remember about remote teaching is…

…go easy on yourself. Our first tip – not included in our official list because we want to call it out – is to practise self-kindness. We’re all in a new situation and it will take time to get used to. Some things you try will work, and some won’t. That’s ok. We’re all learning together.


Rest assured, if you can use a phone and the internet, you are more than able to teach remotely! You have the subject knowledge, teaching experience, and you know your students. The most important thing to do is try and bring the feeling of a classroom setting into their homes.


18 Tips for Educators

1. Use your existing lesson plans

Take those plans and put them online. You’ll have to tweak them a little for the digital world, but you have the majority of the content you need already. As you get used to doing this, you’ll develop your own methods. You might find that constructing all your lessons in a similar way every time makes the whole process more efficient – and gets your students into a routine they recognize.


2. Find software that works for you

There’s plenty of educational software out there. If your school isn’t using one particular system, try Google Classroom, Microsoft Teams or Moodle. Any of these platforms will help you work collaboratively and engage students in an online learning environment.


3. Be available online during the time you’d normally teach

It’s important to still be there to answer student questions when they’d normally be able to ask them. Software helps here, too. Conferencing platforms like Skype, Google Hangouts, and Zoom can all help you stay connected. You may also want to schedule some time outside of normal teaching hours to provide any extra support students may need.


4. Connect your students with each other

Your students (and most likely you, too) will miss the social, collaborative, and peer-to-peer aspects of the classroom, and the ability to ask questions if they don’t understand something. Try and facilitate this as much as possible while teaching remotely.


5. Record (and pre-record) some lessons

Pre-recording your lessons can make remote learning more efficient. You can do this at a time that suits you, and make it available to your students when they need it. It also helps to record your live sessions as it means students can go back and listen to them again if they need to.


6. Set your lessons up to run as smoothly as possible

Decide what you are going to say in live sessions in advance. You don’t need a script, but you do need direction. At the beginning of each lesson, ask your students to turn off their microphones and cameras so you limit distractions as much as possible. Try and limit the length of time you’re talking to your students so they stay as engaged as they would in a normal classroom where everything is much more interactive.


7. Set ground rules

We’ve mentioned turning off mikes and cameras, but students also need to understand that when they log into their remote lesson, they are effectively at school and normal school rules remain in place.


8. Stay in touch with parents

It’s going to be much more difficult to know how your students are really doing. Keeping communications open with parents is vital. You could do this via email or text, and most schools will be updating their website and social media accounts regularly, too. Don’t forget that parents will need support as well. It’s daunting to suddenly have to homeschool your child so you could let them know you appreciate them helping out with remote teaching their child.


9. Take it step by step

Getting used to a remote learning set-up takes time, so don’t try to do everything all at once or try anything overly complicated too soon, especially if you’re new to remote teaching. Allow both yourself and your students time to settle in. A 15-minute recorded lesson that students can pause and rewatch with time for them to process and apply the lesson is a good start.


10. Keep in touch with students individually

Send an email or a note through your classroom management system to ask how your students are getting on, that you’re missing seeing them, and are looking forward to seeing them back at school.


11. Provide feedback

Keeping in touch with your students also means providing them with qualitative feedback. It’s something that can be easy to forget if you’re teaching remotely but it gives students a feeling that they are working with purpose, and they generally want to know how you think they’re getting on.


12. Stay in contact with your fellow teachers and school staff

It’s not just your students that it’s important to keep in touch with. Your colleagues are experiencing the exact same things as you. You can help each other by sharing these experiences, giving each other tips, and learning from what others are doing. Plus, it’s great to have that support network.


13. Create a routine

This is definitely more difficult when you’re teaching remotely than when you are in school. But it’s important for you, your students, and their parents to stick to a routine to have consistency and to set expectations.


14. Motivate your students

Being able to motivate your students is also more difficult when they’re learning from home with all the distractions and temptations that brings. Set goals for your students, both individually and as a class. Involve students in the process of setting these goals so they buy into them, and make sure both they and their parents understand the goals and why you’re working towards them.


15. Recognize successes

Share individual student successes with the class in a video. Create online certificates of achievement. Celebrate wins!


16. Recognize the emotional impact that COVID-19 is having

This is a difficult time for everyone, and it’s important that you talk to and reflect with your students about what’s happening. There are plenty of resources available to support you as you do this.


17. Get hands-on

Just because you’re teaching remotely doesn’t mean you can’t give your students a hands-on, engaging experience!


18. Have a well-thought out physical space in which to work

You need to be comfortable at home in order to deliver remote learning lessons well. Set up a space that works for you – and let the people you live with know when you’ll be on video!


Do you have any other tips for Remote Teaching? We would love to hear from you!


ABOUT THE AUTHOR

This guest blog was written by Arduino Education

Arduino Education classroom programs progress students through STEAM from middle school to university, increasing in complexity to challenge them as they develop their skills.
All programs include a range of electronics such as programmable boards, sensors, mechanical parts, simple open-source software, online content for students, and guided training and support for educators.

The products students learn with are the same as those used professionally in companies around the world, in applications like rapid prototyping, AI, drone technology, and machine learning.

Check MTA’s Arduino Education Range


Shop MTA>

Blog Home>

Posted on

5 Great Reasons To Play Board Games With Your Children

Montage of board game boxes

There’s no school or preschool for many kids right now and with no play dates, sporting events or birthday parties to look forward to, life could be a little tricky at your house as you try to live, learn, work and play under the same roof.

If the novelty of ‘physical distancing’ is starting to wear off and your internet data levels are going through the roof because your children all want to watch ‘screens’ while you’re trying to work from home, why not pull out a board game to keep them engaged and interacting with one another for a while?

Games have been used since time immemorial for teaching social and academic skills to children and adults alike.

Did you know that the games of Go and Chess both evolved from being a way to test the mind of a military leader to a way to pass the time? The board games of today are no different.

Aside from building strong family ties, spending time playing board games with your children can have a surprising range of social and academic benefits.

I’ve been a teacher for over thirty years and wish I had a dollar for every time I’ve played board games with my students. The child psychologists, speech therapists and occupational therapists I work with today also often use board games to help children to develop the skills they need to succeed at home and in the classroom.

With a good board game, you can do the same with your own children!


Benefits of Board Games

Some of the benefits your child can gain include:

• Building resilience

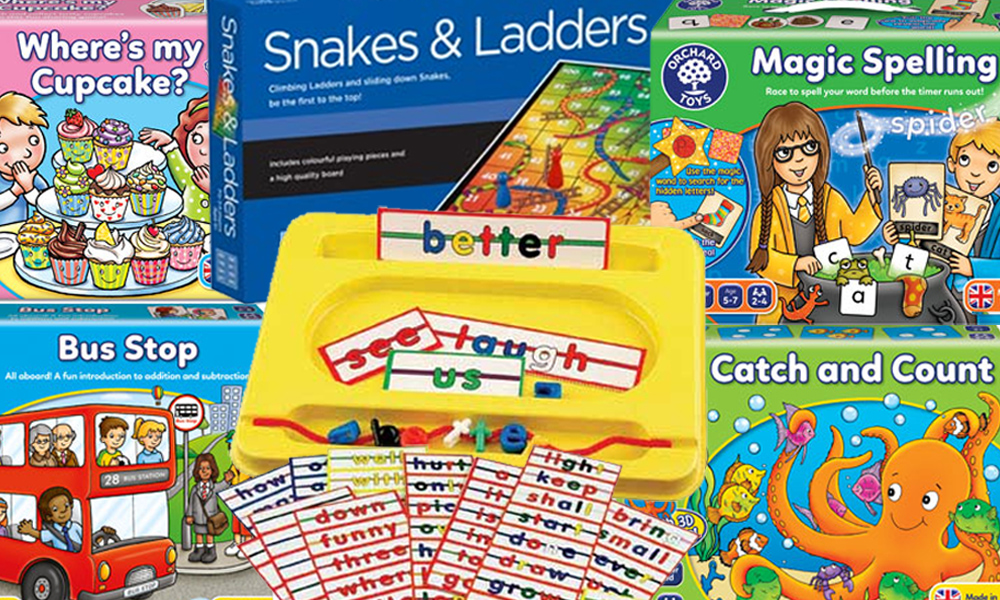
Games that involve a chance to randomly experience a set-back can help your child learn resilience. By playing games like Snakes and Ladders , you can help your child learn to bounce back from a disappointment and keep pushing towards an end goal.

• Learning how to cope with winning and losing

Playing games with others helps children learn to focus on having fun, rather than winning or losing. However, it also teaches them how to cope with both sides of that coin. Rather than celebrating and gloating they learn to move past the glory of winning and focus on having fun as a group. When you play board games with your children, you can show them how to recover from a loss and do better in the next game instead of sulking over coming second.

• Learning patience and the concept of waiting for one’s turn

This one can be difficult in our fast-paced world but taking the time to play with your children can help. In my children’s health and education practice in Sydney, we make frequent use of many of the board games made by Orchard Toys that are perfect for teaching young children this skill. We particularly like the Bus Stop Game and Where’s My Cupcake?, which combine real life scenarios with great lessons in turn taking.

Board games build thinking skills

Games can also be played to help children consolidate curriculum skills that they’re learning at school or preschool.

By playing board games with your child, they get opportunities to practice:

• Early number skills such as matching, counting, and keeping a score

Matching games teach children observational skills as well as being able to pair like with like. One of our favourites to play is Monster Bingo

A key skill for children to learn prior to going to school is the ability to count. Games that can support correspondence counting make the time spent to learn the skill more enjoyable for everyone. A fun one to start with is Catch and Count, which helps children learn to count and recognise numbers.

Keeping score is a step up after learning to count, and can be applied to most games, even if it’s only a simple “OK, I won this game, mark it down.” When the game is over, you can ask, “How many games did you win? How many did I win?”

Another Maths option is a game like the Magic Spelling Game. Kids have lots of fun learning addition and subtraction and quickly come to understand that count how close all the players are to winning is the key to the game.

• Early literacy skills that are learned when a child reads for a purpose

Adding games to your child’s leisure time on a regular basis can also aid them immensely as they develop early literacy skills. Games can vary from letter recognition to reading for a purpose, such as reading the ‘Chance’ cards from Monopoly. Our favourite for this group is difficult to choose, but it might just be Sight Words String Ups which combines vocabulary building, reading and fine motor skills in an innovative game that kids enjoy.
As you spend time playing with your children on a rainy day, you’re not only helping them to learn and build skills, but you’re also building memories.

When they get to play games with you, they learn many life skills that will serve them, as well as a relationship that will only grow with time.

So next time a friend or relative asks what to buy your child for a birthday or other special occasion, why not suggest a board game or two?

They’re the kind of gift that just keep on giving!!


Featured Products:

Snakes and Ladders

Chess

Monopoly

Bus Stop Game

Where’s My Cupcake?

Monster Bingo

Monster Bingo

Magic Spelling Game

Sight Words String Ups

About the Author

Sonja Walker is the best-selling author of School Ready: A practical and supportive guide for parents with sensitive kids. She is also an experienced teacher, speaker, mum and the founder of Kids First Children’s Services, an award-winning pediatric health and education practice in Sydney where she leads a highly experienced team of child psychologists, speech pathologists, occupational therapists and teachers. Sonja’s mission is to help kids to thrive, not just ‘cope’ by supporting their parents and teachers with practical solutions and easy ideas that make life happier at home, preschool and school. Sonja presents keynote speeches and workshops in preschools, schools and corporate settings and is a sought after media commentator on topics related to children’s learning and development. To contact Sonja, please visit www.kids-first.com.au

Shop MTA>

Posted on

Creating Real World Solutions With The Micro:bit

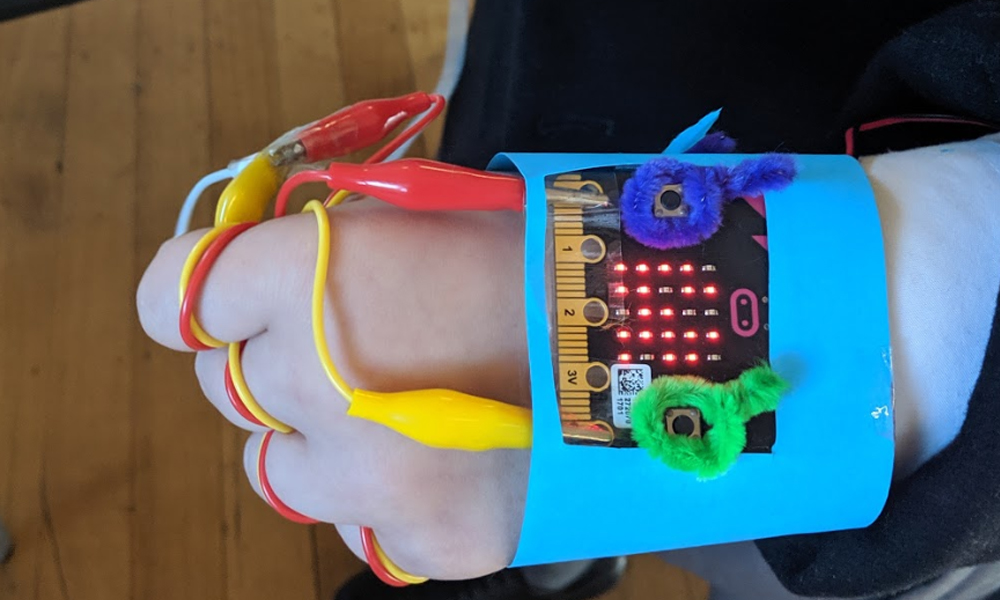
microbit sleeve on kids arm

The BBC Micro:bit is a favourite Digital Technologies tool of mine that allows our students to design solutions to problems, create games, make music and respond to the surrounding environment.

The small handheld micro-controller can be coded by students using Block Code, Python, Javascript or Scratch 3.0, making it a versatile tool that can be adapted for students in primary and secondary classrooms.

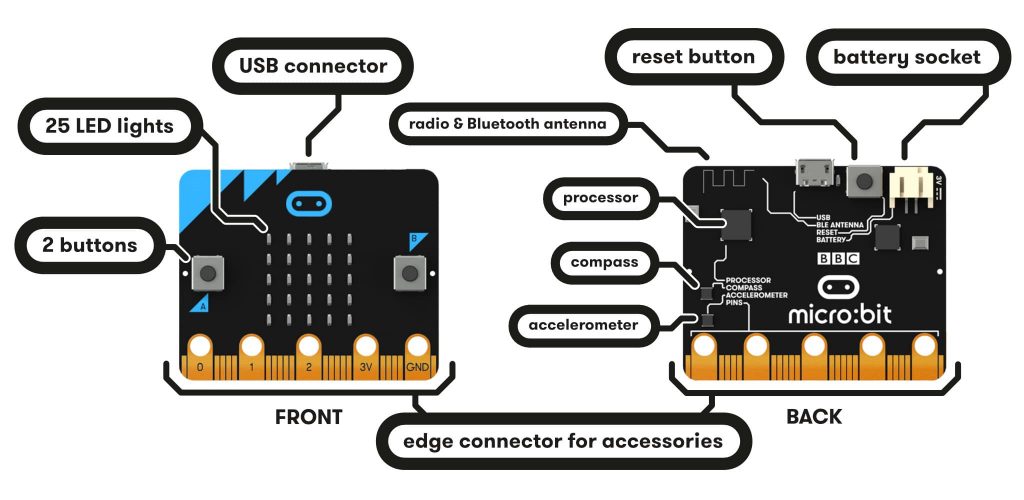
The features of the Micro:bit are;

  • USB connector: Connects to a computer for power and to load programs onto the Micro:bit
  • 25 LED lights: Can be individually programmed to show shapes, text or numbers
  • 2 buttons (A and B): Programmable input buttons
  • Light sensor: The LEDs on the Micro:bit can also act as a light sensor to detect ambient light
  • Edge Connector: 25 external connectors, called Pins, on the edge of the Micro:bit allow you to connect to other input and output electronic hardware, including LEDs, motors and sensors
  • Battery socket: Power the Micro:bit using batteries
  • Reset button: Restarts the Micro:bit
  • Radio: Communicates with other Micro:bits
  • Bluetooth antenna: Wirelessly sends and receives signals to Bluetooth enabled PCs, smartphones, or tablets
  • Processor: Where the program is stored and executed
  • Compass: Detects the direction (north, south, east, west) the Micro:bit is facing
  • Accelerometer: Detects if the Micro:bit is being moved, tilted, shaken or in free-fall and at what acceleration
  • Temperature sensor: Detects the current temperature of the Micro:bit in degrees Celsius

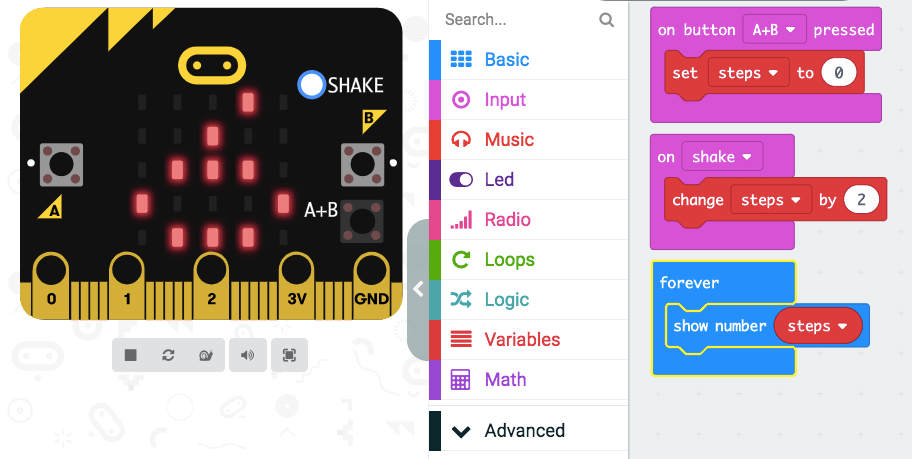
microbit stepcounter

Introduction to the Micro:bit

The Makecode platform, developed by Microsoft, allows students to code using Block Code and Javascript. It has a great range of project tutorials for students to work through to develop their understanding of, and familiarity with, the Micro:bit.

Website: https://makecode.microbit.org/

My favourite tutorials:

Rock, Paper, Scissors
Name tag
Step counter

Step Counter

microbit stepcounter code blocks

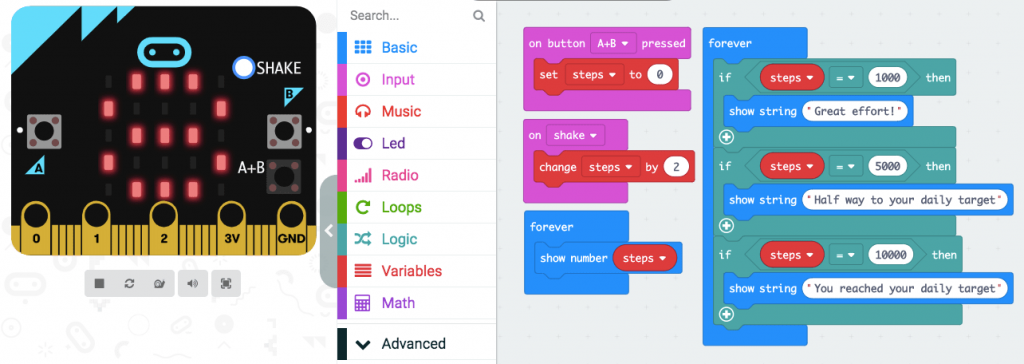
Extension: Have students personalise and/or make enhancements to the code.

Step counter – Enhanced with a message displayed on the Micro:bit when the user reaches 1,000, 5,000 and 10,000 steps.

microbit stepcounter blocks

Once students have developed a basic understanding of how the Micro:bit works, they can be given a range of projects or challenges to solve individually or in small groups. These challenges will allow students to use their imagination and creativity to design their end product.

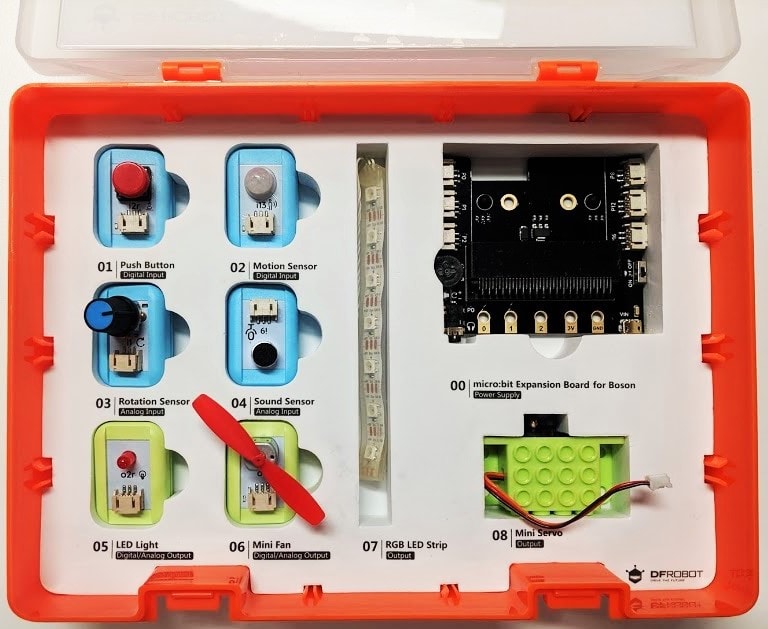
BOSON – Starter Kit for Micro:bit

microbit in box

Micro:bit is a simple micro-controller that can be enhanced with a range of add-on resources to allow students to achieve even more. The Boson Kit comes packed with easy-to-attach modular blocks to further empower student creativity and projects.

The Boson Kit features:

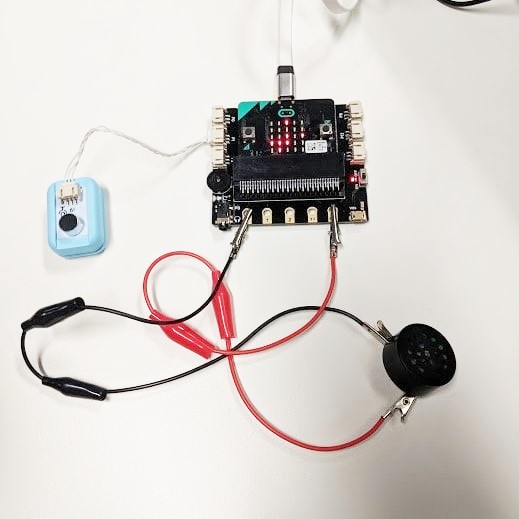
  • Micro:bit expansion board
  • Push button
  • Motion sensor
  • Rotation sensor
  • Sound sensor
  • LED light
  • Mini fan
  • LED strip
  • Mini servo

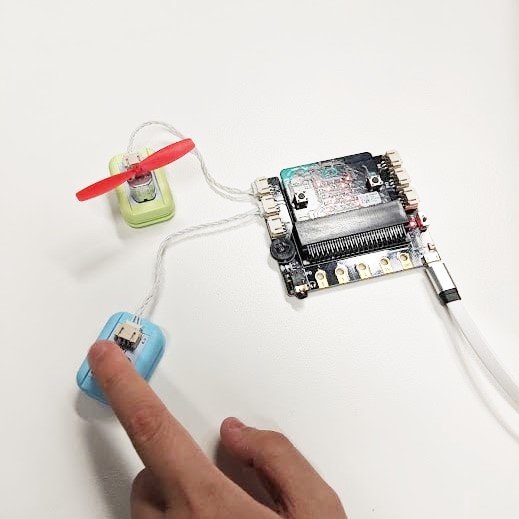
microbit fan sensor with button and childs hand
Incorporating the features of the Boson Kit into their designs allows students the opportunity to create solutions that can respond to a variety of inputs or sensors and respond or act with a desired output.

microbit sensor circuit setup

Micro:bit Pets

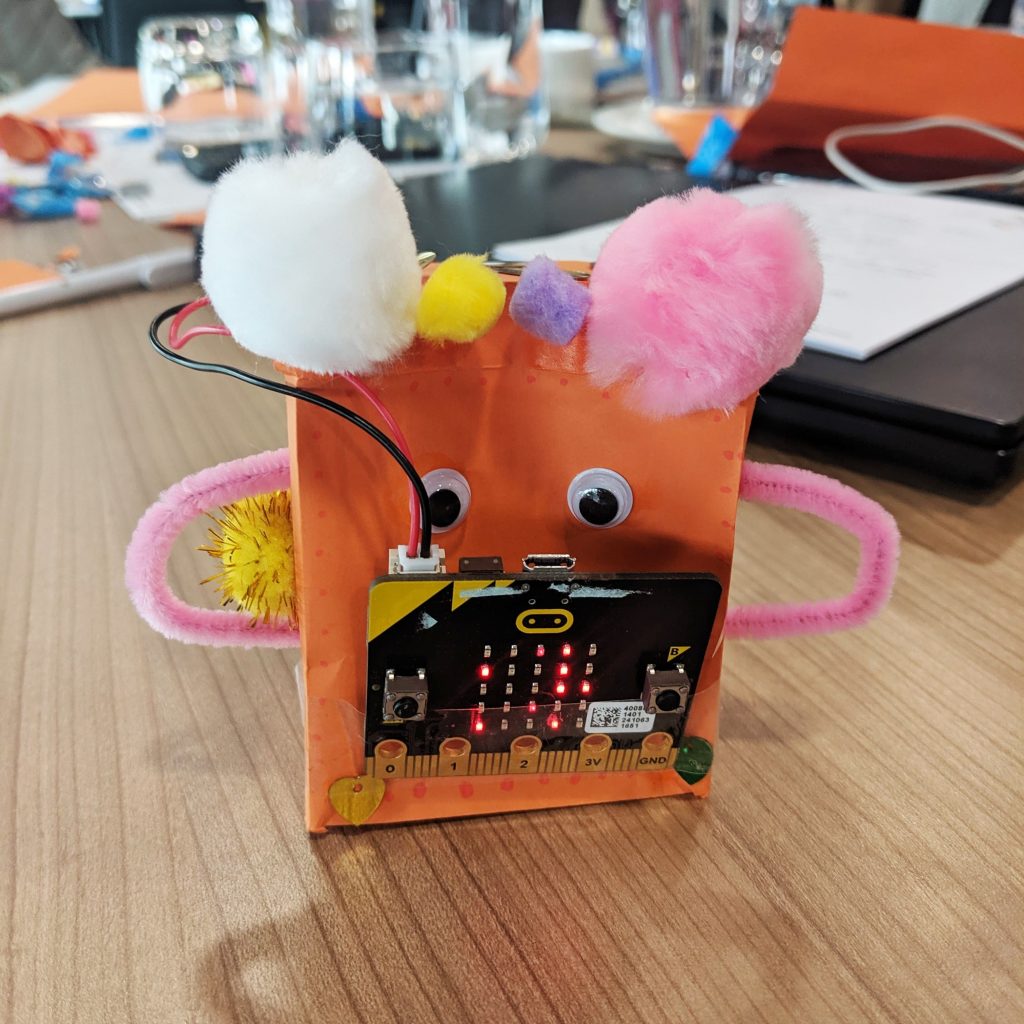
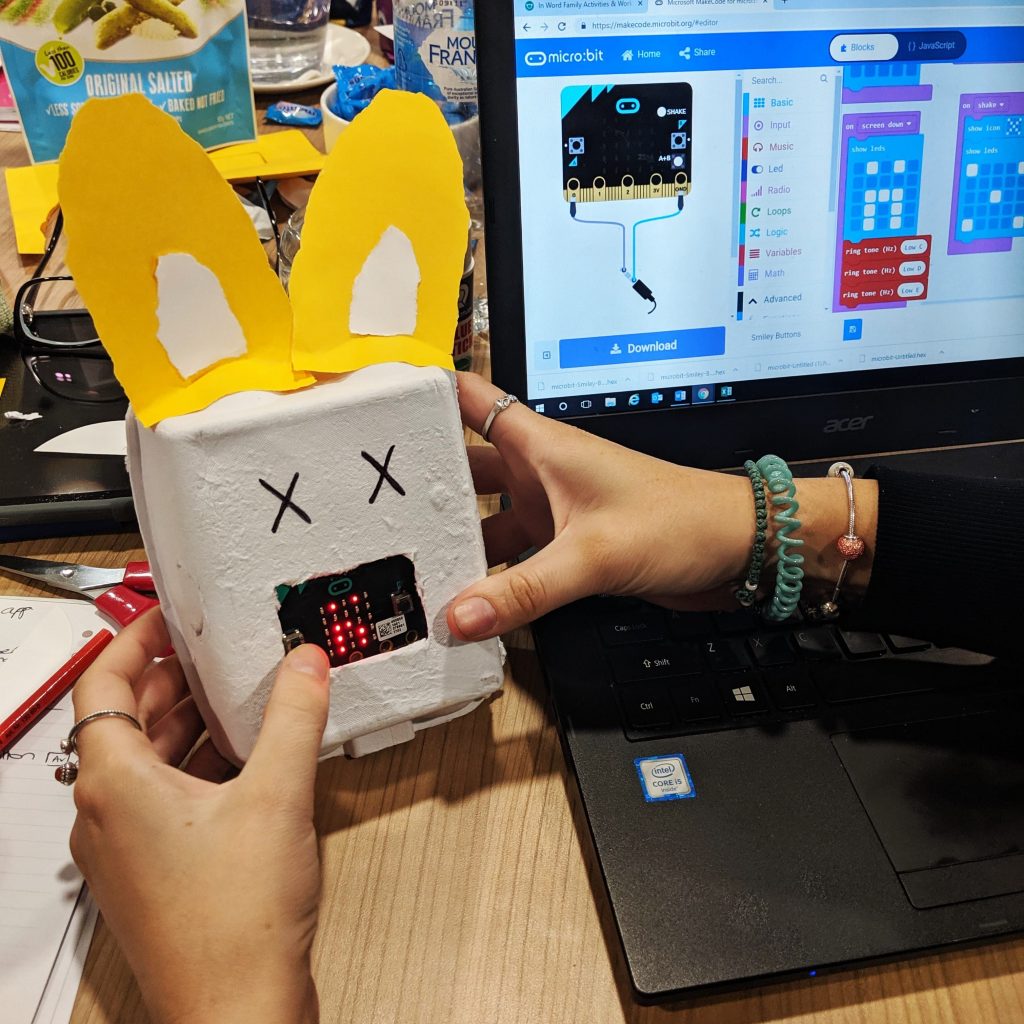
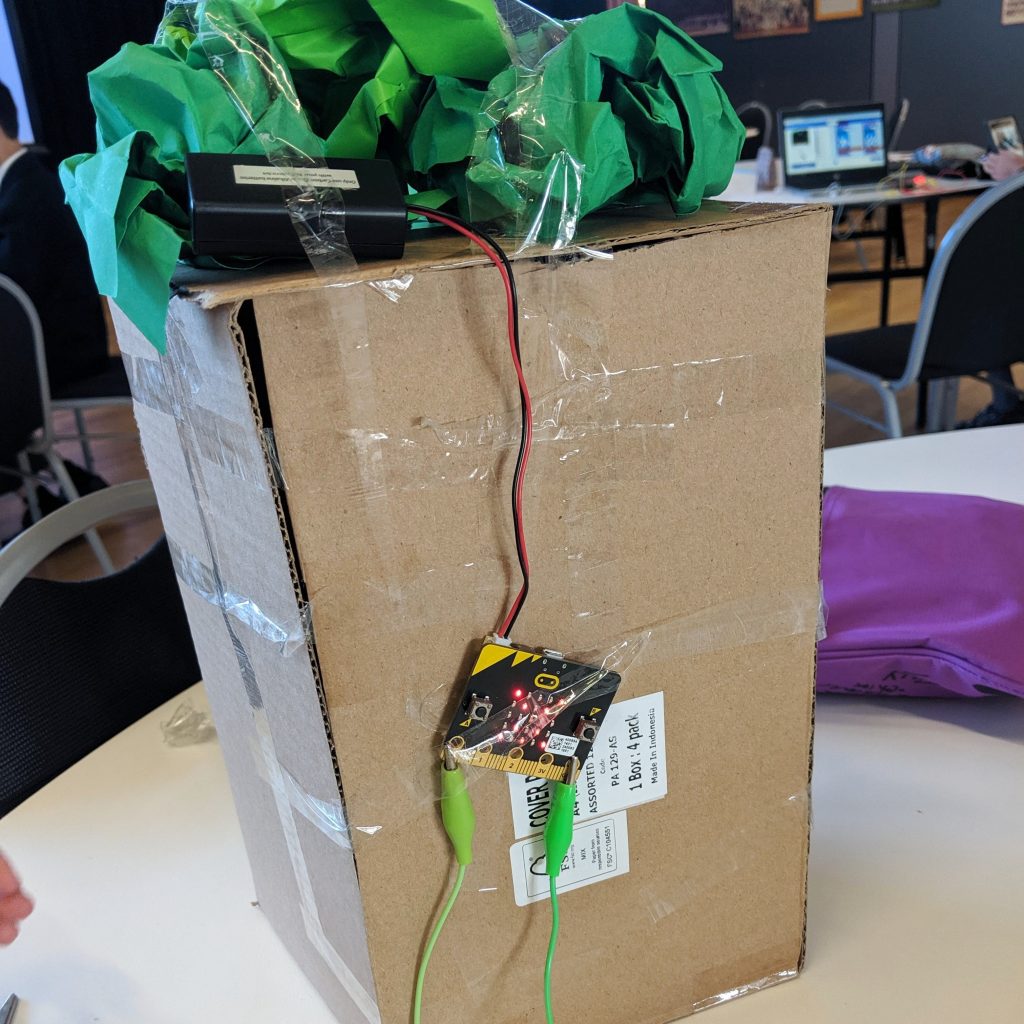
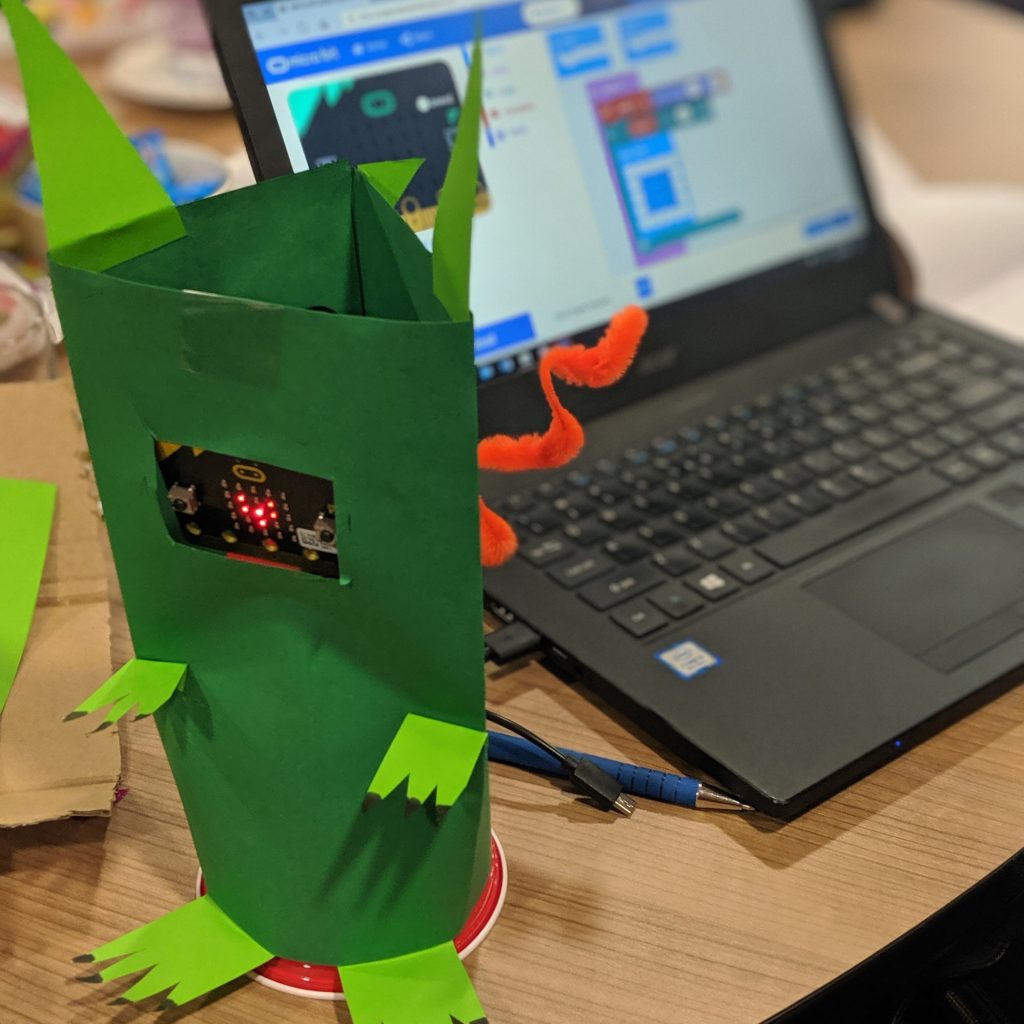
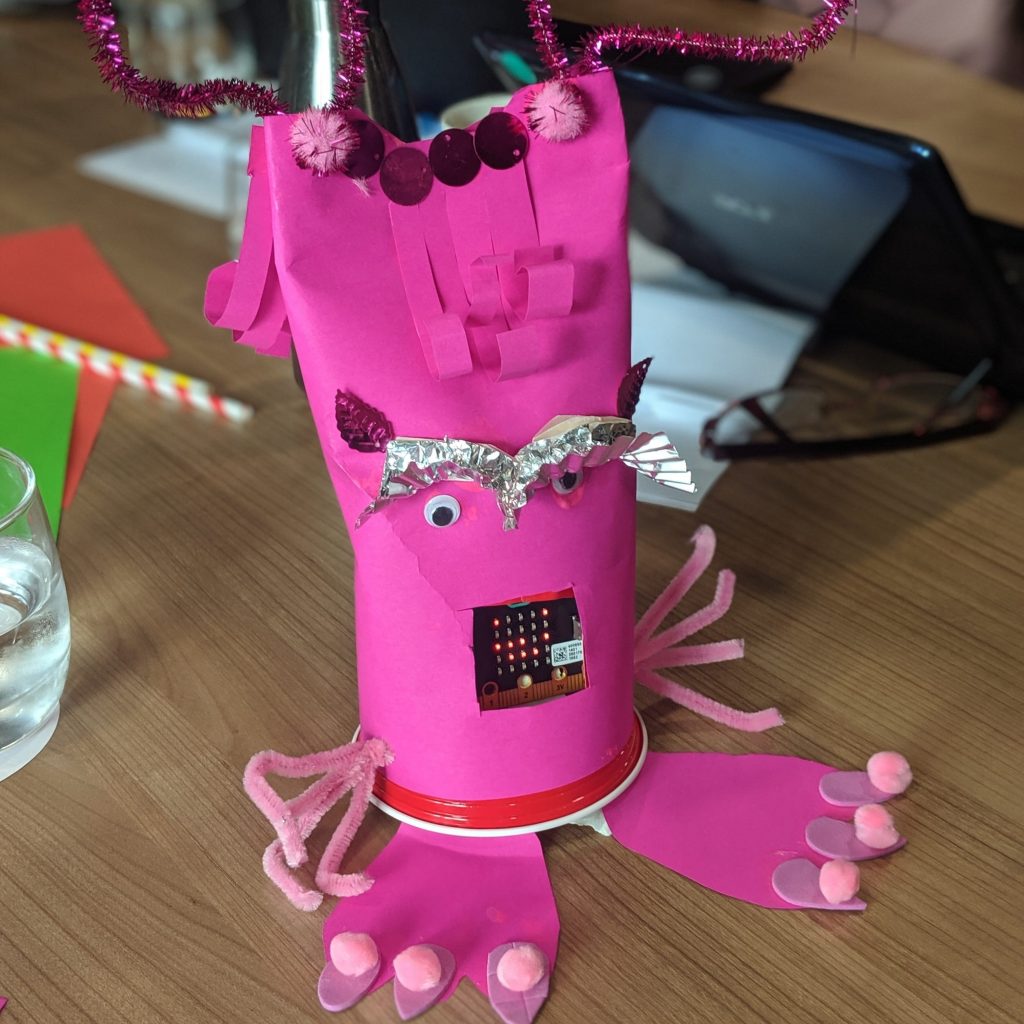
Students create their own Micro:bit Pet. The pet must react to different Micro:bit movements by using the LEDs and sounds to showcase the pet’s emotions. Students use art and craft materials to design and create their pet, integrating the Micro:bit to act as their pet’s face.

microbit pet green, faeturing laptop in background

microbit pet pink on classrom desk


microbit pet orange on classroom desk


microbit pet yellow with laptop in backgroundMaterials:


UN Sustainable Goals

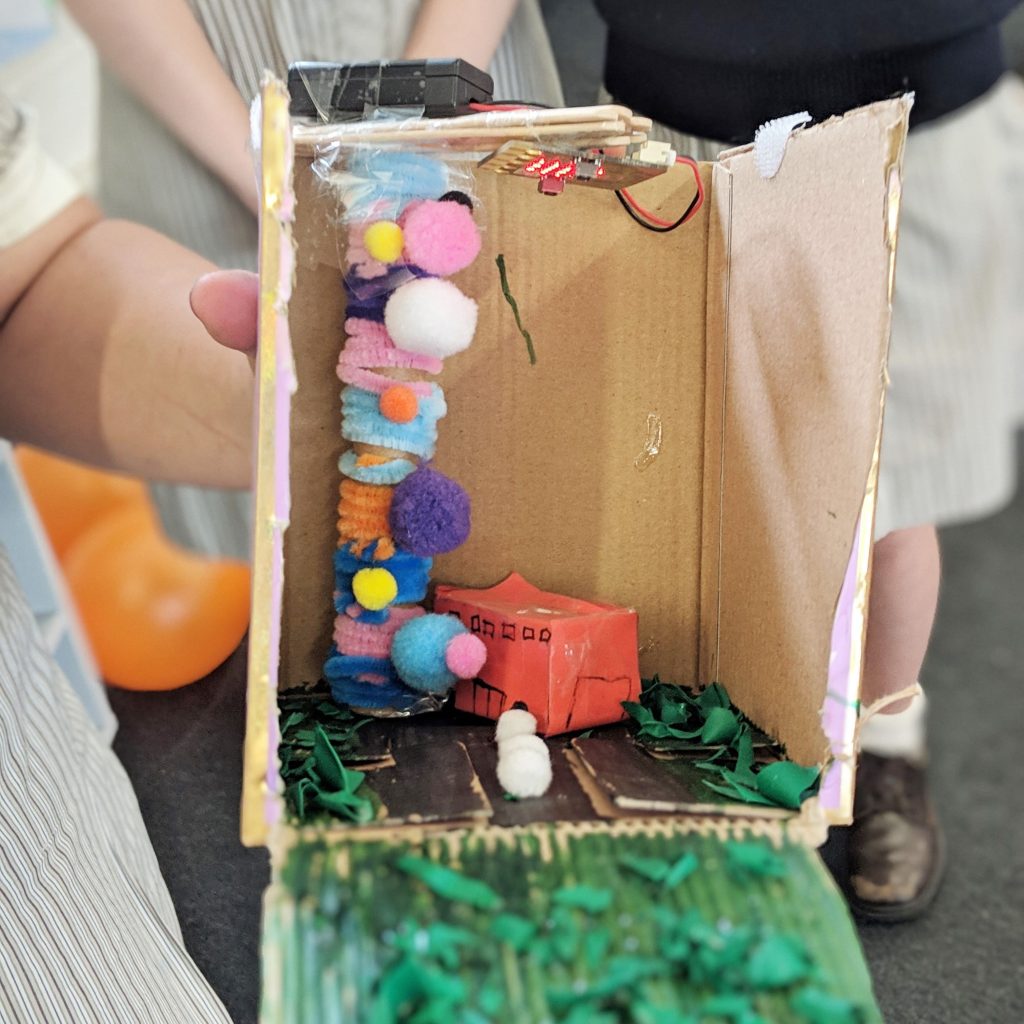
There are a total of 17 goals that make up the UN Sustainable Goals. I focus on two or three that connect to the current learning themes taking place in our classroom when undertaking this project. This provides students with a real-life scenario to develop a solution using the Micro:bit.

UN Sustainable goals vector table

Students need to apply their content knowledge from our units of work in class, to generate ideas, code a solution and create a prototype.

Examples created by students aged 11-13 years old.

Automated Street Lights
Goal 7 – Affordable and Clean Energy
As pedestrians walk on the footpath at night, the light above sensors their presence and switches on. This provides light where it is needed, saving energy as they are not on all night long.

microbit automated street lights


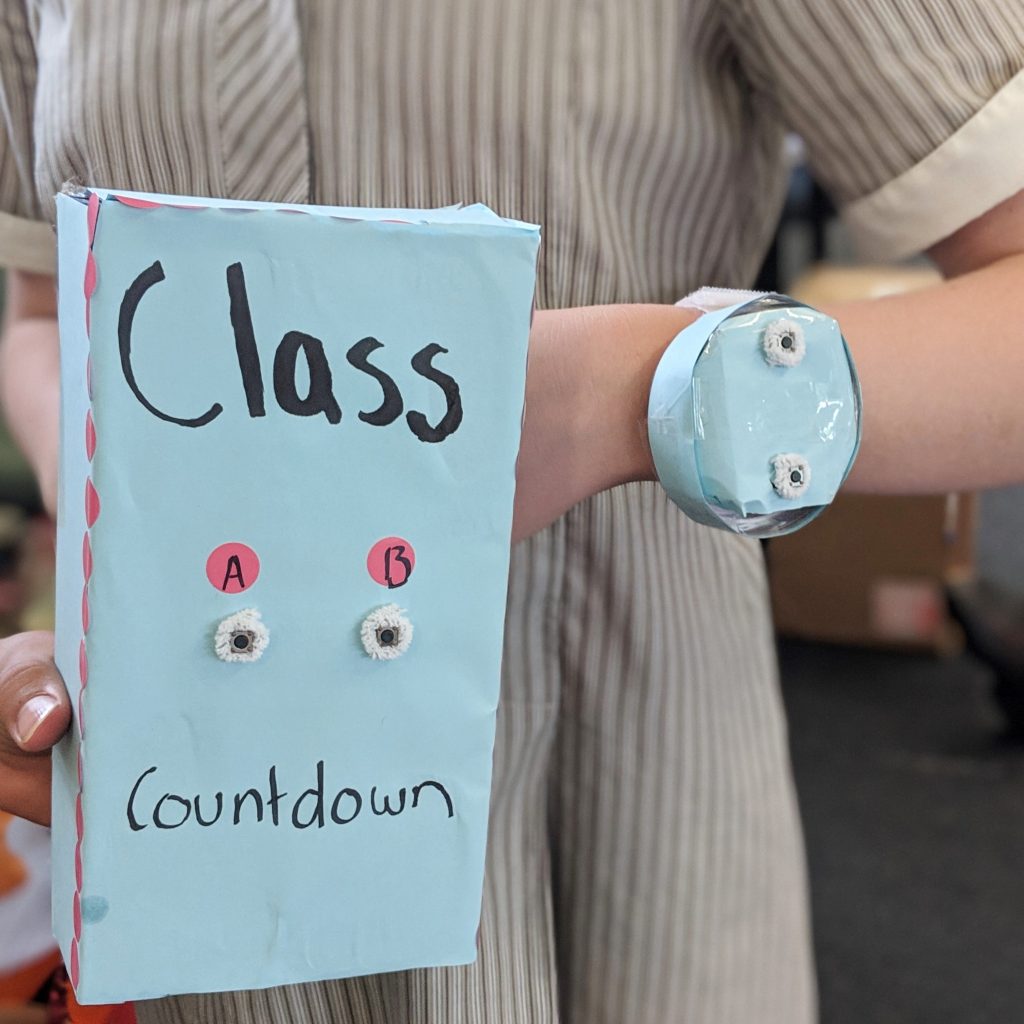
Class Countdown
Goal 4 – Quality Education
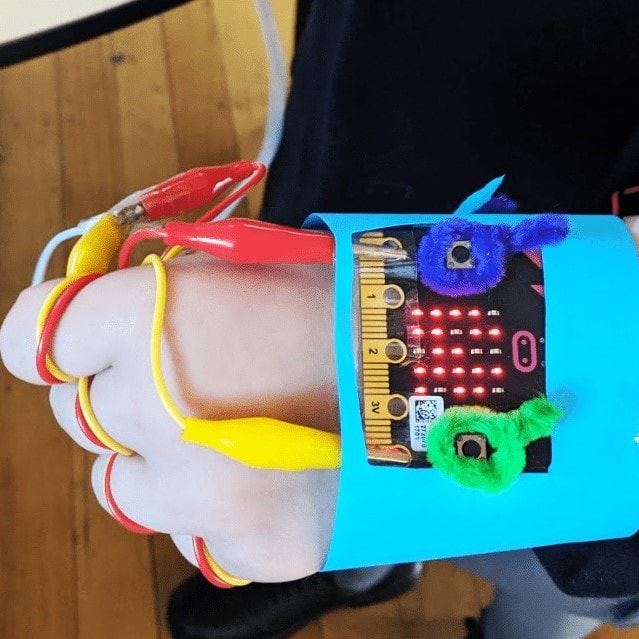
This device will be installed in every classroom and every student wears a synced watch. As students enter the classroom they press button A to automatically mark the roll. If students require teacher assistance, they press button B on their watch. If the teacher wants all students’ attention on the floor, they get a countdown timer to appear on the LED screen of their watch. This was designed to save time in the classroom so teachers and students can work more efficiently.

microbit class countdown


Tree Cut Down Warning System
Goal 13 – Climate Action
Goal 15 – Life On Land
Trees in forests have sensors attached. When a tree is cut down it notifies the rangers, so they can then locate where the tree is and stop deforestation before it occurs.

microbit tree cut down warning system


Turtle to Clean the Ocean
Goal 14 – Life Below Water
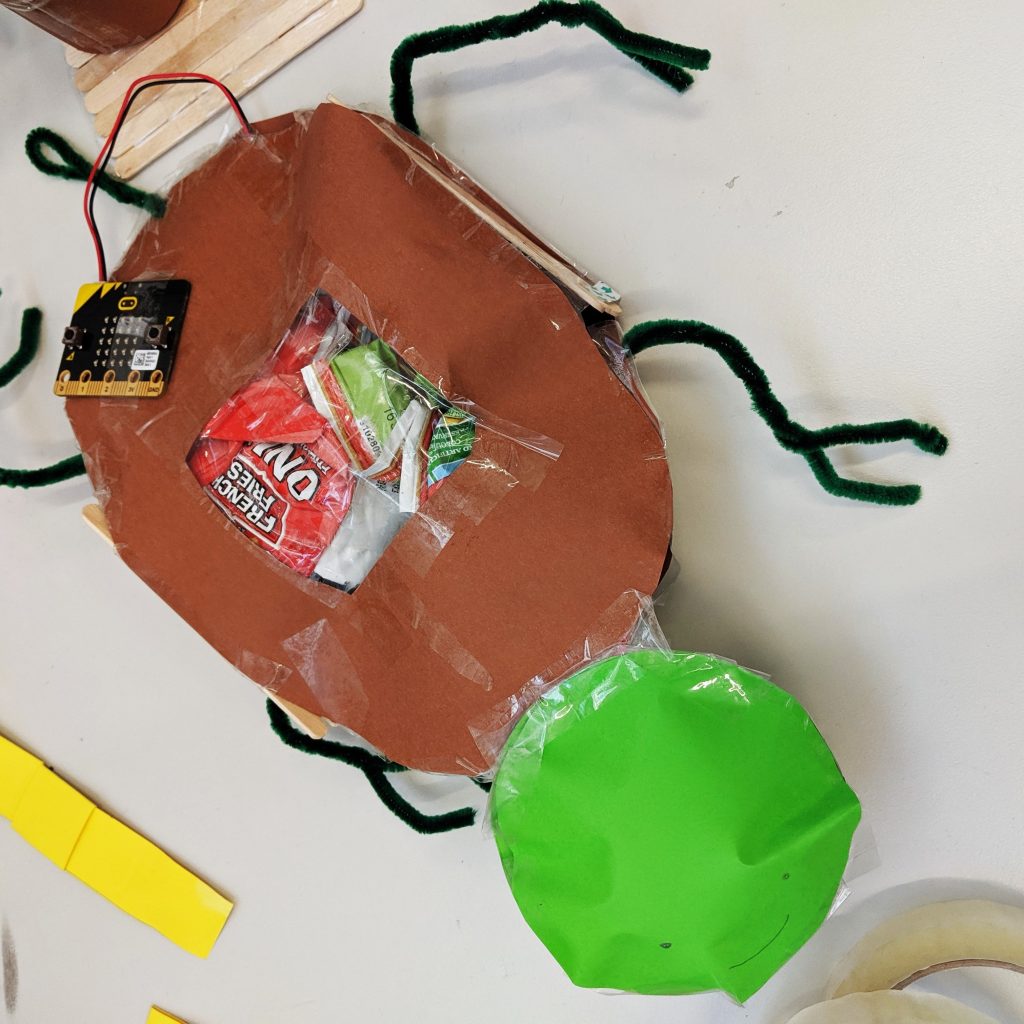
The turtle swims in the ocean collecting rubbish. It was designed to appear like other animals in the ocean so as not to scare others.

microbit turtle to clean ocean


Wellbeing Watch
Goal 3 – Good Health and Wellbeing
This wellbeing watch helps fight mental health issues. When button A is pressed, either a joke, funny emoji or funny sound will play at random to cheer the person up. When button B is pressed, it notifies authorities of the location and that this person is in trouble and needs urgent attention.

microbit wellbeing watch


The Micro:bit and Boson Kit allow students to work through the design process to prototype and solve real-life problems. These resources give students the creative freedom to explore and generate ideas through hands-on learning experiences. How are you using these tools in your classroom?

Featured Product:

Boson Start Kit for Micro:Bit & MicroBit


How do you use Micro:bit in your classroom? We would love to hear from you!

About the author

Eleni Kyritsis is an award winning Year 3 teacher and Leader of Curriculum and innovation from Melbourne, Australia. Eleni facilitates professional learning workshops around the world that focus on unleashing creativity and curiosity in classrooms. You can contact her at elenikyritis.com and @misskyritsis

Shop MTA>

Posted on

All Time Favourite Literacy Resources

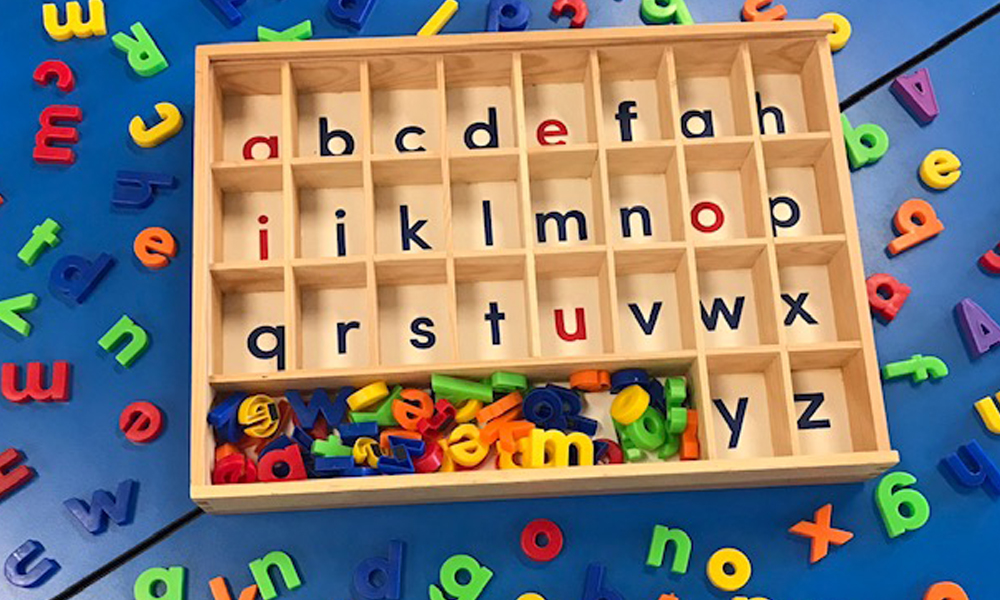
Alphabet Sorting Tray And Magnetic Letters On Blue Desktop

Developing literacy skills in young students is extremely important in the early years and a large proportion of the school day is spent teaching these skills. To help me develop my students’ literacy skills, I use a wide variety of teaching tools and resources within my literacy program. Over the past few years, my collection of literacy resources has grown, yet I always seem to return back to my favourites; the resources that can be used in a myriad of ways. In this blog, I have compiled a list of my ALL TIME favourite literacy resources that I use regularly in my classroom and explain the different ways they can be used.
Chunky Alphabet Beads

Chunky Alphabet Beads Letters On Grass

There is something about threading activities that really captivates children’s attention. I have used these Chunky Alphabet Beads in both kindergarten and school settings and both age groups have adored them. On top of the obvious hand-eye coordination and fine motor skills that threading resources promote, there is also a range of literacy skills that these Chunky Alphabet Beads encourage. I have used these beads with my students to develop their letter recognition skills, name and word building skills, as well as awareness of uppercase and lowercase letters and alphabet sequence. Some of the activities I have implemented using these Chunky Alphabet Beads include:

    • Spelling names (focus on using uppercase letter followed by lowercase)
    • Spelling sight words
    • Spelling CVC words
    • Matching uppercase and lowercase beads together
    • Sequencing the alphabet
    • Letter finds (e.g. finding all of the e’s, or finding the letter that makes a /s/ sound)

Chunky Alphabet Beads Words On Grass

Featured Products:

Chunky Alphabet Beads
Flower Sorting Tray

Wooden Alphabet Sorting Tray

Alphabet Sorting Tray With Letters In and Around Desktop

I LOVE resources that can be used in a variety of ways, which is why this Wooden Alphabet Sorting Tray is included in my list of All Time Favourite Literacy Resources. I’ve lost count of the number of times I have used this tray in my early years classroom and it is one of my ‘go-to’ resources when planning hands-on activities for literacy rotations. Some of the activities I have implemented using this Wooden Alphabet Sorting Tray include:

    • Sorting and matching magnetic letters into compartments (using tongs for added fine motor opportunities)
    • Matching an uppercase letter manipulative with the matching lowercase compartment
    • Practising letter formation by writing letters of the alphabet on a piece of paper and then placing them in the matching compartment
    • Writing words that start with each letter on a piece of paper and then placing them in the correct compartment
    • Beginning sound match-up (having a range of small toys and sorting them into the correct compartment according to their beginning phoneme)

Alphabet Sorting Tray Activity With Sight Words Placed In And Around Tray On Grass

Featured Products:

Wooden Alphabet Sorting Tray
Easy Grip Tweezers
Magnetic Lowercase Letters

Alphabet Bean Bags

Alphabet Bean Bags Spread Out On Grass

In early years classrooms, there are many times in the day when students are transitioning from one activity to another. I like using these transition times as a teachable moment to consolidate learning and to give the children an opportunity to showcase their understanding. One of my favourite ways to transition students (e.g. from the carpet to the tables) is by throwing an alphabet beanbag to each student. Each child will catch their beanbag and tell the class what letter they are holding. This activity can also be adapted by having the student explain what sound that letter makes, or say a word that starts with that letter. Besides transitioning, other activities I have implemented using these alphabet beanbags include:

    • Throwing beanbags into a hula hoop and saying the name of letter/correlating sound
    • Laying letter cards out on the carpet and throwing the beanbags on top of matching letters
    • Uppercase/Lowercase game where the beanbag is thrown and then depending on what side it lands on, students will say “Uppercase!” or “Lowercase!”

Alphabet Bean Bags Activity The Word Play held In Hands

Featured Products:

Alphabet Bean Bags
Alphabet Wall Frieze

Phonix CVC Group Work Set

Phonic CVC Group Work Set Blue And Red Letter Blocks On Green Grass

These Phonix Cubes are a staple in my classroom and can be used throughout the year as our learning focus changes depending on our English unit. These Phonix Cubes come with a set of pictorial work cards for word building, which my students love using in English rotations. Students use the pictorial work cards along with the Phonix Cubes to build CVC words. My students are always excited to show me what CVC word they have built and I find this particular resource great for developing students’ confidence with word building.

Phonic CVC Activity Single Sight Words Sheet With Letter Blocks Surrounding Them On Grass

Along with making CVC words, some of the other ways we have used these Phonix cubes in the classroom include:

    • Building sight words
    • Building word families
    • Building names (they have uppercase on one side, lowercase on the other)
    • Sequencing the letters of the alphabet (my students love this one because they end up with a really long creation, which they think is fun!)

Phonic CVC Matching Activity Matching Up With Letters And Numbers With Cards On Grass

Featured Product:

Phonics CVC Group Work Set

Lowercase Alphabet Dough Stampers

Lowercase Alphabet Dough Stampers Green Dough On Blue Desktop With The Word Look Embossed In Dough

Playdough is ALWAYS a hit in my classroom and is perfect for developing those important fine motor skills as well as allowing children to engage in sensory play. To add an extra element to playdough play, I love adding these Alphabet Stampers to our playdough table to encourage letter exploration and word building. We frequently use our Alphabet Stampers to practise our sight words, which is a great way for students to familiarise recognising, reading and spelling these important words. Other ways we have used these Alphabet Stampers in our classroom include:

    • Stamping names into playdough
    • Stamping CVC words into playdough
    • Tracing letters with a finger after stamping

Lowercase Alphabet Dough Stampers Activity Materials On Blue Desktop

Featured Product:

Lowercase Alphabet Dough Stampers

Write and Wipe Sleeves

Write And Wipe Sleeves Sight Words On Blue Desktop

These Write and Wipe Sleeves have saved me SO much time and money over the past year, which is why I’ve included them on my All Time Favourite Literacy Resources list! What teacher doesn’t love saving time and money?! There is no need to laminate sheets with these Write and Wipe Sleeves, I simply place whatever sheet I need for the lesson inside the sleeve and then voilà! Students can write with whiteboard markers on these sleeves and then easily wipe away. Some of the activities we have used these Write and Wipe Sleeves for include:

    • Roll and Write sight words
    • Tracing and writing sight words
    • Tracing letters or using resources (rocks etc) to trace over letters
    • Making playdough letters

Write And Wipe Sleeves Activity Roll A Sight Word On Blue Desktop With Markers And Erasers

Featured Product:

Write and Wipe Sleeves

Storywands

Storywands With Books On Green Grass

Developing oral language skills and comprehension skills are vital components of our early years curriculum. One of my favourite resources to support development of both of these skills are Storywands. Storywands are a fun way to encourage discussion and understanding of stories. We have used them in whole-group shared reading sessions, as well as small-group guided reading. Each star has a different question on it, which encourages students to focus on different story elements. These Storywands are used extensively as part of our reading program and in a variety of ways, including:

    • In whole-group shared reading
    • In small-group guided reading (where each student answers a question)
    • Using one star per lesson as a focus (for example, students will draw a picture to answer the question, ‘How did the story end?’)
    • To focus on developing the reading skill of prediction
    • To focus on developing oral retelling skills

Storywands Activity Wands In Holder On Desktop

Featured Product:

Storywands

Wooden Alphabet Discs

Wooden Alphabet Discs Spread Out In Pairs With Upper & Lower Case Letters On Grass

I have a weakness for any type of wooden resource – especially ones that can be used in so many ways! These Wooden Alphabet Discs have 26 uppercase and 26 lowercase discs and are perfect for simple letter recognition and letter matching games. I have used these beauties in both kindergarten and school settings in a variety of ways, including:

    • Letter match-up sheets (matching letters, matching uppercase to lowercase)
    • Looking for alphabet discs in rainbow rice

Active World Tray Alphabet Discs Activity Tray Filled With Coloured Rice

  • Separating numbers and letters (with the addition of Wooden Number Discs)
  • Letter Partner game (hand out uppercase and lowercase discs to students and then they have to find their partner with the matching letter)

Wooden Alphabet Discs Activity Numbers On Left And Letters On Right Cardboard

Featured Products:

Wooden Alphabet Discs
Active World Tray
Coloured Plastic Bowls – Set of 6
Easy Grip Tweezers
1-20 Wooden Number Matching Discs – 40pc

Lowercase Letter Beads


Lower Case Letter Beads With Pincers On Grass Background

You already know that my students LOVE threading activities, so it probably won’t surprise you that I have included these Lowercase Letter Beads in my list of All Time Favourite Literacy Resources. I love that these beads are lowercase and they can be used with lots of different tools such as string, laces or even pipe cleaners. We mainly use these beads to practise spelling our sight words. Our favourite way to do this is by threading them onto a string as well as using tongs to pick them up and arrange them into a word. Other ways we have used these Lowercase Letter Beads in the classroom include:

    • Spelling names
    • Sequencing letters in the alphabet
    • Creating a string of words in word families (e.g. mat, cat, sat)

Lowercase Letter Beads Activity Sight Words And Letters On String Sitting On Grass

Featured Products:

Lowercase Letter Beads – 288 pieces
Fine Motor Tweezer Tongs


Alphabet Soup Sorter Cans

Alphabet Soup Sorter Cans

Last, but definitely not least, on my list of All Time Favourite Literacy Resources are these Alphabet Soup Sorter Cans. My students always get super excited whenever I bring these out because of their fun nature and opportunities for hands-on learning. This resource encourages students to sort the object and letter cards into the correlating cans and supports alphabet awareness, letter and sound recognition. Some of the ways I have used this resource in my classroom include:

    • Whole group activities when introducing a letter/sound
    • Consolidating a group of sounds (e.g. SATPIN)
    • Small group sorting with some or all cans

Alphabet Soup Sorter Cans Activity On Blue Desktop

Featured Product:

Alphabet Soup Sorter Cans

Have you used any of these resources within your literacy program? What is your all time favourite literacy resource? We’d love to hear from you.

ABOUT HEIDI:
Heidi Overbye from Learning Through Play is a Brisbane based, Early Years Teacher who currently teaches Prep, the first year of formal schooling in Queensland. Heidi is an advocate for play-based, hands-on learning experiences and creating stimulating and creative learning spaces. Heidi shares what happens in her classroom daily on her Instagram page, Learning Through Play. See @learning.through.play for a huge range of activities, play spaces and lesson ideas.

Posted on

Early STEM Activities: Part One

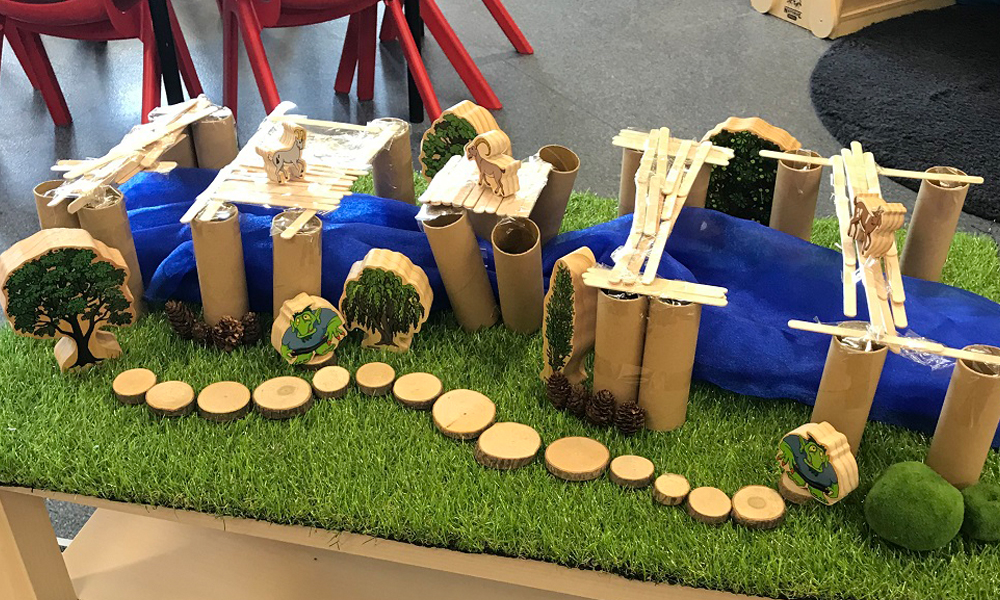
Early Stem Activities Forest Landscape With Billygoat Bridge

STEM! It’s a word we have all been hearing a lot about lately! At the beginning of this year, I started teaching at a new school and quickly learnt that STEM was a focus for teaching and learning. To be honest, I felt quite nervous because I did not know much about STEM when I started. I had so many questions… What exactly is STEM? What does it look like with 5 year olds? Continue reading “Early STEM Activities: Part One”