Posted on

Deck The halls: 8 Christmas Craft Activities That Bring The Festive!

Christmas Craft

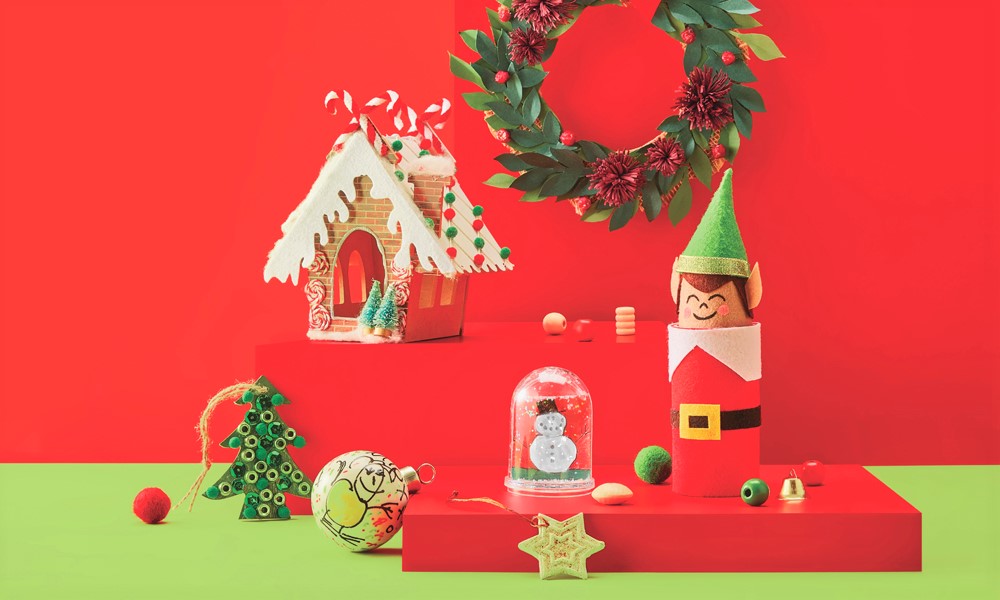
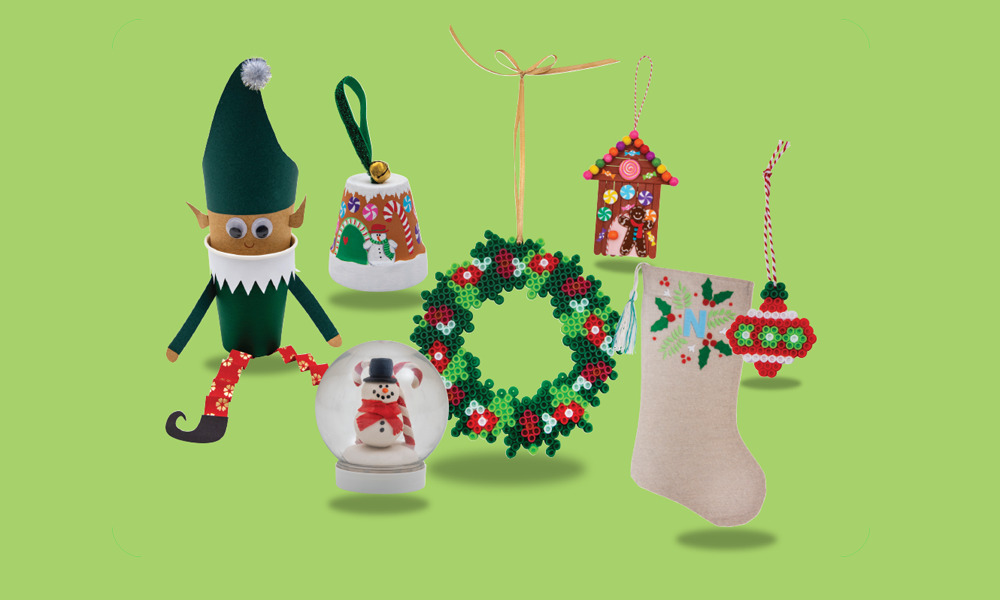
From wreaths to snow globes, it’s time to get Christmas crafty with these 8 elf-approved activities! While Santa is busy in the North Pole preparing for his big appearance, that’s the cue for all of us down here to plan our festive season arts and crafts. We’ve put our Santa thinking caps on and come up with 8 fun craft activities to bring the joy and merry! They’re as easy to make as kicking back on a sleigh ride with jingle bells on! Little creative minds and hands ready? Let’s gooo!


Elf cup
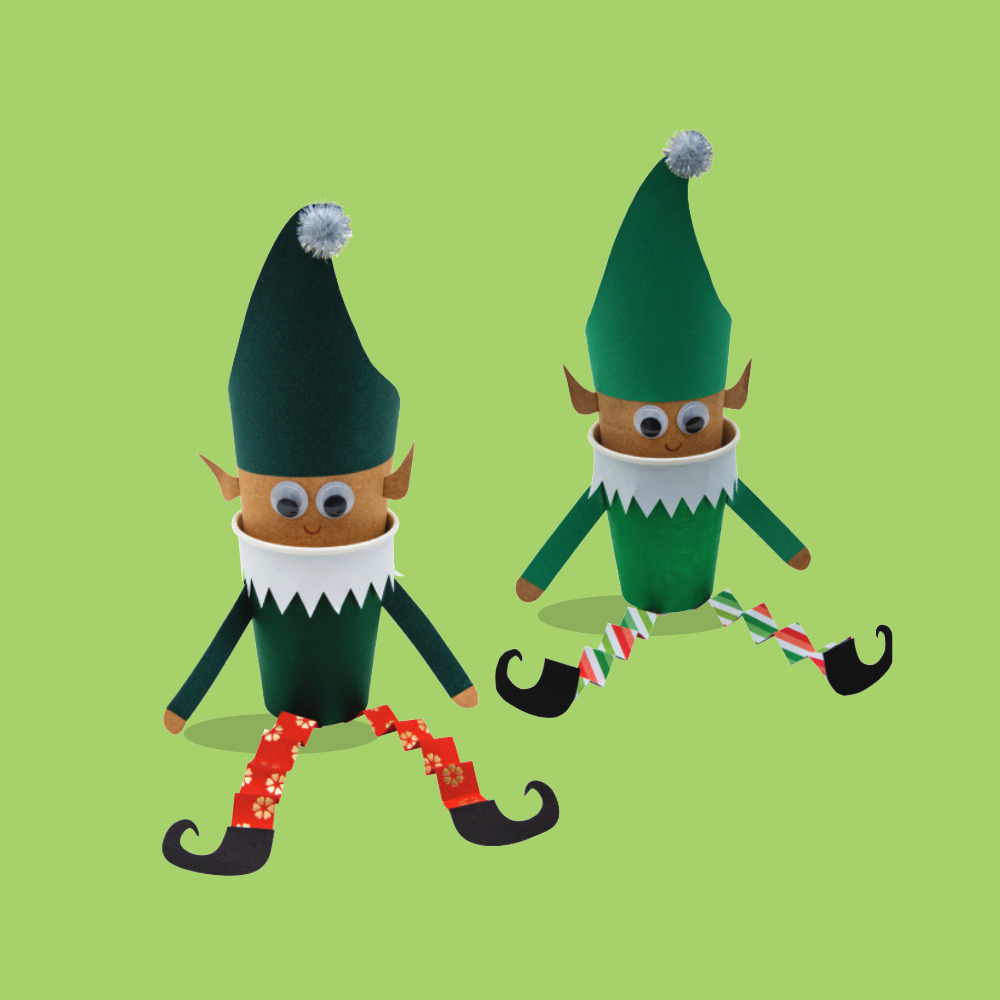
Christmas Craft Elf Cup

We took a poll and 100% of Santa’s elves LOVE it when you create little craft versions of them! These finished elf cups look wonderful sitting on a shelf (naturally), on the Christmas table or near the tree. White eco-paper cups are the basis of these cute decorations, painted in green. Then you build your elf’s legs, feet, and cheeky head and hat.


You will need:

White Eco Paper Cups https://teaching.co.nz/product/jm850

Christmas Paper Chains https://teaching.co.nz/product/cs5548

A4 Coloured Cover Paper https://teaching.co.nz/product/teb0001

18mm Joggle Eyes https://teaching.co.nz/product/sh1038

Strong Craft Glue https://teaching.co.nz/product/cs0004

A4 Kraft Paper https://teaching.co.nz/product/teb0087

Assorted Christmas Pom Poms https://teaching.co.nz/product/th180


Let’s make it!

Cover your cup in green using a marker or paint and set aside to dry.

To make the elf’s collar, cut a strip of white cover paper 28(L) x 3.5(W)cm, and then trim zig-zags into one edge (triangles measuring approx. 1.5cm, with each point roughly 1.5cm apart).

Wrap your zig-zag collar around the top of the cup, attaching with glue at the back.

To make the elf’s legs, take 2 strips of Christmas paper chain and fold them back and forth to make a zig-zag fold.

Use a dab of glue to attach the legs to the base of the cup.

To make the feet, fold a piece of black cover paper in half and draw one point elf shoe with a pencil, cut the pencil markings out, giving you two shoes.

Use a dab of glue to attach the shoes to the very end of the zig-zag paper legs.

To make the elf’s head, cut a piece of brown Kraft paper approx. 15(L) x 26(W)cm, wrap it into a cylinder with an overlap of approx. 2cm, and either tape or glue in place. Pop it into the cup.

To make the hat, free draw a wonky triangle shape (measuring approx. 26cm at the base, going up to a point. Our elf’s hat measures 14cm from the base line to the point).

Cut out your elf hat and glue it onto the top of the elf hat, overlapping the hat onto the Kraft paper.

To make the arms, use the excess paper from the hat and Kraft paper. Cut two strips of brown craft paper measuring 9(L) x 1.5(W), and 4 x coloured paper lengths 8(L) x 1.5cm.

Layer the Kraft paper and coloured paper together – 1 coloured on the bottom, Kraft in the middle with the ends poking out and another coloured on the top, gluing together. Repeat to make the second arm. Use a pair of scissors to round off the brown Kraft paper to form the hands.

Make a small 45-degree fold on the tops of the arms and glue to the elf cup body.

Free draw two ears on the brown Kraft paper – with 0.5cm excess to fold back and glue to the elf’s head.

Finish off by adding a smile and gluing on 2 joggle eyes, a pom pom on the hat and set aside to dry thoroughly.

Done! The perfect Elf Cup is ready!


TIP: Modify for younger age groups with pre-cut shapes or templates to snip out.


Gingerbread house terracotta pot ornament
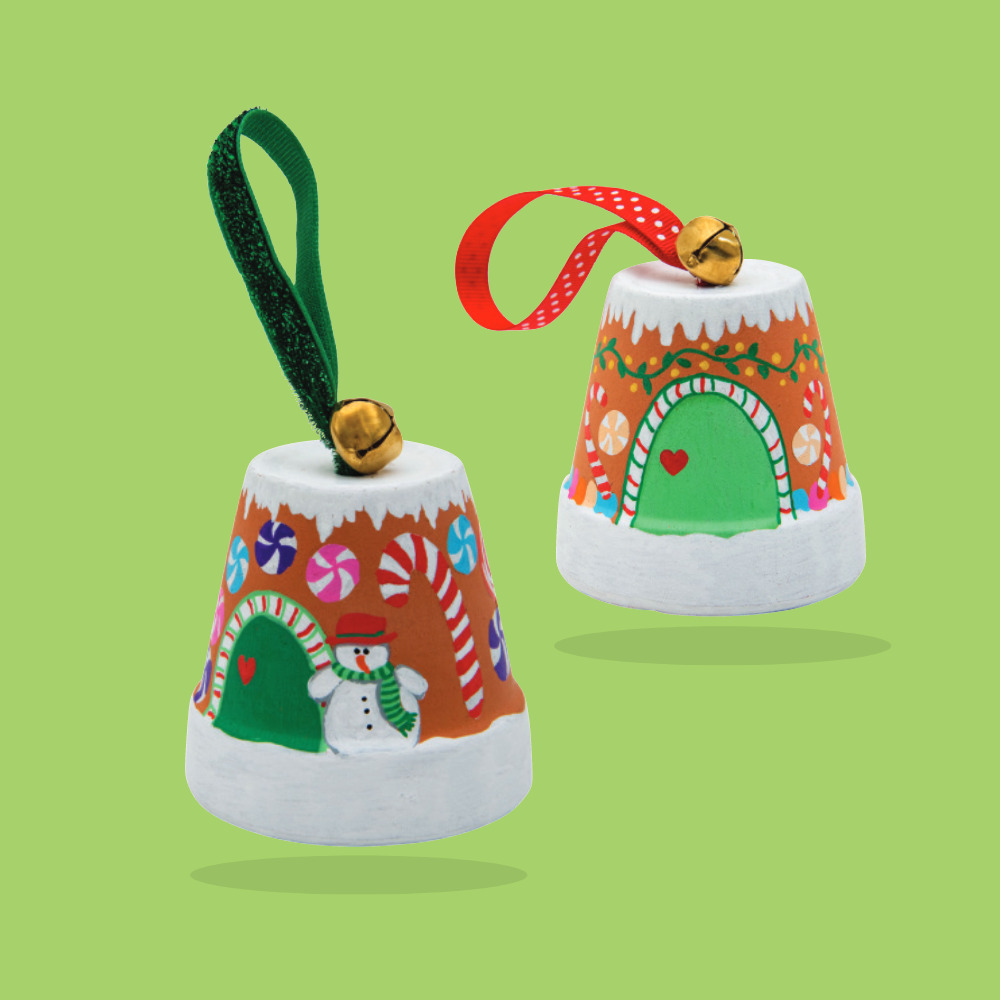
Christmas Craft Terracotta Pot Ornament

This gingerbread house ornament is so cute, it’s bound to be a big favourite for little hands to create and give them a tremendous sense of pride in their work! It would look great sitting on a desk, a shelf, coffee table or a windowsill! These little terracotta pot ornaments also make perfect seasonal gifts for loved ones!

You will need:

Terracotta Plant Pots https://teaching.co.nz/product/sh9802

Fine POSCA Markers https://teaching.co.nz/product/um300

Christmas Jingle Bells https://teaching.co.nz/product/sh9475

Assorted Christmas Ribbons https://teaching.co.nz/product/sh1588

Crystal Clear https://teaching.co.nz/product/md025


Let’s make it!

Lightly draw your design onto the terracotta pot with a lead pencil – white snow around the rim and fallen snow coming down around the top edges, a little door, candy canes, gum drops, lollies etc. as desired.

Use the white POSCA paint marker to fill in the large white snow areas.

Use the colourful POSCA paint markers to fill in the brightly coloured details, letting your pencil markings guide your art and set aside to dry.

Apply a layer of Crystal Clear to the entire surface of the pot to provide a permanent barrier to moisture and wear & tear and set aside to dry.

Cut a 20cm length of Christmas Ribbon, form a loop and push the two loose ends through the Jingle Bell.

Feed both loose ends through the hole at the top of the pot, trapping the Jingle Bell on top.

Use strong tape or glue to adhere the loose ribbon ends to the inside of the pot.

Done! The perfect Gingerbread House Terracotta Pot Ornament is ready.


TIP: Further personalise your decoration with embellishments, glitter or writing as desired.


Gingerbread pop stick houses
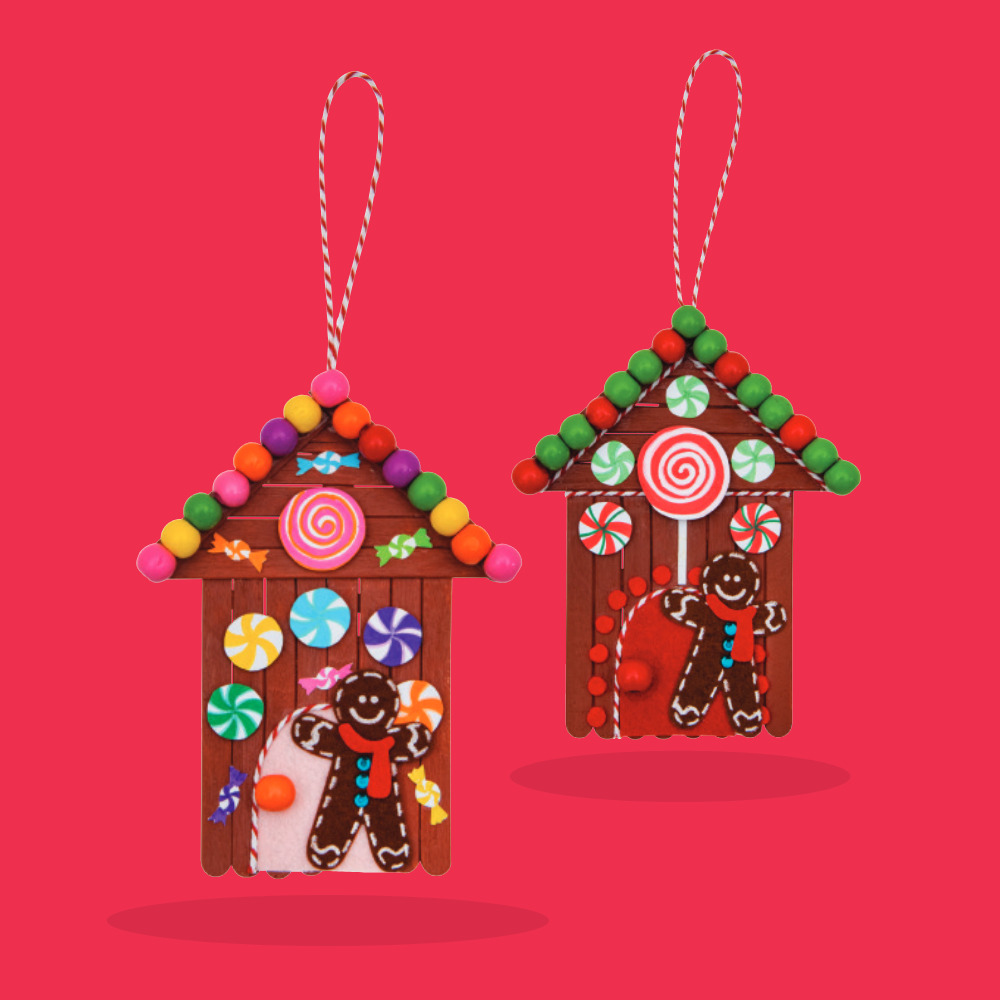
Christmas Craft Gingerbread Pop Stick HouseNo holiday season is complete without a gingerbread house – the sort you can eat and the sort you can treasure, like these! Whimsical and looking oh-so-delicious, these quaint pop stick houses make beautiful seasonal displays. They’re so pretty to hang around the classroom, on the Christmas tree at home or to gift as thoughtful presents!


You will need:

Paddle Pop Sticks Plain https://teaching.co.nz/product/jm67

Choc Fudge Brown Classroom Splash Acrylic Paint https://teaching.co.nz/product/ec1114

Strong Craft Glue https://teaching.co.nz/product/cs0004

Wooden Coloured Beads https://teaching.co.nz/product/am1770

Assorted Felt Sheets https://teaching.co.nz/product/flt016

A4 White Cardboard https://teaching.co.nz/product/AUS208

Christmas Candy Colour Chenille Sticks https://teaching.co.nz/product/sh1321

Fine POSCA Marker https://teaching.co.nz/product/UM300

Assorted Felt Christmas Stickers https://teaching.co.nz/product/SH1613

Red and White Bakers Twine https://teaching.co.nz/product/sh733


Let’s make it!

To assemble the pop stick house – trim 9 pop sticks to 2/3 of their original size.

Lay 8 of the trimmed pop sticks in a row and use strong glue to adhere the 9th trimmed pop stick across the bottom (to hold your 8 pop sticks together). Allow to dry.

When your glue is dry, flip over and glue 1 whole-length pop stick to the top of the trimmed pop sticks, covering the trimmings.

Trim 2 more pop sticks to 2/3 of their size and glue these to form a triangle-shaped roof (one end each on the sides, and the other end together to form the roof’s point).

When the glue is dry, trim 4 more pop sticks to fit the roof’s triangular frame, and glue in place. Allow to dry.

When the glue is dry, flip your Gingerbread House over – it’s now ready to paint the front in your desired shade of fudge brown. Set aside to dry.

Now it’s time to make all your decorations. We’ve used coloured wooden beads to decorate the roof and doorknob, felt sheets to make the door, bakers’ twine to trim, Christmas felt stickers and candy colour chenille sticks. The sweet treats have been made using POSCA markers on white cardboard which have been cut out and glued into scraps of white felt to raise them up.

Use strong glue to attach all your decorations to the front of your Gingerbread House and set aside to dry thoroughly (the wooden doorknob might need a 2nd blob of strong glue to hold in place).

Lastly, flip your Gingerbread House over, cut a length of baker’s twine and attach to the back of the house to form a hanging loop) and set aside to dry.

Done! The perfect Gingerbread House Decoration is ready.


TIP: Older age groups might enjoy using glue guns to assemble their houses and decorations.


Iron-on beads tree baubles and Christmas wreath
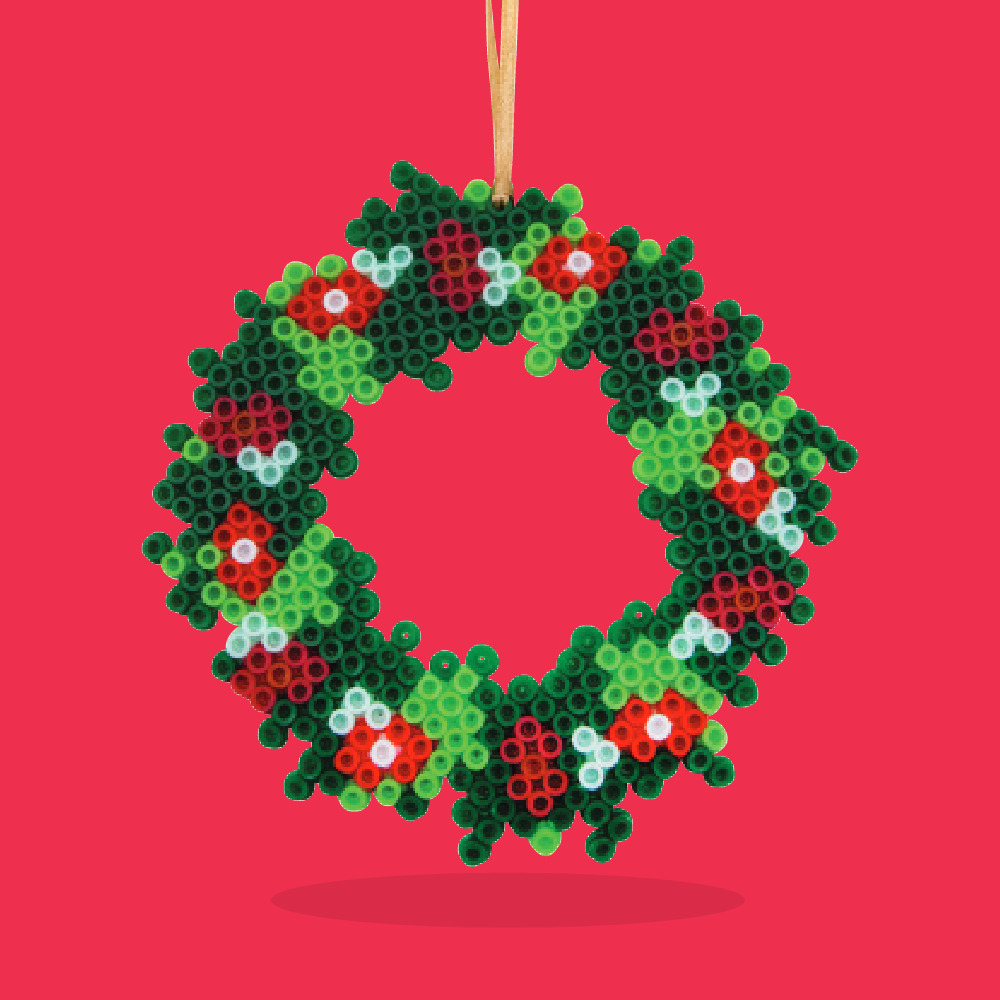
Christmas Craft Christmas Wreath

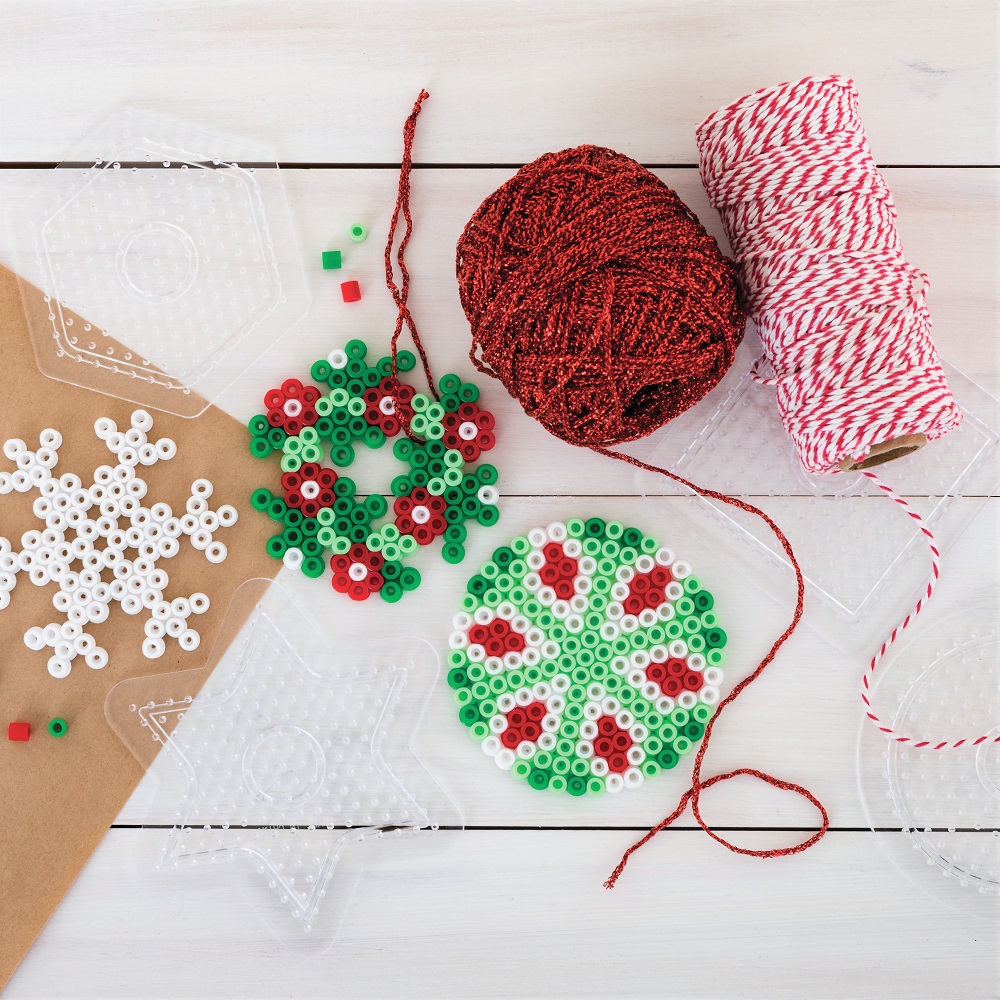
Have you tried making iron-on bead ornaments? It’s a really simple and fun creative activity, allowing for all sorts of patterns and shapes. You arrange the Christmas-coloured beads on the peg boards to make your desired pattern. You’re then ready to fuse the beads together using a hot iron (adult time!) to make a long-lasting ornament to adorn classrooms, homes or the beloved family Christmas tree.

Baubles – you will need:

Christmas Iron-on Beads Kit https://teaching.co.nz/product/pb2456k

Red and White Bakers Twine https://teaching.co.nz/product/sh733 OR

Christmas Ribbon Rolls https://teaching.co.nz/product/cs9207

Wreath – you will need:

Christmas Iron-on Beads https://teaching.co.nz/product/pb2456

Square Bead Boards for 5mm Beads https://teaching.co.nz/product/amb600

Ironing Paper for Iron-on Beads https://teaching.co.nz/product/amb800

Christmas Ribbon Rolls https://teaching.co.nz/product/cs9207


Let’s make them!

Arrange the iron-on beads into a design on the bead board.

Warm a household iron to high, making sure the steam is off.

Cover the design with a sheet of ironing paper and iron over until the beads start to melt and fuse together into a colourful and flexible shape.

Allow your design to cool before removing from the bead board.

Peel the protective layer off an acetate sheet and cut two pieces to the size of your frame.

When cool, thread a length of yarn through one of the beads, creating a loop to hand, and tie off (a skewer will help to remake a hole if the beads have completely melted.

Done! The perfect Iron-on Beads Christmas decoration is ready.


TIP: Make sure you have an adult to help or complete the ironing steps.


Snow globe
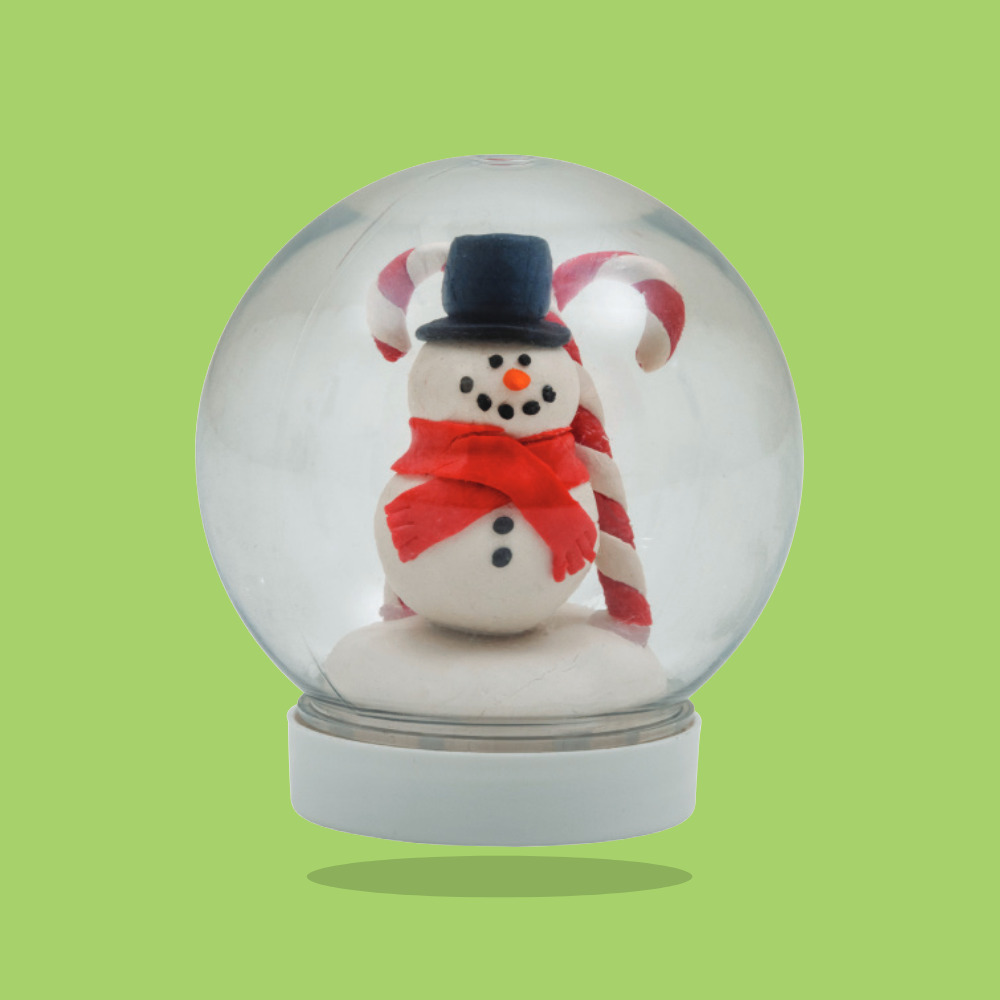
Christmas Craft Snow Globe

Do you collect snow globes? Do you have one special one? Have you made one before? A snow globe makes a perfect lasting seasonal treasure for little ones – or a perfect gift for friends or family members. You can make whatever scene you like for the inside of your snow globe, although we went with a snowman! However, you can let your creativity run wild with your perfectly preserved snow globe creation!


You will need:

Snow Globe https://teaching.co.nz/product/CS6575

Oven Bake Polymer Clay https://teaching.co.nz/product/KC1025

Glitter https://www.teaching.co.nz/product/CS1100K

High Temp Glue Gun https://teaching.co.nz/product/CS1660

High Temp Glue Sticks https://teaching.co.nz/product/CS1661

Christmas Rhinestones https://teaching.co.nz/product/SH9727

Christmas Ribbon Rolls https://teaching.co.nz/product/CS9207


Let’s make it!

Wash your hands with soap and water, and dry thoroughly before using the clay.

Soften the Polymer clay using the warmth of your hands, kneading until it is warm and workable.

Shape the clay into a Christmas scene (a snowman, candy canes, reindeer, Santa, presents, a tree etc). Make sure it’s able to fit inside the snow globe (we’ve made a snowman, 2 candy canes and a platform).

Carefully lay your designs onto a flat baking tray with baking paper.

Put your finished design into the oven and bake at around 130 degrees Celsius for 15 to 30 minutes (baking times may vary depending on the size of your chosen designs).

Let your creation completely cool before handling (any rough areas can be sanded or touched up with paint as desired).

Using a hot glue gun (or strong glue that will be waterproof when dry), adhere your Christmas creations to the inside of the snow globe lid, and set aside to dry.

Fill the snow globe with water and glitter as desired and tightly screw the lid to the globe (securing the lid to the globe with a hot glue gun will add complete security).

Decorate the base of the snow globe with sequins or ribbon as desired.

Done! The perfect Christmas Snow Globe is ready.


TIP: Make sure to have an adult help or complete the steps requiring an oven.


Pop stick nutcracker ornament
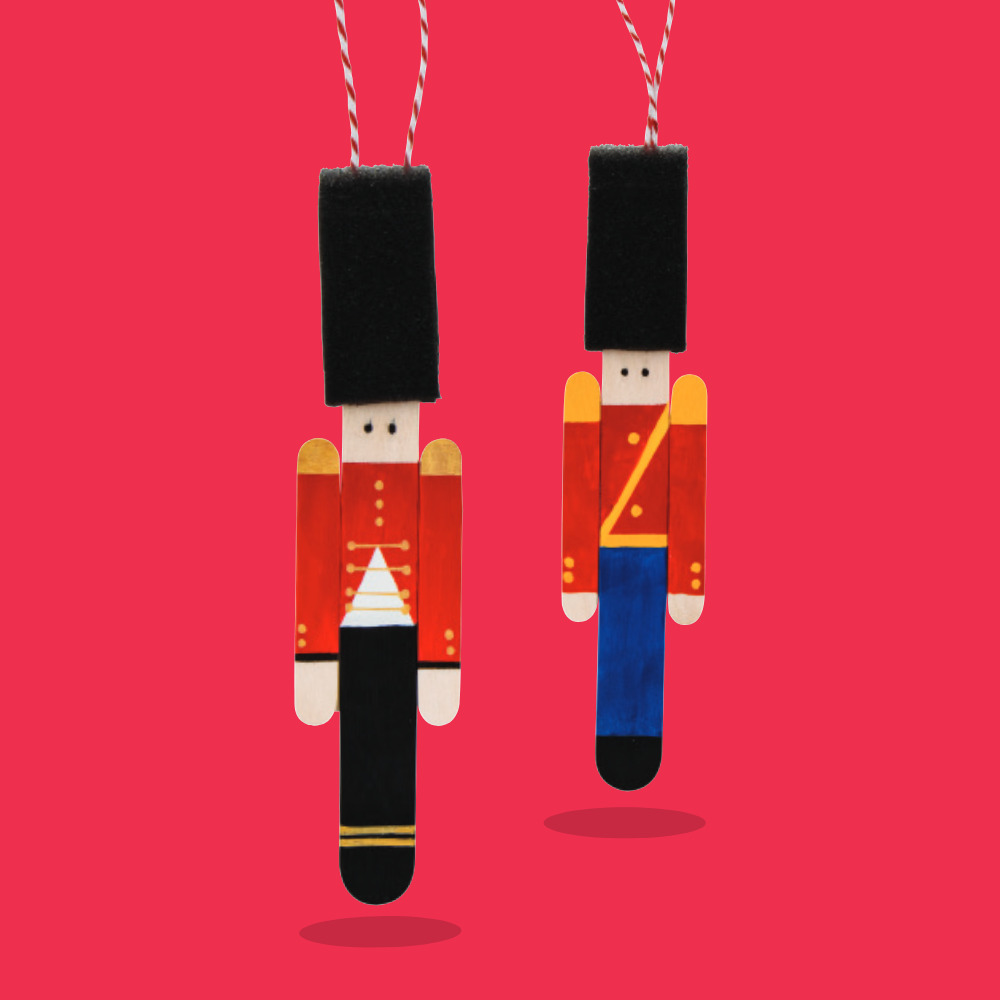
Christmas Craft Pop Stick Nutcracker

This is such a simple but adorable ornament to hang on the Christmas tree! Do you know the story of the Nutcracker? It tells the story of a little girl called Marie (Clara in some versions) and her toys. In the original story, Marie’s toys come to life on Christmas Eve and a Nutcracker figure helps lead the fight against an army of mice! One of the main themes is about the power of imagination. Marie leads people through a magical dream, who see the wonder of Christmas through her eyes.


You will need:

Foam Paint Brush Set https://teaching.co.nz/product/nar102

Jumbo Pop Sticks https://teaching.co.nz/product/jm100

Mini Paddle Pop Sticks https://teaching.co.nz/product/sh956

Student Acrylic https://www.teaching.co.nz/product/FN5100

Fine POSCA Markers https://teaching.co.nz/product/UM300

Gold Bullet POSCA Marker https://teaching.co.nz/product/UM509

Strong Craft Glue https://teaching.co.nz/product/cs0004

Red and White Bakers Twine https://teaching.co.nz/product/sh733


Let’s make it!

Use a lead pencil to lightly mark out the Nutcracker’s details on 1 x jumbo pop stick (the face, jacket, pants and shoes) and 2 x mini pop sticks (the arms and hands).

Use acyclic paint to block out the colours (washi tape can help create crisp lines) and set aside to dry.  Washi Tape: https://teaching.co.nz/product/th1625

Use fine POSCA paint pens to decorate the details – yellow for the uniform’s buttons, black to make the eyes etc. and set aside to dry.

Lay the pop sticks face down, arrange them into place and use strong tape or glue to hold them in place, and set aside to dry.

Remove the handle from the foam paint brush, add a small squeeze of strong glue inside, and slide it onto the Nutcracker’s head.

Attach a loop of baker’s twine to the back of the ornament with strong glue (we’ve poked the ends into the back of the sponge hat) and set aside to dry.

Done! The perfect Pop Stick Nutcracker Ornament is ready.


TIP: A small pop stick cut in half and running along the back of the Nutcracker will help the body and arm pop stick pieces stay in place.


Paper Jingle Ornaments
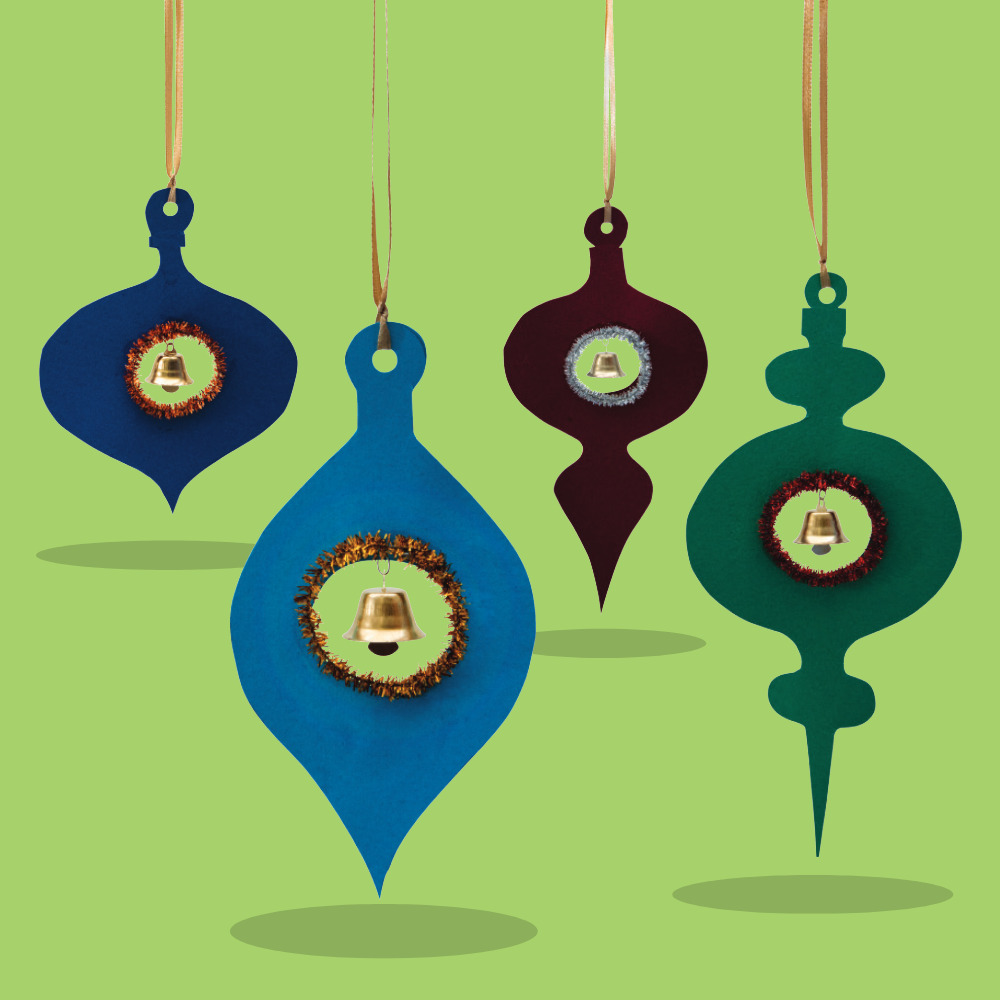
Christmas Craft Paper Jingle Ornament

These paper crafting favourites will look beautiful hanging around the classroom or on the Christmas tree at home. They can be made in so many different shapes and colours too! Christmas is all about jingle bells and these are a perfect way to bring your own personalised jingle bells to life!


You will need:

A4 Coastal Cardboard https://teaching.co.nz/product/aus502#

Tinsel Pipe Cleaners https://teaching.co.nz/product/cl2205

Christmas Ribbon Rolls https://teaching.co.nz/product/cs9207

Gold Christmas Bells https://teaching.co.nz/product/CS9208

Paper Punch One Hole https://teaching.co.nz/product/acc003

Silver Craft Wire https://teaching.co.nz/product/THE218

Supertac Glue https://teaching.co.nz/product/th005


Let’s make it!

Draw your Christmas decoration shapes onto cardboard and cut out (make sure to leave room for the tinsel and bell in the middle, and a hanging hole at the very top).

Use a compass or small round object to draw a circle in the middle of the decoration (roughly 3.5cm diameter).

Cut out the centre hole (fold the cardboard slightly, make a snip and then use the snip to insert your scissors to cut around the circle line). Discard the trimmings.

Cut a short length of beading wire roughly 4cm long, thread a Christmas bell onto the wire, fold the wire in half and push one end through the cardboard decoration, roughly 1cm above the cut-out circle. Twist the two ends around each other to hold the bell securely (trim if needed).

Cut a sparkly pipe cleaner to approx. 15cm in length and bend around to form a circle to fit around the cardboard decoration centre cut out. Twist the ends around the circle neatly. Use strong glue to attach the sparkly pipe cleaner to the cardboard decoration and set aside to dry thoroughly.

When dry, use a hole punch to make a hole at the top of the decoration and tie a length of Christmas ribbon, forming a loop to hang.

Done! The perfect Paper Jingle Ornament is ready.


TIP: It doesn’t need to stop there! Add as much decoration and sparkle as you like with drawings, embellishments and glitter.


So, there you have 8 beautiful Christmas craft activities to give you decorative goodies that young and old alike will love. Hang them, place them, gift them, share them, enjoy them!

If you’d like to download the step-by-step activity pack pdf, click here.

Happy crafting and seasonal wishes and please share your crafty seasonal awesomeness with us @modernteaching

 

Blog Home>

Shop MTA>


Posted on

12 Crafting Ideas For The Festive Season

Christmas Blog leaderboard

The most magical time of the year is fast approaching, which makes now a perfect time to organise your upcoming holiday season arts & crafts.

In this blog, we’ll showcase wonderfully inspiring crafting ideas to get you started. Whether you’re looking for classroom decoration activities or Christmastime keepsakes with memories to treasure for countless years to come, you’ll find all the projects you need for children of all ages including step-by-step guides to take the hassle out of planning.

So, sit back & relax and choose your favourite bright & merry handicrafts to release children’s festive creativity.


Santa’s Cookies Porcelain Plate


Santa's Plate


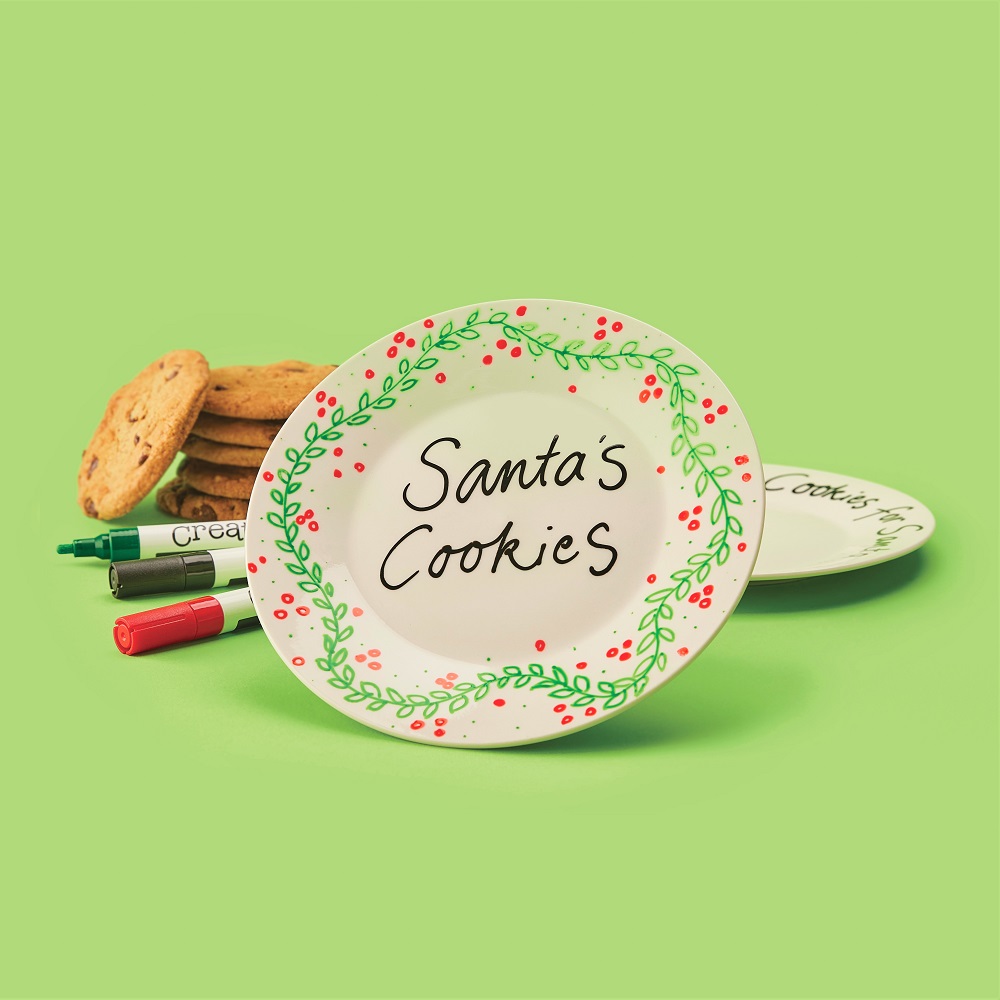
Father Christmas must get hungry with all that work he does! Santa’s very own cookie plate will surely go down a treat! White porcelain plates make a wonderful blank canvas for children to decorate with drawings and words, using glass & porcelain markers or paint. Whether it’s “Cookies for Santa”, “Carrots for Rudolf” or a personalised plate for the Christmas lunch table, children are sure to enjoy making their own tableware to be treasured for years to come.

To set the markers and paint for wear & tear and dishwasher use, the plate will need to be baked in an oven. Simply set oven to 150 degrees C, and once the oven temperature has been reached, bake the plate for 30 minutes. Turn the oven off and allow to cool before removing. Santa’s plate is now ready for his favourite snacks.

*TOP TIP – Paint provides great overall coverage of colour, while porcelain markers provide precise detail.

Featured Products;

Porcelain Plates

Glass & Porcelain Markers

Glass & Ceramic Paint


Ceramic Hanging Ornaments


ermaic Hanging Ornaments


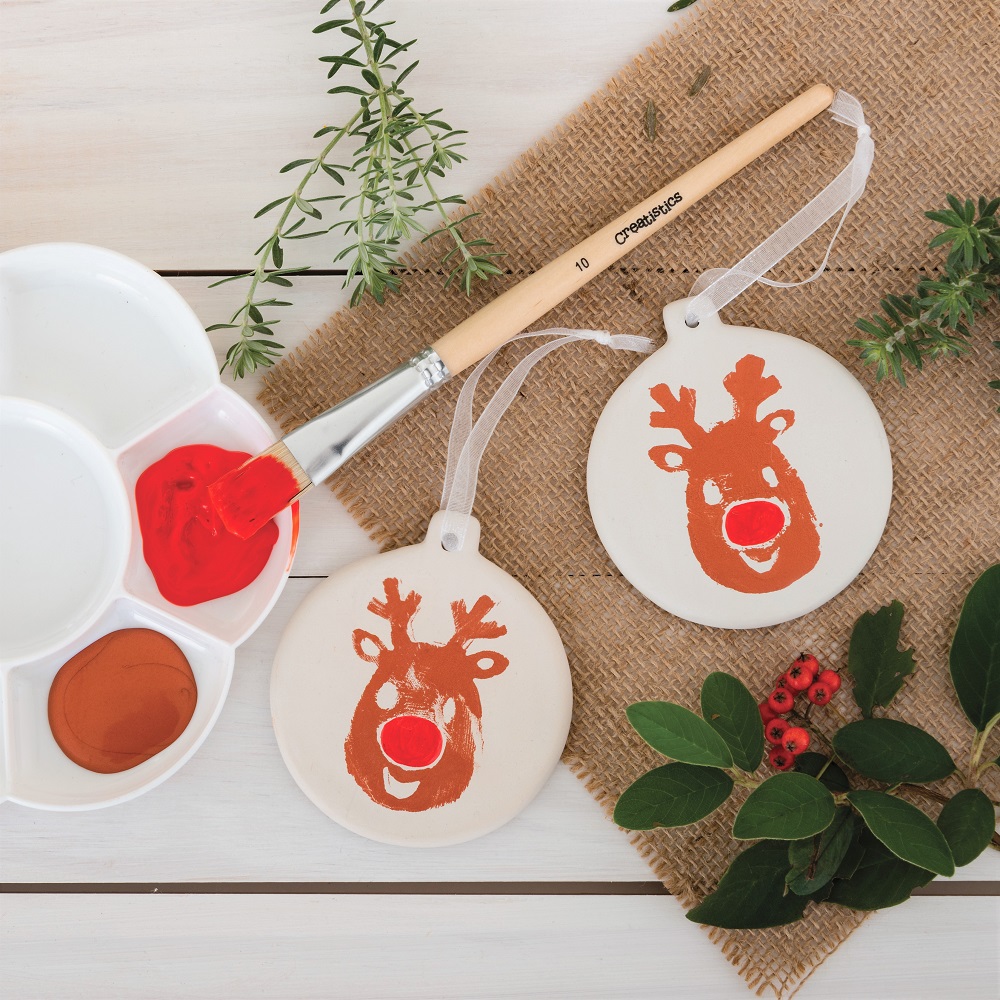
Fun & festive ceramic hanging baubles, also in Santa shapes, Christmas trees and candy canes and stockings make beautiful gifts and keepsakes.

Decorate your ceramic surfaces with porcelain markers, ceramic paint or poster paint and finish off with glitter glue or Christmas-themed glitter for extra sparkle and pizzazz.

Perfect for hanging around the classroom, on the Christmas tree at home or to gift as thoughtful presents that will no doubt take pride of place!

Featured Products;

Ceramic Hanging Bauble

Glass & Porcelain Markers

Glass & Ceramic Paint

Metallic Silver Porcelain & Glass Painter

Metallic Gold Porcelain & Glass Painter


Air Dry Clay Ornaments


Air Dry Clay Ornaments


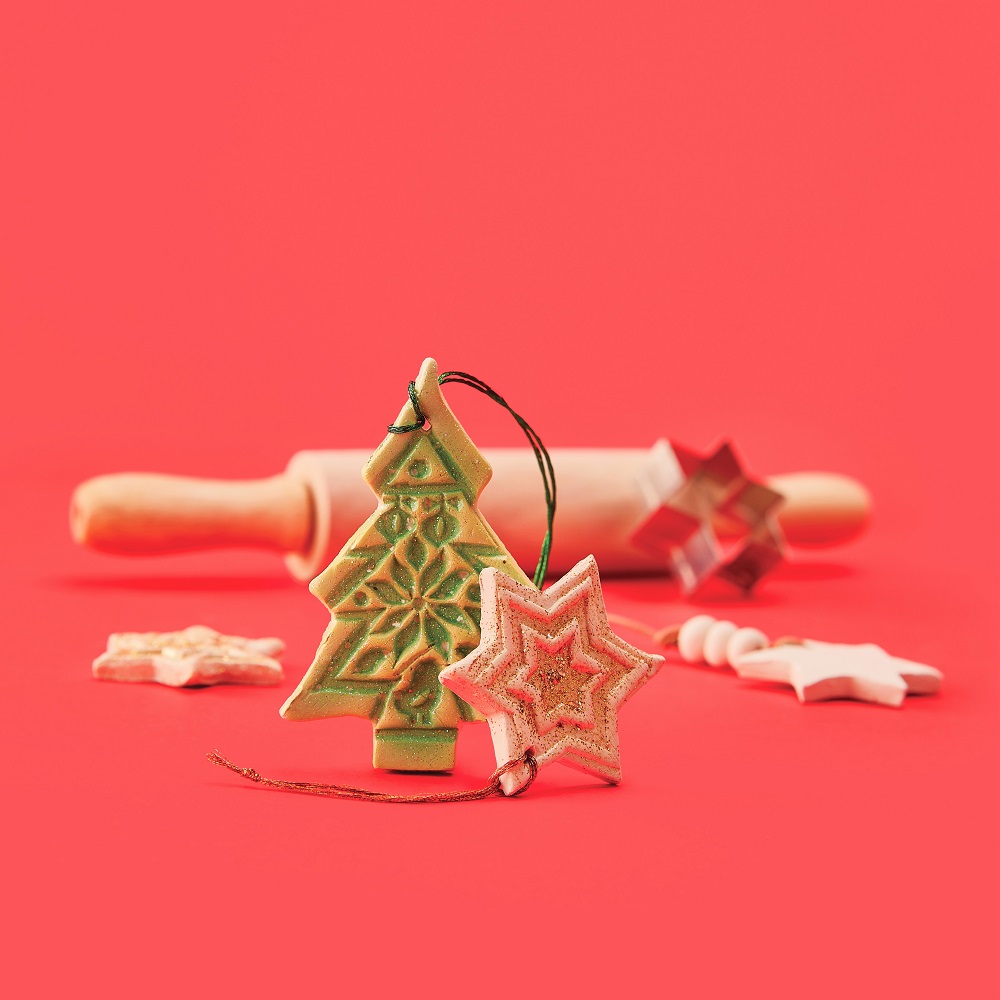
Air dry clay, cookie cutters, wooden stampers and glitter glue – yes please! So many crafting favourites feature in this action-packed handicraft experience. The end results make very special ornaments that will surely adorn the family Christmas tree for countless years into the future. Metallic yarn in red, green, gold, silver or blue makes the perfect hanging cord to match the sparkly austere texture of the glittery clay to hang proudly.


STEP BY STEP

  1. Using the wooden rolling pin, roll out a handful of air-dry clay until it is smooth and flat (roughly 1cm thick to ensure your decorations are sturdy).
  2. Press a cookie cutter shape into the dough and press firmly until it cuts through the clay.
  3. Gently remove the excess clay (this clay can be used again or used to make extra embellishments including clay beads).
  4. Next, press one of the block print stamps into the clay and lift, creating an indented pattern.
  5. Using a skewer or the pointed end of a pencil, gently poke a hole in the top of your shape (ensuring your hole is large enough to thread your chosen cord or twine).
  6. Lift your decoration and gently smooth down the edges with your fingers.
  7. Set aside for 24 to 48 hours to dry.
  8. When the clay ornament is completely dry (firm to the touch) add a thick layer of glitter glue to the surface, letting the glue flow and sit in the indented pattern.
  9. Set aside to dry for 24 hours.
  10. When your ornament is completely dry, thread your desired length of cord or twine through the decoration, and tie in place with a knot.
  11. Lastly, tie off the very ends of the cord/twine with a firm knot to ensure your decoration is ready to hang safely.


*TOP TIP – Adding several layers of glitter glue (and setting aside to dry between layers) will add extra shine and lustre to your decorations.


Featured Products;

White Creatistics Air Dry Ceramic Clay

Christmas Cutters Set

Christmas Block Print Stamps

Christmas Glitter Glue


Paper Straw Decorations


Paper Straw Decorations


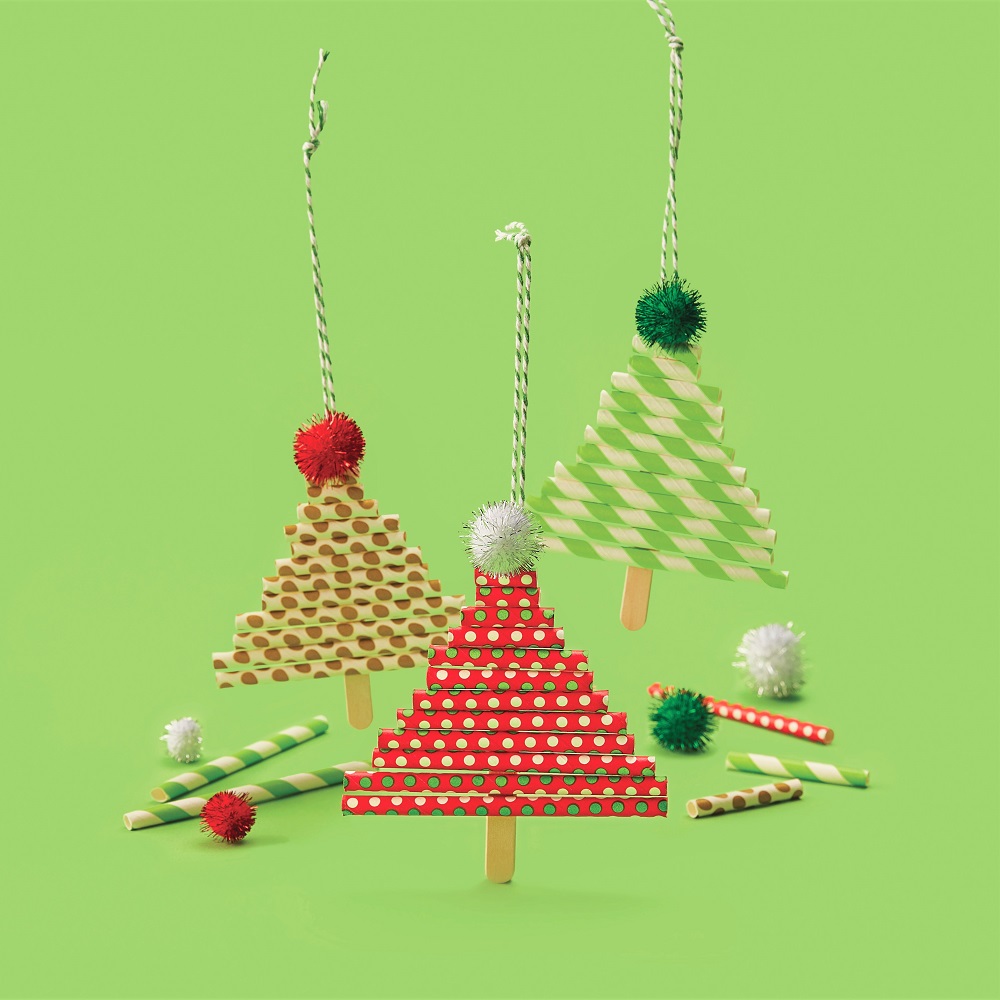
Over recent years the nation has been ditching plastic straws to better care for our environment – replacing those harmful plastics with eco-friendly paper alternatives, which is fantastic news both for the environment and for us teachers so we don’t need to ditch our favourite straw crafts!

These sweet Christmas trees are super simple to make, gluing ascending lengths of paper straws onto wooden paddle pop sticks and adding a length of twine to hang. Glitter pom poms or sparkly stars will make the perfect finishing touch to your project.

*TOP TIP – It’s not just Christmas trees that can be made – why not try candy canes, stars and bell shapes, or swap the pop sticks for pipe cleaners for round threaded wreath ornaments.


Featured Products;

Assorted Paper Straws

Green and White Bakers Twine

Red and White Bakers Twine

Glitter Pom Poms

Adhesive Christmas Stars

Paddle Pop Sticks

Creatistics Strong Craft Glue


Gingerbread House


Gingerbread House


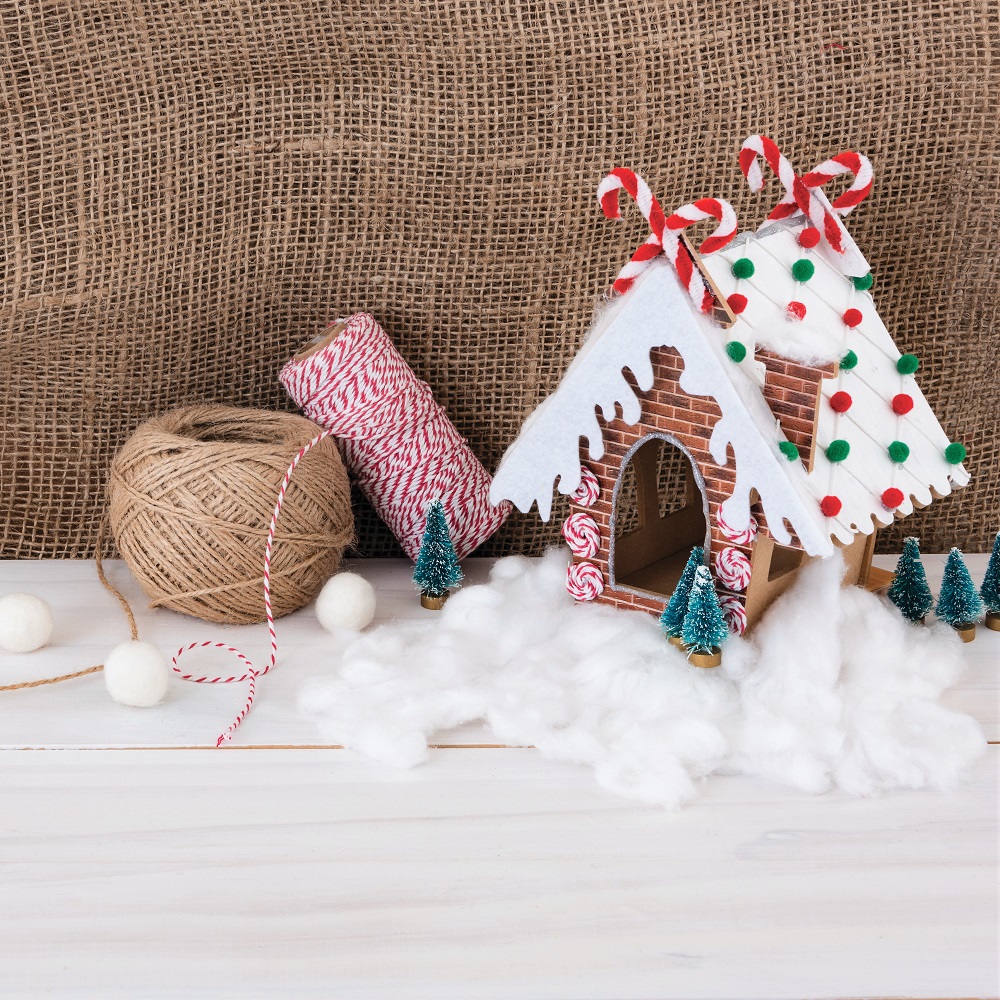
No holiday season is complete without a Gingerbread House! Whimsical and looking oh-so-delicious, these quaint wooden houses make beautiful seasonal displays or props to inspire imaginative play. Made from plain MDF, they’re calling out to be decorated with paint, patterned paper and Christmas embellishments & finished off with Christmas Bio Glitter & Stars.


*TOP TIP – Decorating Gingerbread houses over multiple days will allow glue to dry in between the paper and embellishment layers for a more workable crafting surface.

Featured Products;

Gingerbread House

Christmas Candy Colour Chenille Sticks

Building Pattern Paper

Mini Christmas Trees

Green Pom Poms 

Red Pom Poms

Christmas Assorted Buttons

Cotton Wool Balls


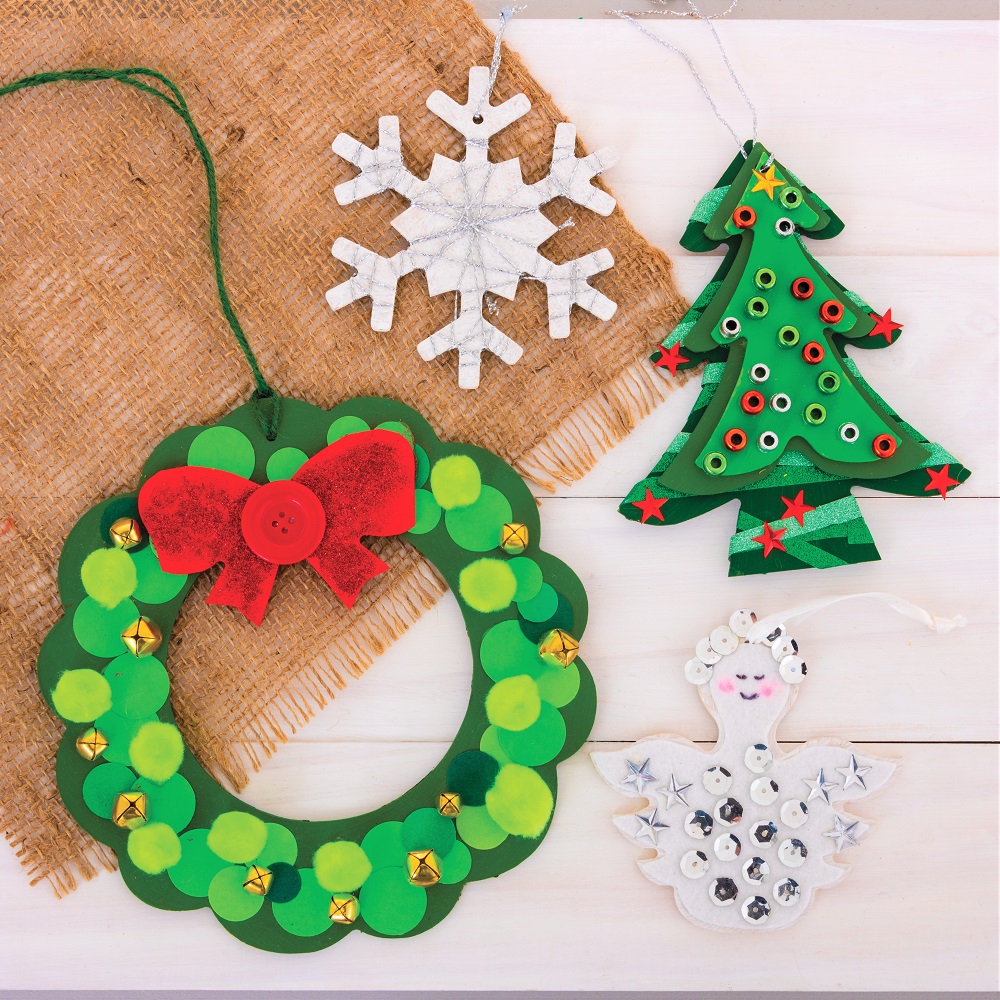
Native flora-inspired Christmas Wreath


Native Flora Inspired Wreath


Traditionally, the Christmas wreath’s evergreen foliage represents growth, and the circular shape having no beginning and no end signifies eternal life. For such a long time they have been hung on the door to welcome the Christmas spirit in to bring good luck to all.  These stunning wreaths may just bring you some good luck during the holiday too!

Made from a wooden base to provide a stable surface in which to glue or weave any number of arts & crafts resources, these beautiful wreaths make the perfect adornment for any front door.

The steps below are terrifically age-appropriate for older students. Younger students or preschool-aged children will likely enjoy painting their wreaths with wood-appropriate paint and using PVA washable glue to stick down Christmas collage items.


STEP BY STEP

  1. Apply strong glue over one surface of the wooden wreath and press a sheet of hessian onto the glue, set aside to dry.
  2. When the glue has dried, cut away excess Hessian.
  3. To make the leaves, fold a green piece of paper in half, and then half again (snipping with multiple layers of paper makes for light work). Two pieces of green A4 paper have made all the foliage for one wreath.
  4. Using a pencil, draw leaves or sprigs of leaves onto the paper and carefully cut around. Using a few shades of green will add depth and drama to your wreath.
  5. Arrange your leaves around the wreath and glue into place.
  6. To make the flowers, cut strips of red paper lengthways (1 piece of A4 paper will make 8 flowers).
  7. Using scissors, make fringing by carefully snipping down the length of the paper leaving ½ cm on one edge (snip gently to avoid cutting through the strip).
  8. Next, roll the fringe into a tight coil, adding a little bit of glue to hold in place. Pinch together to hold for a few moments (you can also use a peg to hold them in place until they dry completely). When thoroughly dry you can make the flowers look realistic by gently scrunching the petals to fan them out.
  9. Use strong glue to adhere the flowers onto the wreath.
  10. Glue any additional embellishments onto the wreath as desired.
  11. Attach a length of jute string to the top of the wreath and it’s ready to hang!


*TOP TIP – A layer of Hessian over the wooden wreath continues the natural feel and creates the perfect surface to weave or thread wire ornaments through.

Featured Products;

Wreath with Bow

Christmas Bows

Wreath Decorations

Nature Cover Paper

A4 Christmas Cover Paper

Jute Hemp Twine

Hessian Sheets Natural

Tacky Glue


Shrink Film Ornaments


Shrink Film Ornaments


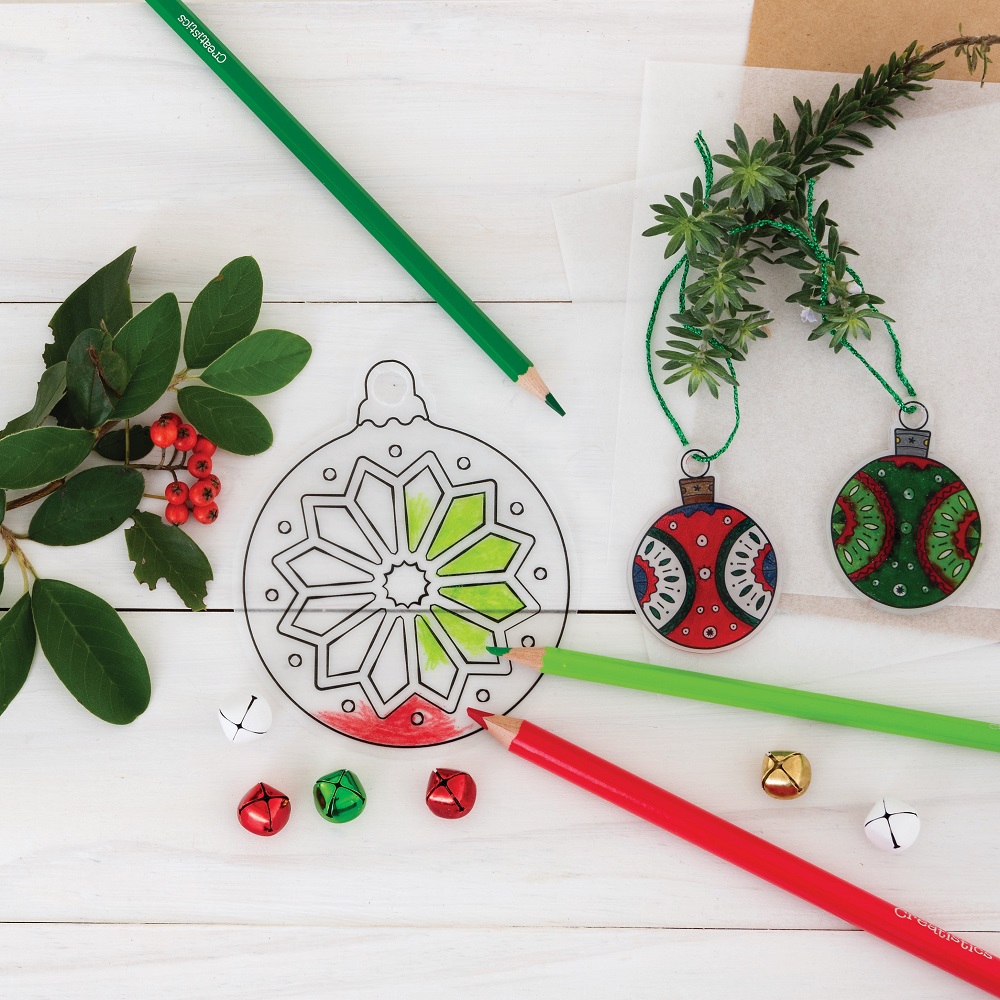
Shrink Film makes for incredibly fun art experiments! A teacher’s dream, the Christmas Shrink Film Ornament Pack includes all you need to make a whopping 96 bauble ornaments, with coloured pencils and hanging thread included. Simply use coloured pencils to design your bauble shapes and then bake in the oven to reduce the size by roughly 60%, turning your decoration into thick hard plastic.

The pre-cut Christmas ornaments are wonderfully convenient, however, if you’re after free form to design then the clear shrink film or printable shrink film options are terrifically open-ended.


Baking Instructions:

  1. Colour in your design on the matt side of the shrink film using coloured pencils or permanent markers.
  2. Preheat oven to 150°C.
  3. Place design on a lined tray (matt side up) and bake in preheated oven.
  4. Plastic will begin to shrink after 10 seconds. Remove from oven when plastic has returned to its flat shape.
  5. If your pieces don’t lie completely flat, lightly press with a spatula, cardboard or oven mitt.
  6. Wait for the shrink film to dry completely before handling.


*TOP TIP – With shrink film, coloured pencils go a long way. A very light shading only will result in bold and vibrant colours.

Featured Products;

Christmas Shrink Film Ornament Pack

Shrink Film Activity Pack

Mini Jingle Bells


Woven Christmas Tree Cards


Woven Christmas Tree Cards


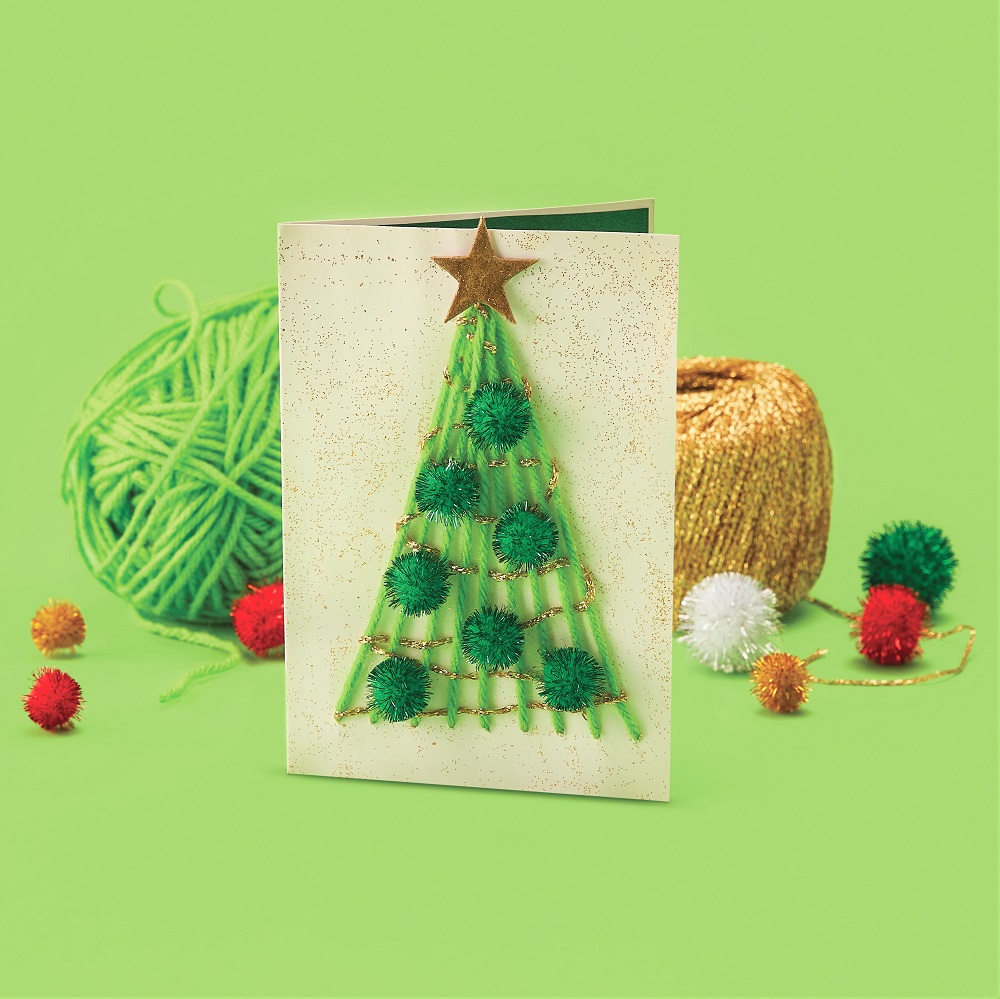
These festive Christmas tree cards incorporate paper crafts & threading together to make oh-so-special greeting cards for spreading the holiday cheer. The metallic and glitter elements add a magical touch to bring children’s creations to life.

To adapt this activity for younger early childhood age groups, simply omit the threading elements, with children enjoying pre-cut lengths of yarn to glue down into a tree design, using washable PVA glue, age-appropriate embellishments and liquid crayon markers to decorate the inside.


STEP BY STEP

  1. Mark the threading holes with a pencil, and then poke a tapestry needle or skewer through the pencil marking all the way through the cardboard.
  2. Cut a length of yarn, thread your needle, and then weave the yarn up and down, threading in and out of the holes until you’ve created a Christmas tree design.
  3. On the front of the tree use a length of metallic gold yarn to weave in and out of the tree, creating a Christmas Tree tinsel design, and tie off on the front reverse.
  4. On the front reverse of the card, secure your yarn with strong tape and create a flat surface).
  5. Glue half a piece of coloured cover paper onto the inside of the card to cover the back of the tree and press down to flatten (glue sticks are ideal for this task, so the paper won’t crinkle).
  6. The front of your card is now ready for embellishments – pom poms, a Christmas star and glitter glue.
  7. Set aside to dry completely for 24 hours.
  8. Your card is now ready for drawings or writing on the inside – paint pens are ideal for vibrant creations over coloured paper.


*TOP TIP – Writing or drawing on the coloured cover paper before sticking it inside the card will make a more workable surface for younger students.

Featured Products;

White Cards and Envelopes

Green Acrylic Yarn 

Gold Metallic Yarn

Glitter Pom Poms

Adhesive Christmas Stars

Tapestry Chenille Needles

Christmas Glitter Glue

A4  Christmas Cover Paper

Creatistics Superstik Glue Stick

Tacky Glue


Wooden Crafts


Wooden Crafts


Pre-cut Wood Crafts are the perfect combination of woodworking, imagination and art – essentially blank canvases in which children can tinker with paint, glue and collage materials to design & personalise works that are truly their own.

You’ll find an incredibly large offering of wood crafts at MTA, so much to choose from that’ll make teachers giddy with excitement, including convenient ornament or tree packs that include all the glue, paint and embellishments you need to complete the activity.


*TOP TIPMessy mats or table coverings make brilliant surfaces to protect tables from wet and messy play art activities.


Featured Products;

Wreath with Bow

Hanging Christmas Tree

Wooden Snowflake Decorations

Wooden Christmas Ornaments

Christmas Collage Pack

Metallic Christmas Collage Pack

Handmade Christmas Paper

Fabric Paint Set


Woven Wire Ornaments


Woven Wire Ornaments


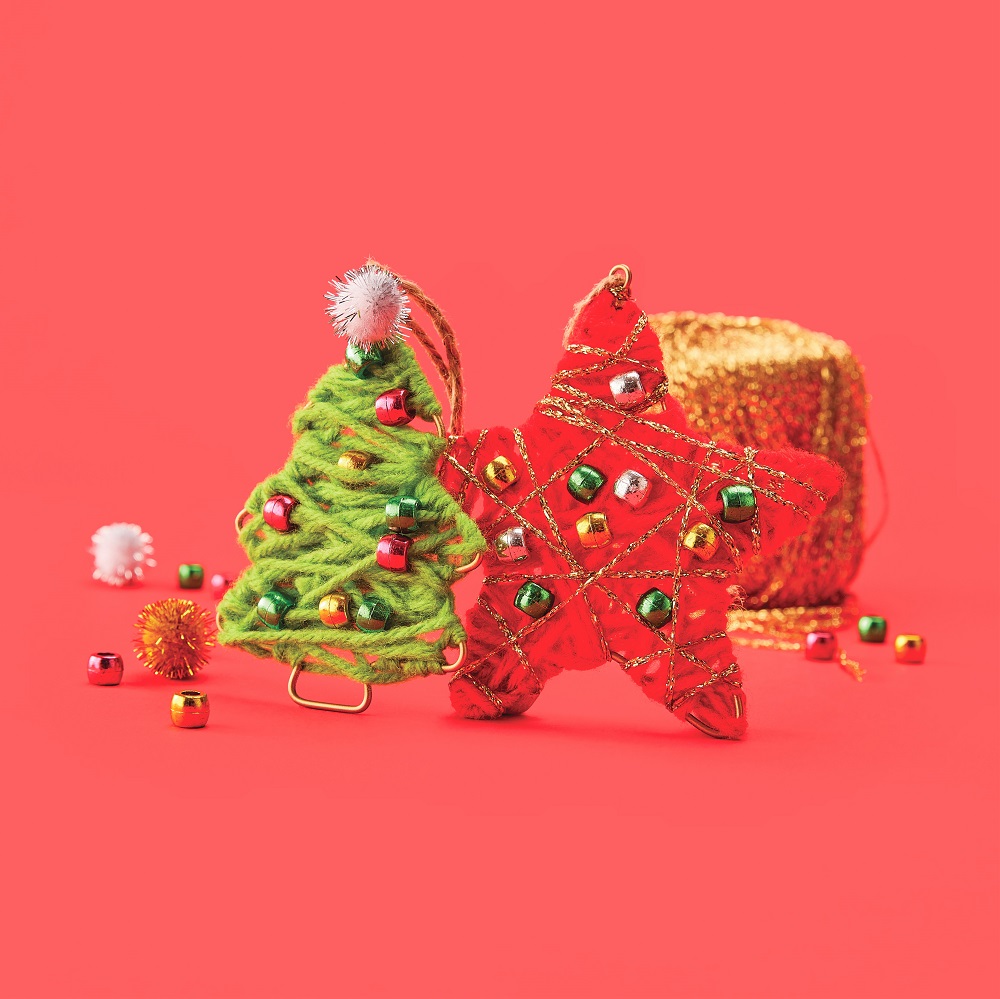
Beautifully simple wire ornaments make a welcoming invitation for children’s personalisation. Use wire, yarn or string to weave around, filling the open space with Christmas colours and finishing off with metallic yarn & beads – and a sparkly pom pom star for the tree.  Your woven ornaments are ready to hang on the tree year after year or share as gifts for loved ones.

Yarn can be wrapped around the wire ornaments in free form using your hands only (ideal for early childhood) or incorporate sewing elements into the activity using tapestry chenille needles for older students or plastic lacing needles for younger students. Tying off your yarn after every few wraps will ensure the younger years don’t unravel their creations when they need to take a break.

Tying off your yarn after every few wraps will ensure the younger years don’t unravel their creations when they need to take a break.


STEP BY STEP

  1. Cut a long piece of your desired coloured yarn and tie it around the metal shape (tying the yarn onto the wire shape will ensure you have a firm grip to get you started).
  2. Gently weave the yarn around the shape, wrapping over and under, in and out and all around, pulling firmly to ensure the yarn stays in place.
  3. When your decoration is starting to look colourful and almost finished, it’s time to start adding beads.
  4. Thread or slip a bead over the yarn, adjusting it into place as you continue to wrap the yarn.
  5. Add as many beads for your desired look, and finish tie the yarn firmly to the decoration to keep it all in place.
  6. Lastly, add a length of twine to the top of the decoration, making sure to tie it at the end to create a loop for hanging.


*TOP TIP – The thick acrylic woollen yarn is easier to handle and wrap to create form and colour, with the more delicate metallic yarn bringing a sparkly touch to finish off.

Featured Products;

Wire Ornaments

Metallic Gold Yarn

Green Acrylic Yarn

Red Acrylic Yarn

Christmas Pony Bead

Glitter Pom Poms


Festive Terracotta Garden Pots


Festive Terracotta Garden Pots


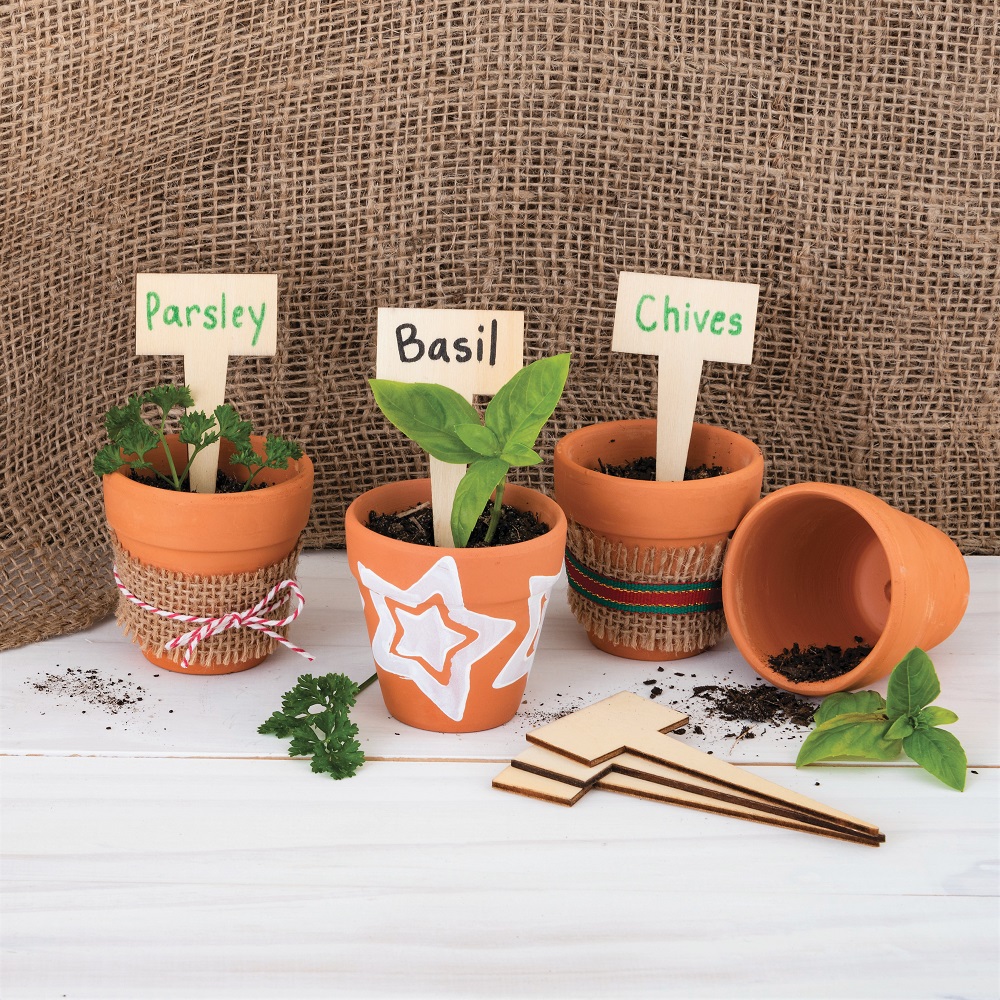
Personalised pots with seedlings are the perfect growing gift to keep the festive season thriving long after the Christmas Tree has been packed away. Endless decorating options await with the terracotta surface lending itself to porcelain or paint markers, paints and embellishments. Sparkle paint metallic markers and glitter glue add a magical touch for Christmas-inspired decorating.


TOP TIP – Use a spray varnish to ensure your pot is ready for outdoor use with a permanent barrier to dirt, tarnish, wear & tear and moisture.


Featured Products;

Terracotta pots

Fine POSCA Markers

Bullet  POSCA Markers

Christmas Ribbon Rolls

Natural Hessian Sheets


Iron-On Bead Ornaments


Iron on Bead Ornaments


Have you tried making Iron on Bead ornaments? Simply arrange the Christmas-coloured beads on the peg boards to make your desired pattern. You’re then ready to fuse the beads together using a hot iron to make a long-lasting ornament to adorn classrooms, homes or the beloved family Christmas tree.

But it’s not just ornaments that can be made! Iron-on Beads are incredibly versatile – either fused together or used as traditional beads for loose parts threading. Ideal for jewellery including bracelets, necklaces and earrings. Glue them onto wood and paper crafts for textural collage embellishments. Make festive hot drink coasters, gift tag decorations, hanging key chains or bag decorations and even plates for treasured trinkets! My only advice for this activity would be to buy several tubs – because they’re wonderfully addictive!


STEP BY STEP

  1. Arrange the beads into a design on the boards.
  2. Warm a household iron to high making sure the steam is off.
  3. Cover the design with a sheet of ironing paper.
  4. Iron over until the beads start to melt and fuse together into a colourful and flexible shape.
  5. Allow your design to cool before removing from the bead board.
  6. Cut a length of twine and tie onto the top of your ornament ready to hang.


TOP TIP – Iron-on Beads are small loose parts, perfect for school-aged students. Preschool age groups (aged 3+ years) may find the Jumbo-sized Iron on Beads and boards a more comfortable working size.


Featured Products;

Christmas Iron on Beads Kit

Creatistics Iron-on Beads Pack

Red and White Bakers Twine 

 Red Metallic Yarn


*All these Christmas crafting activities can be modified or adapted to suit different age groups, taking away small parts for children under 3 years of age and replacing them with larger safe parts. Where scissors, glue guns or irons are used, educators may use adequate supervision to suit the needs of the children (pre-cut shapes for young children, PVA glue in place of glue guns etc.) or educators may safely carry out risky steps themselves (such as the iron for iron on beads).


What are your favourite seasonal crafts for the holiday season?


Download: Christmas activities PDF Bundle

Blog Home>

Shop MTA>


Posted on

Ten Frightfully Good Activities For The Spooky Season

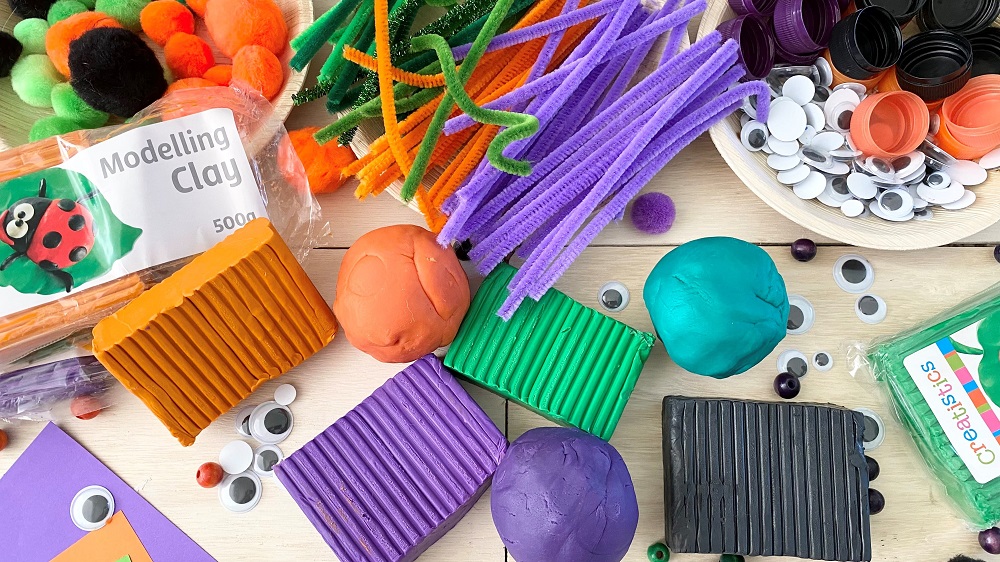
Various Halloween themed craft supplies

Halloween is such a fun time of year for spooky crafts and activities, with plenty of opportunities to bring out children’s creativity and imagination. From dressing up in costumes and decorating the classroom or home to scavenger hunts, and arts and crafts, there’s something for everyone to have a wickedly good time! Read on for some quick, easy and festive Halloween projects that will have you howling!


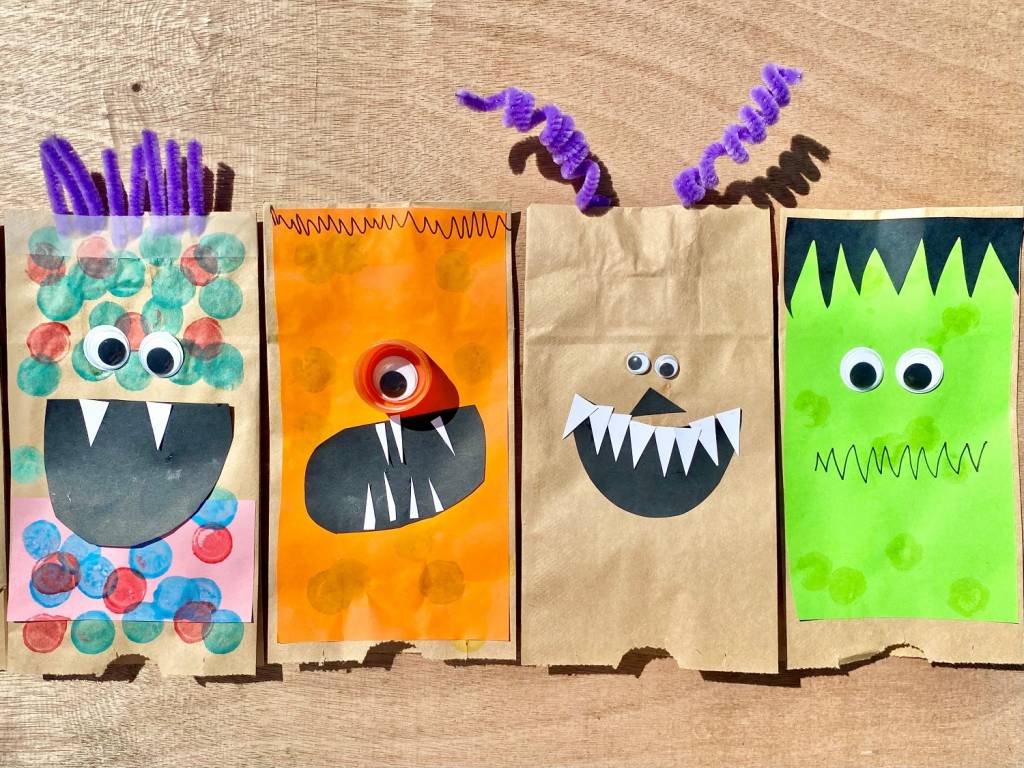
Paper Bag Monsters

Spooky bag monster craft project
Paper bag monsters are a versatile craft experience for children to let their imaginations run wild! These plain bags can be decorated in whatever wacky characters come to mind, with children freely exploring the open-ended materials offered and choosing to use them in their own wonderful ways. Add language and storytelling to the experience by creating storylines with their characters or find a cosy spot for children to engage in spooky monster puppet play when their paper bag creations are dry.


Featured products:
Paper Bags 
Dot Markers 
Jumbo Creations Box 
Paper Shapes 


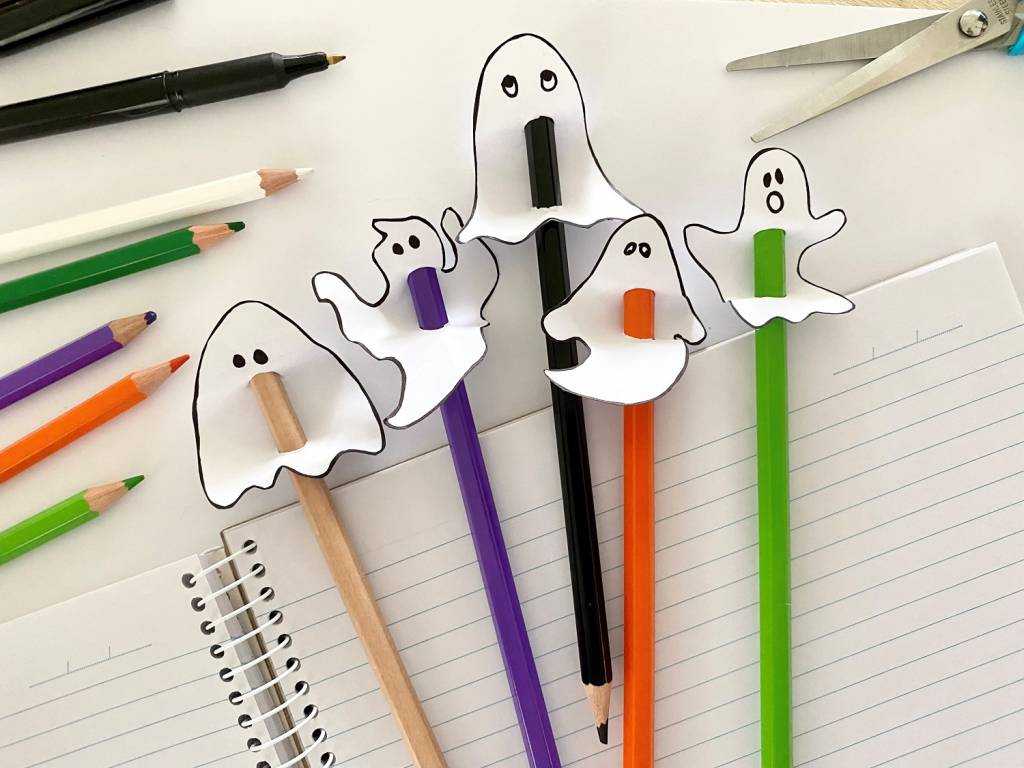
Ghost Pencil Toppers
frightful ghosts pencil toppers craft project
Add some spooky excitement to drawing and writing with these quick and easy paper pencil toppers. Simply draw a ghost character onto thick paper or cardboard and cut the shape out, punch two holes in the ghost and gently thread the pencil or pen through the holes  and abracadabra, your adorably spooky pencil toppers are ready for action.


Featured products:
White Cover Paper 
Coloured Pencils 


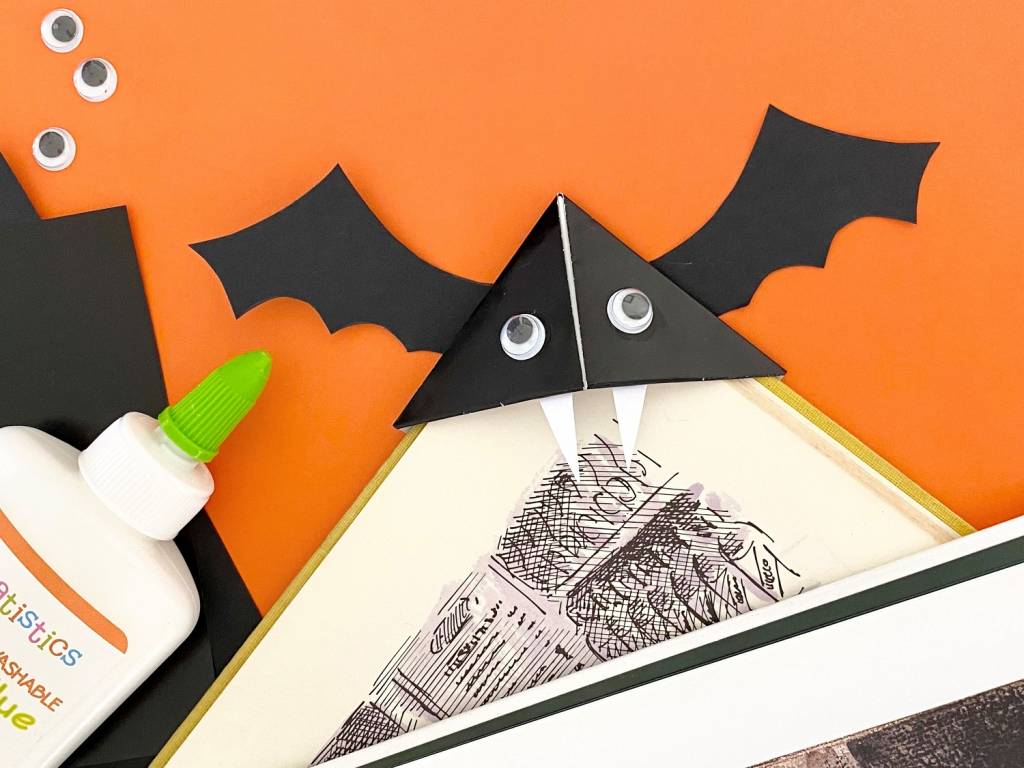
Spooky Book Placeholder
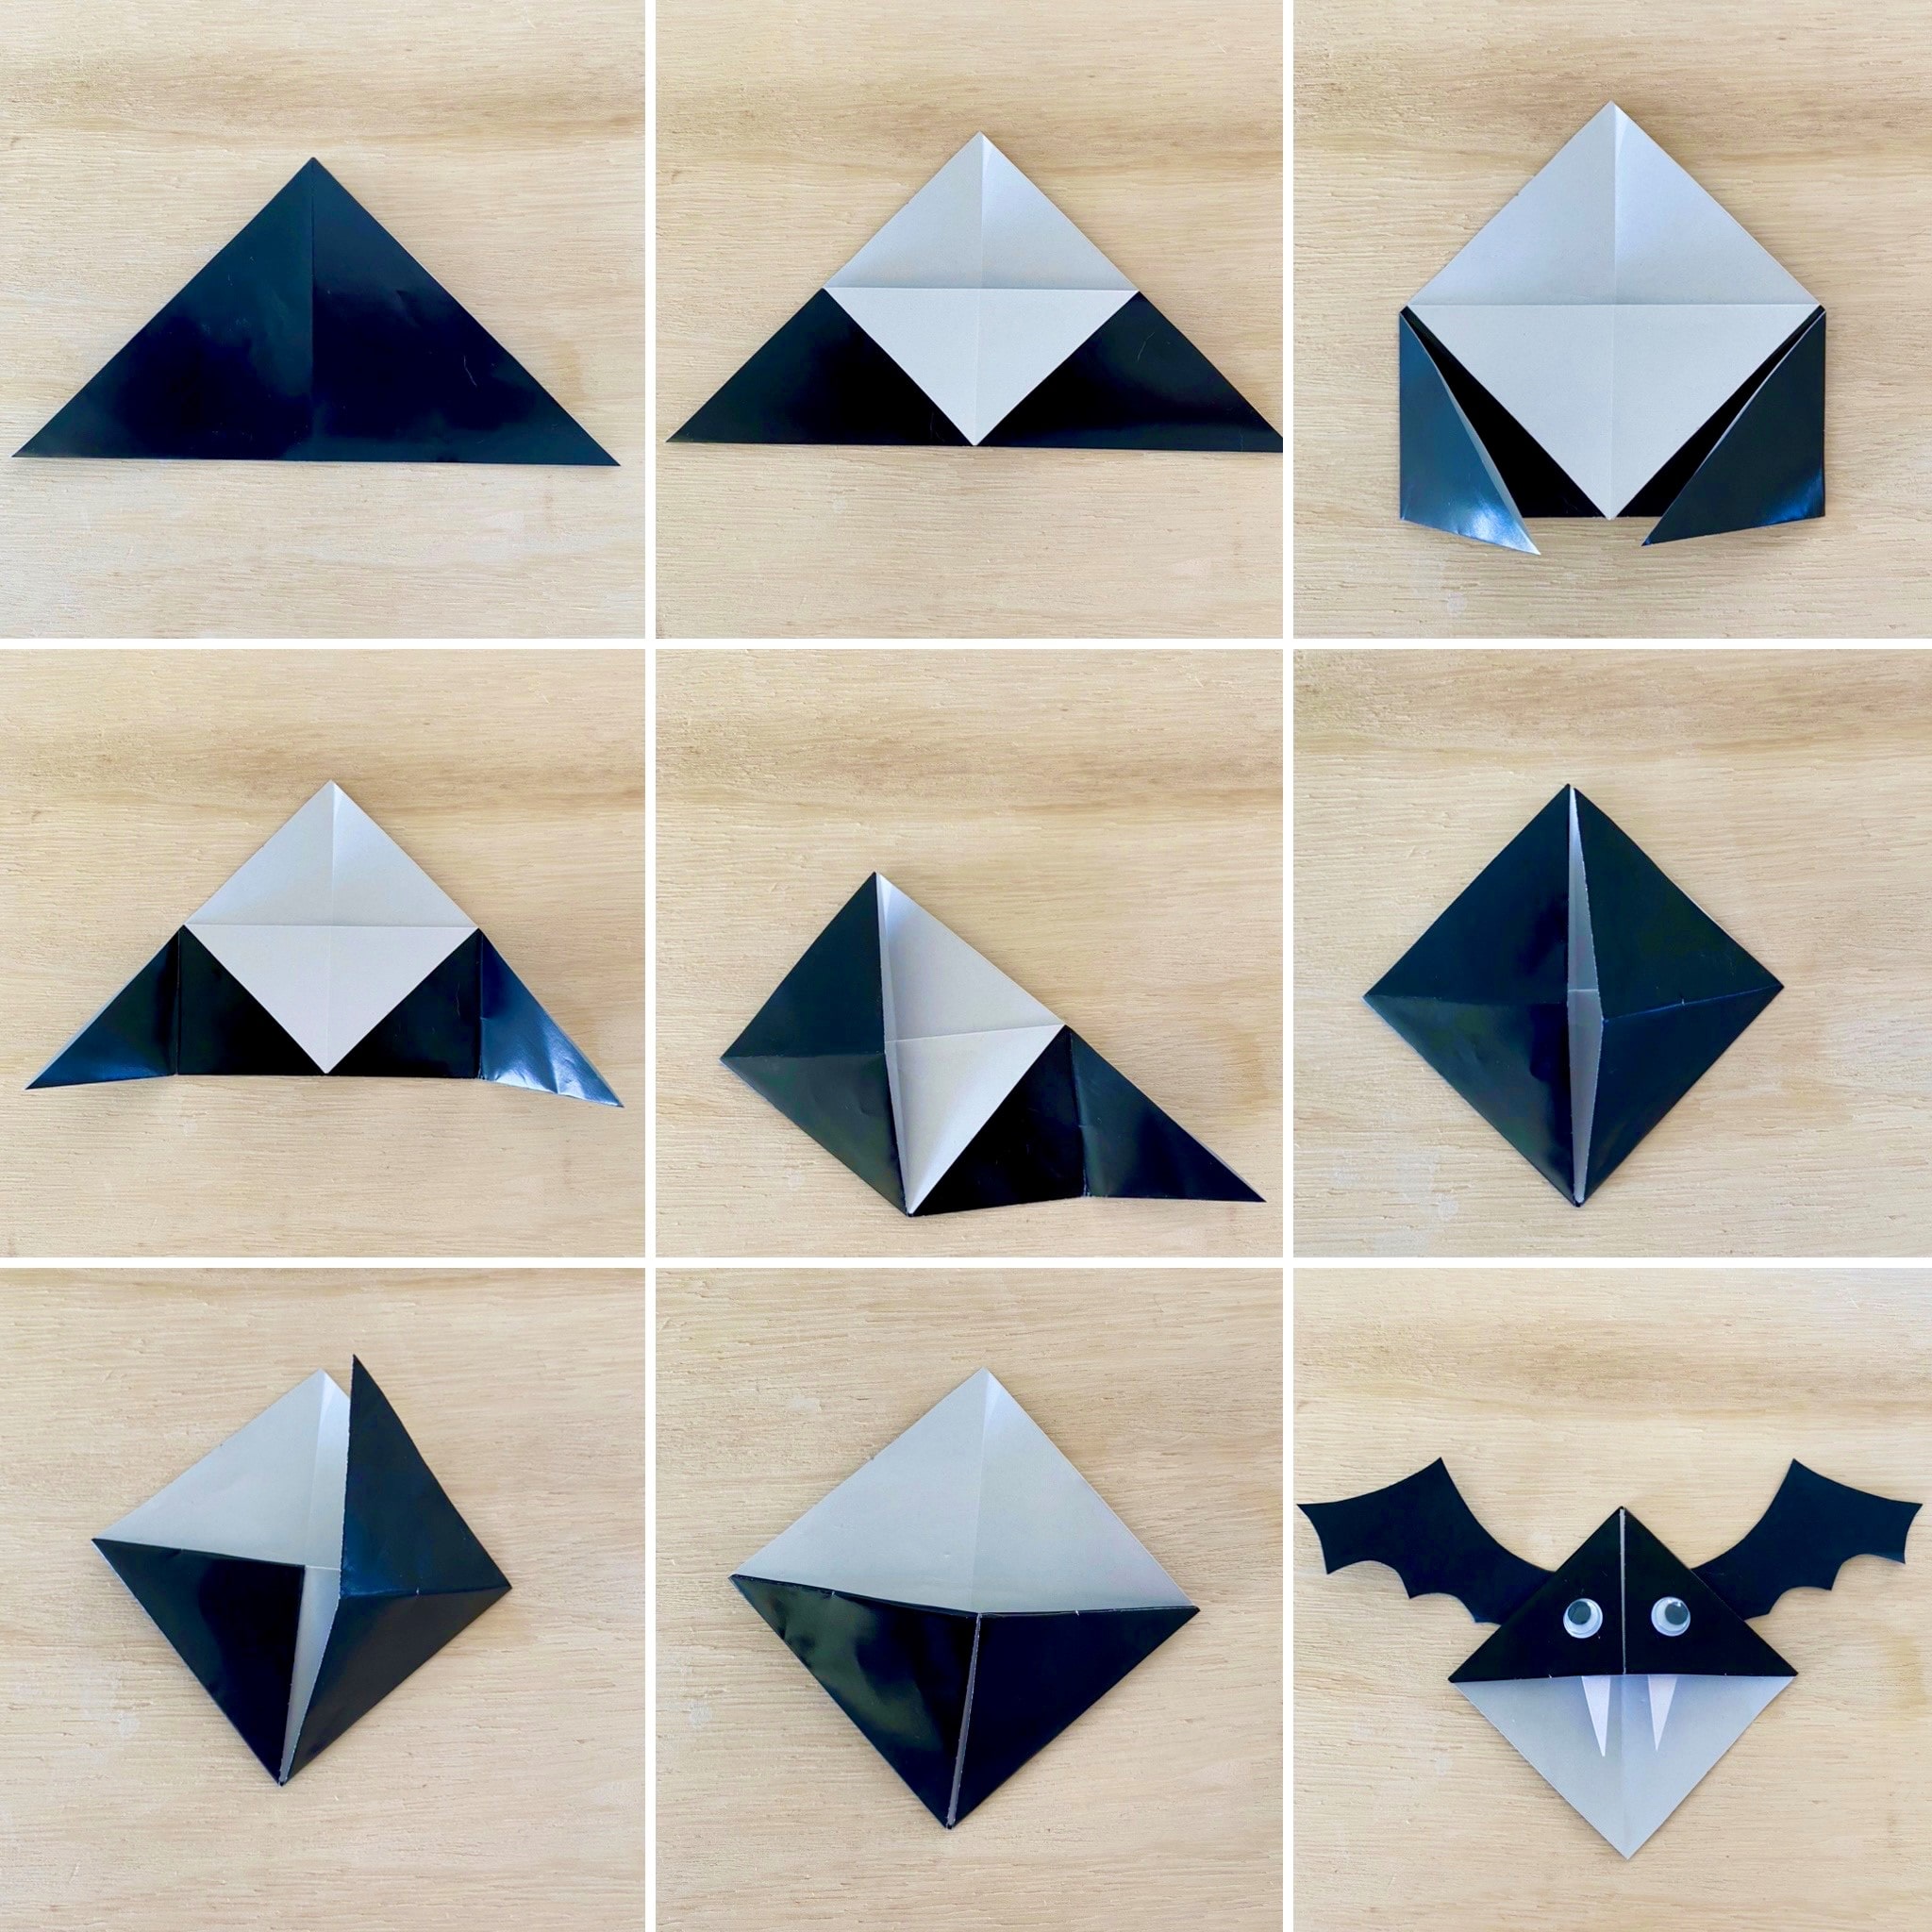
Made from only a few simple paper folds and embellishments, this is one cute creature that’s batty about storytime! Grab yourself a square piece of black paper and follow the folding sequence pictured below.

Bat Bookmark Folding Instructions

Add some little wings, fangs and joggle eyes, and this adorable spooky book placeholder is ready to join in the reading. Let your imaginations run wild and fold all sorts of fun creatures with a spooky twist – bats, pumpkins, cats, frogs, owls, ghosts and more!


Featured products:
Matt Paper Squares 
Gloss Paper Squares 


Storytelling Pop Sticks
Storytelling Popsticks
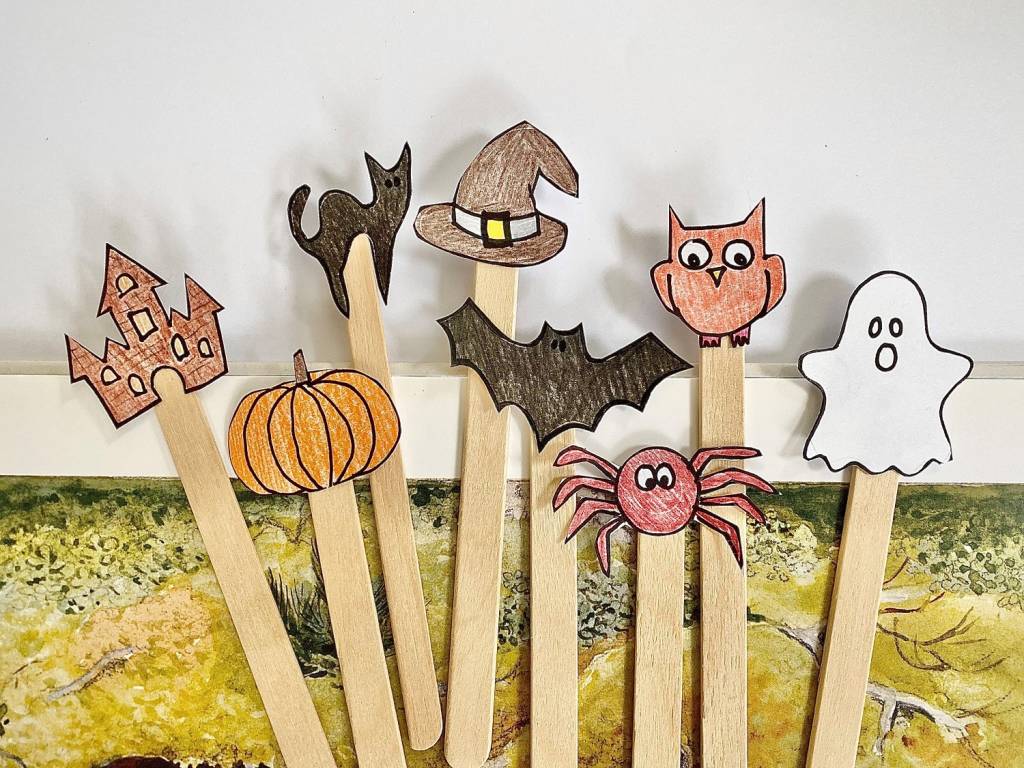
Storytelling is an activity rich in language and communication! It’s a time for children to hone their concentration and listening skills, explore feelings and emotions, share their own experiences and learn from others in an interchange of knowledge. Stories can explore aspects of STEM, problem solving, memory recall and provide a place where children can freely express their thoughts and imaginings. We love storytelling!

These adorable props provide visual prompts for children and educators to tell a story. Draw some story characters on thick paper or cardboard, colour them in, cut them out and stick them onto pop sticks (for extra durability, the drawings can be laminated before they’re added to the pop sticks). Follow the characters from a favourite storybook or create your own for all sorts of imaginative tales. Once upon a time….


Featured products;
Pop Sticks 
Coloured Pop Sticks 
Coloured Pencils  
Coloured Jumbo Pencils 


Spider Tic Tac Toe
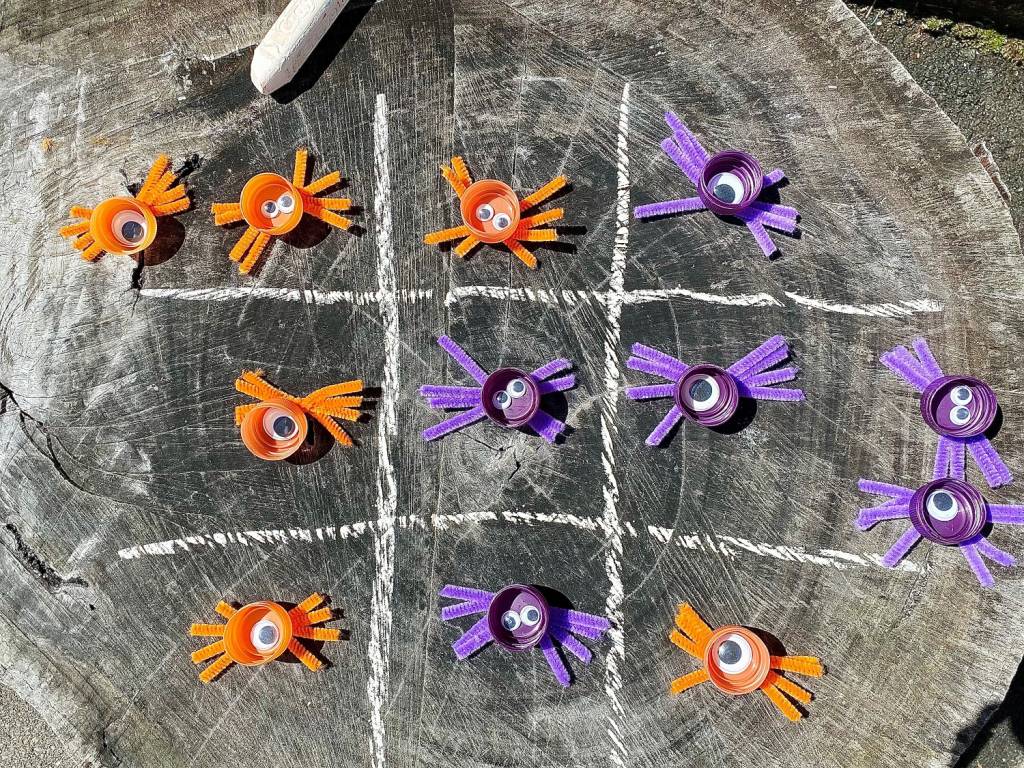
Spider Tic Tac Toe drawn in chalk on slate
Also called Noughts & Crosses, Tic Tac Toe is a fun and simple game for young children to build maths skills, including counting, predictability, problem solving and special awareness. Taking turns to lay their pieces on the board, whoever gets three in a row, either horizontally, vertically or diagonally, is the winner! This is a traditional game that can be made up with all sorts of odds and ends – to make the game board, use paper and markers or a hard, flat surface and chalk or sticks. To make the playing pieces, simply find four of something that’s different from the other player’s pieces. We’ve made spooky bottle top spiders in two different colours, but you could use stones, shells, wood slices, counters etc.


Featured products:
Bottle Tops 
Pipe Cleaners 


Loose Parts Dough Creatures
Loose Parts Spooky Dough Creatures
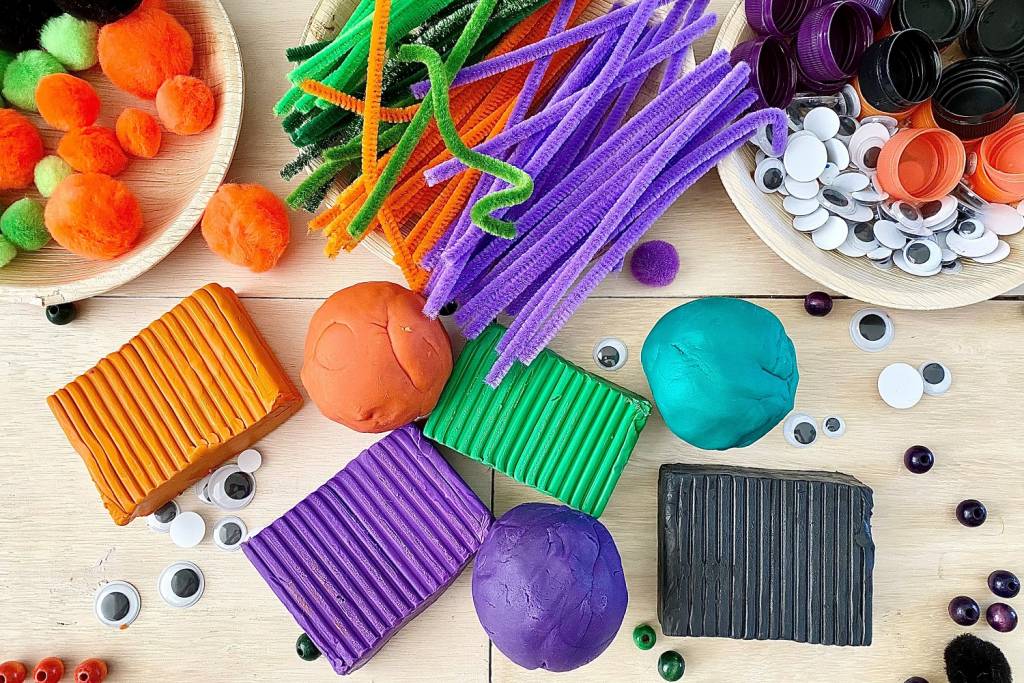
With loose parts play, anything can happen! Children can move loose parts freely, adapting and turning them into anything their imagination desires. A selection of open-ended loose parts makes a wonderfully inspiring invitation for children to explore, experiment, inquire and invent, and with the addition of dough or modelling clay, children are sure to make some fantastical creations!
To make a treasured keepsake that will last, switch the dough or modelling clay for air-dry clay, which will harden beautifully in a day or so, ready to adorn the classroom or live on at home.


Featured products:
Modelling Clay Kit 
Creatistics Dough Kit 
Creatistics Dough Set 
Craft Essentials Kit 


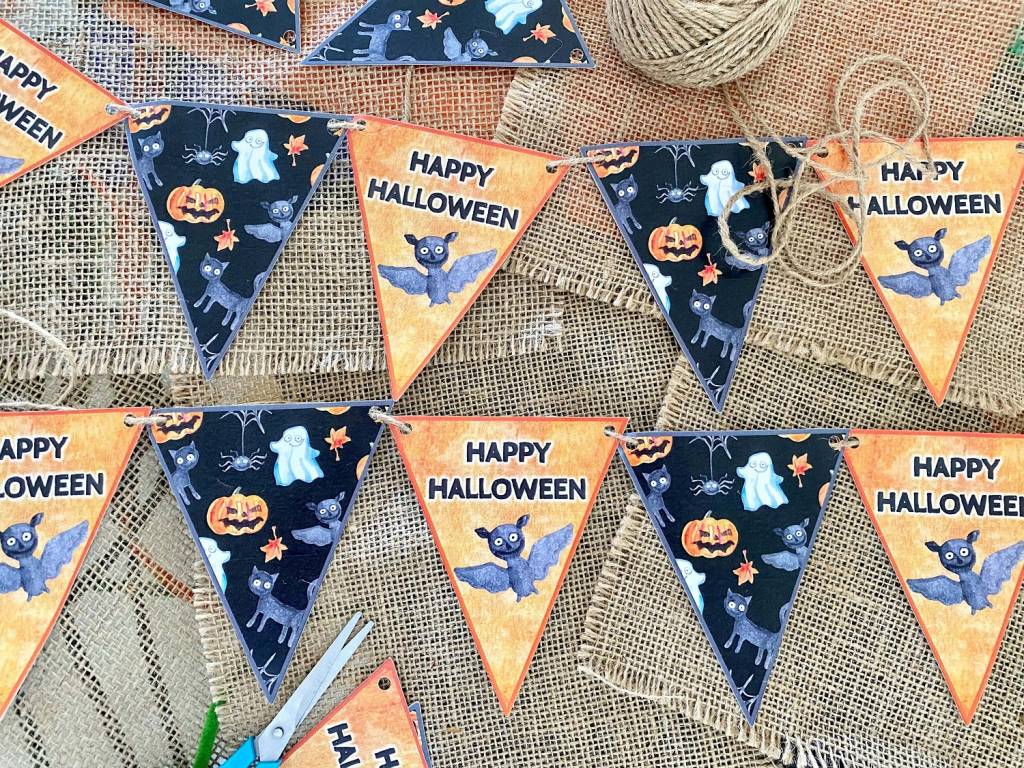
Happy Halloween Bunting
Happy Halloween bunting
Adorable FREE printable Happy Halloween bunting!

These sweet and spooky characters are sure to bring festive cheer to the learning environment – whether it’s the classroom, after school setting, home learning or weekend fun – the finishing touch to any Halloween party is here. Simply print out as many copies of the bunting as you desire, snip out the shapes, follow the hole punch guide and string up your spooky triangle bunting.
No need to worry about waste either. Paper bunting can be saved and reused next year, snipped up for spooky collage art, popped into the recycling or even shredded and added to the compost to make nutritious soil to grow yourself a real pumpkin!


Featured products:
White Cardboard 
Happy Halloween Bunting  FREE PDF Download 


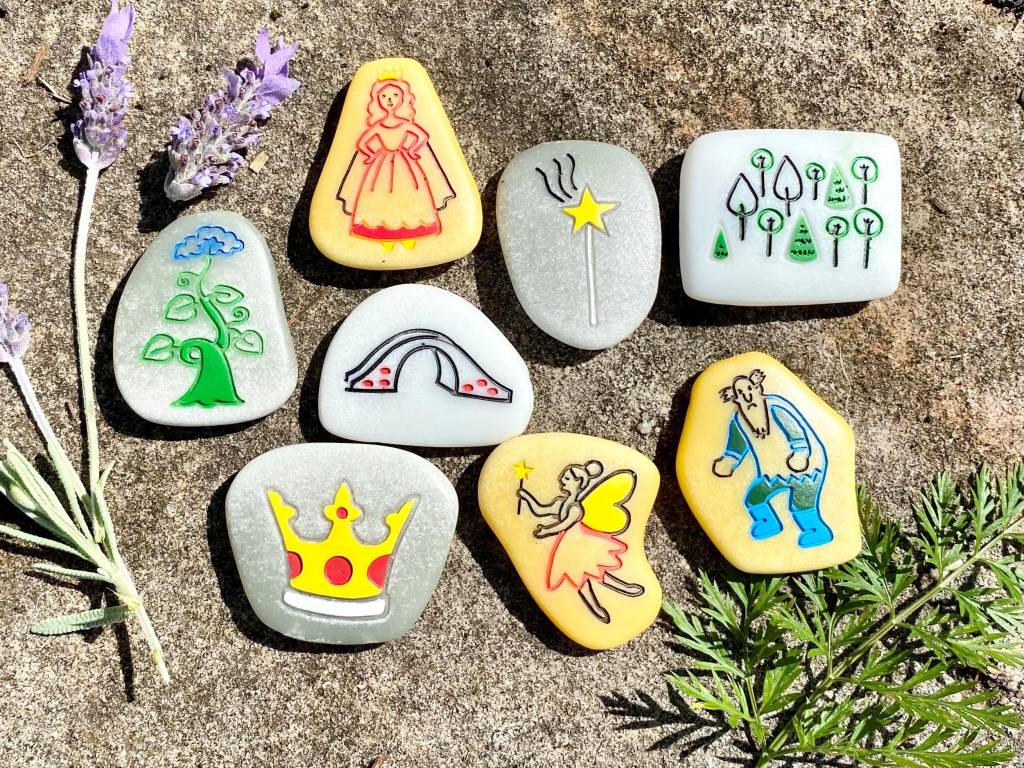
Outdoor Story Stones

Outdoor Story Stones
Combine storytelling with the wonder of nature with these adorable story stones. Made from a mix of natural stone and resin, they’re built to last the rigours of play outside, allowing outdoor nature play to guide imaginative storytelling. The sights, sounds and textures of the great outdoors all make wonderful prompts for scenes where anything can take place. Story stones can also be made by adding simple illustrations to stones or small wooden branch cuts.


Featured products:
Story Stones – Fairy Tales 
Story Stones – Outer Space 
Story Stones – Under the Sea 


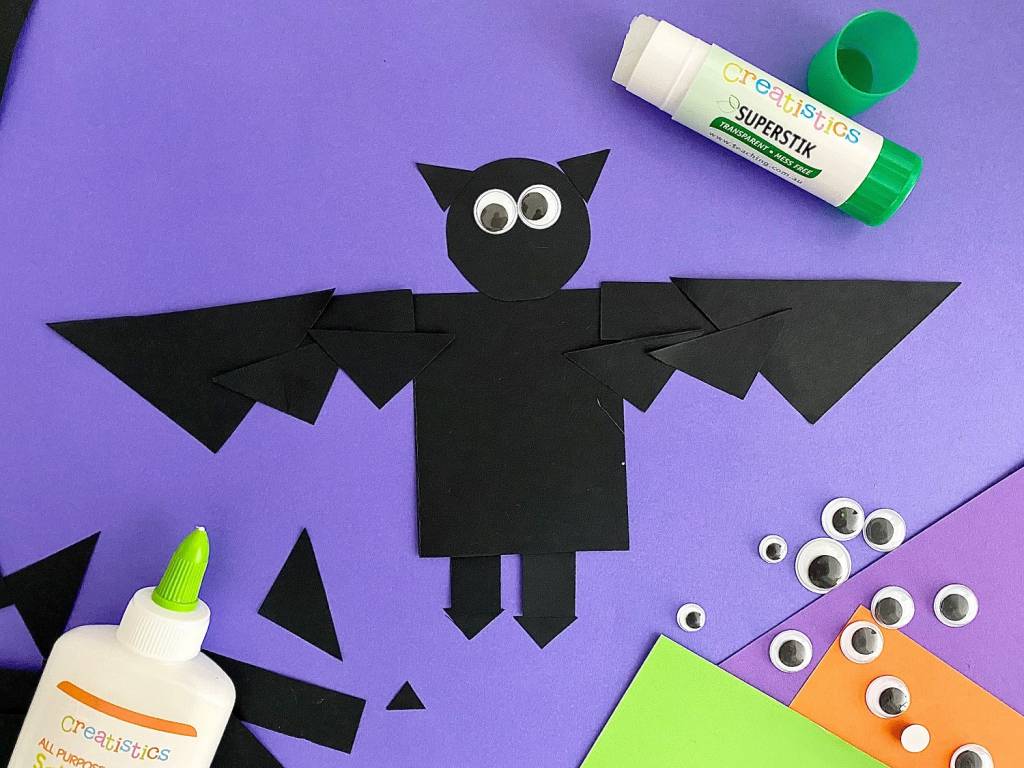
Batty Paper Crafts

frightful bat paper craft project with google eyes and gluesticksPaper arts and crafts are fantastic for children learning about colours and shapes. Snipping paper is also a fun way to work on scissor skills. Joggle eyes will help bring children’s creations to life and may even inspire some spooky storytelling! The paper shape pictures can decorate the classroom or be taken home as gifts to share the excitement of the spooky season.
This activity can also be adapted for different age groups to make sure everyone’s safe. Children confident with scissors may like to snip their own shapes out, where younger ones might benefit from a selection of pre-cut shapes to choose from.


Featured products;
Coloured Paper 
Joggle Eyes 


Spooky Fairground Bowling

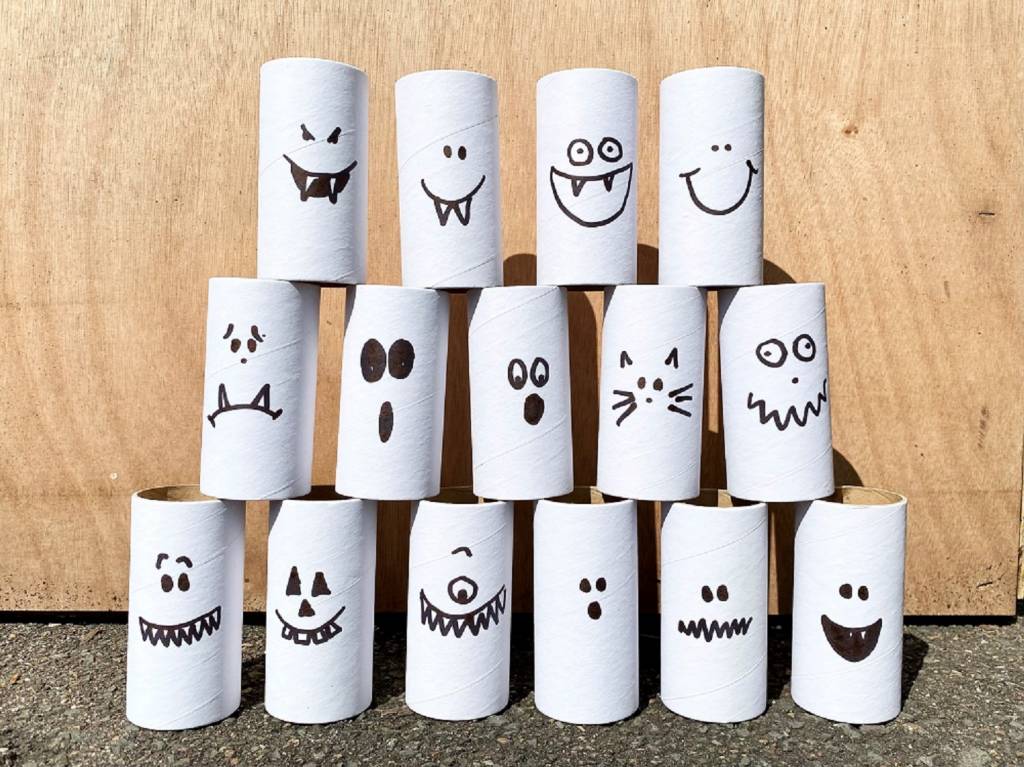
Spooky Fairground Bowling craft project using cardboard rolls Fairground bowling games are a timeless tradition for all good parties, and this sweet, spooky version is a hoot. Add some wacky faces to sturdy cardboard rolls and take turns knocking them down with any ball you have handy. These ghosty characters look great with plain white rolls or decorated with paint, markers, coloured paper and all sorts of embellishments for endless design options. For older children, numbers can be added for scoring up the total points knocked over for fun maths practice.
 

Featured products:
Cardboard Tubes 
Craft Rolls 


*All these activities can be modified and adapted to suit different age groups, taking away small parts for children under 3 years of age and replacing them with larger safe parts. Where scissors are used, educators may use adequate supervision to suit the needs of the children or offer pre-cut shapes.


What are your favourite spooky crafts and activities to celebrate Halloween?


About the Author
Penny Groen is an Early Childhood Teacher who has been working in Early Childhood Education and Care settings around Sydney for 17 years. She has a passion for working in meaningful partnerships with families and communities, providing a responsive and engaging curriculum where everyone feels welcome to contribute. You can see Penny’s interest in the natural world with all the weird and wonderful experiments growing both inside and outside the classroom. Penny’s also known for equipping children with the tools to explore their interests and celebrate the discoveries each day brings.


Shop MTA>

Blog Home>

Posted on

Back-to-School Essentials

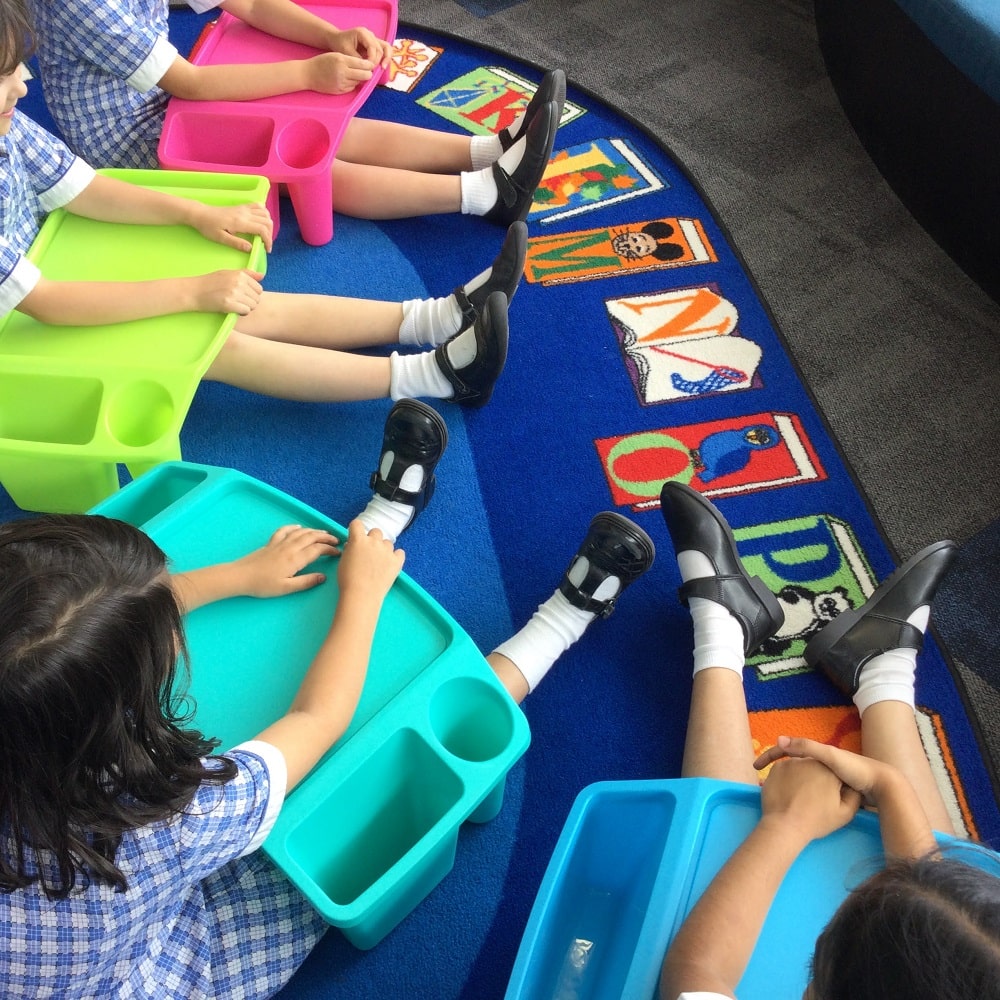
Children on floor with laptrays

Every new school year brings with it a level of excitement for both teachers and students. It is my favourite time of the year as everyone begins with a fresh start and an enthused energy for the year ahead. For teachers, we have the privilege of getting to teach a new class of students, designing the learning space from a blank canvas, and for many, the always-elusive goal to be more organised.

In this post I will be sharing some of my must-have resources for the classroom along with my favourite beginning-of-the-year activities to get to know your students and for your students to get to know each other.


Classroom Must-Haves:
When setting up my classroom I always like to have a theme or colour scheme. Over the years some of my favourite themes that I have created have been based on butterflies, ‘Up in the Sky’ (hot air balloons, planes), the ocean and the circus. I love having the colours of the learning space, resources and display boards match to set the tone of a creative organised space that welcomes students to our class.

Some items I love to include in my classroom are;


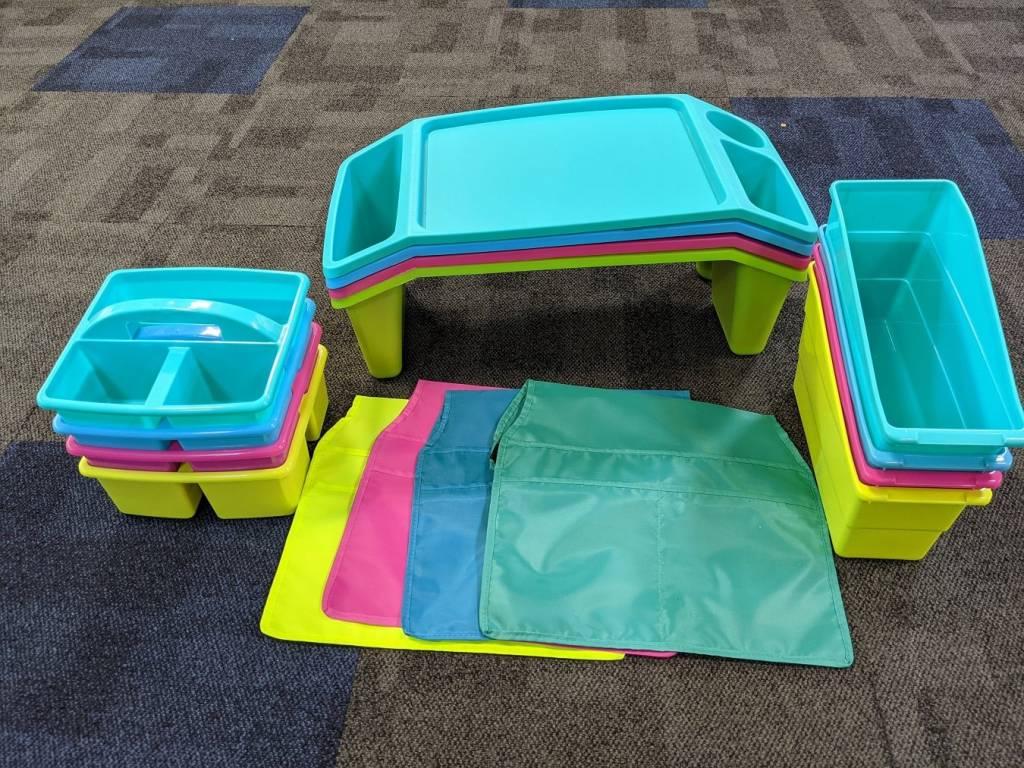
Classroom Caddies Laptrays and Chairbags

These products can be used in a variety of ways in the classroom and the best thing is that they all match.


Lap Trays
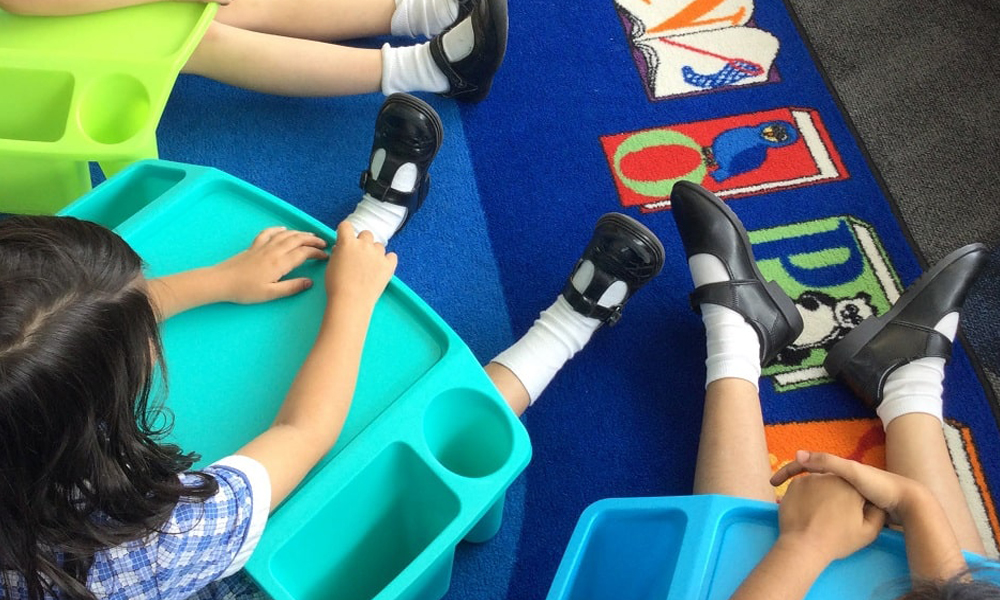
These Lap Trays are a great addition to any junior primary classroom. They allow for flexibility in the learning space during group work and also during independent learning. I love that these trays provide students with a hard surface to complete tasks in their books so they do not need to write on the carpet or flooring. I use these daily with my students during small group work that takes place on the floor space around the class. Many students also choose to use the Lap Trays during independent learning time so they can work in a quiet spot or away from others. In my classroom, I have a beautiful courtyard outside where my students sometimes choose to go outside to work and these Lap Trays allow them to have a suitable surface to work on.


Children with Laptrays sitting on floor


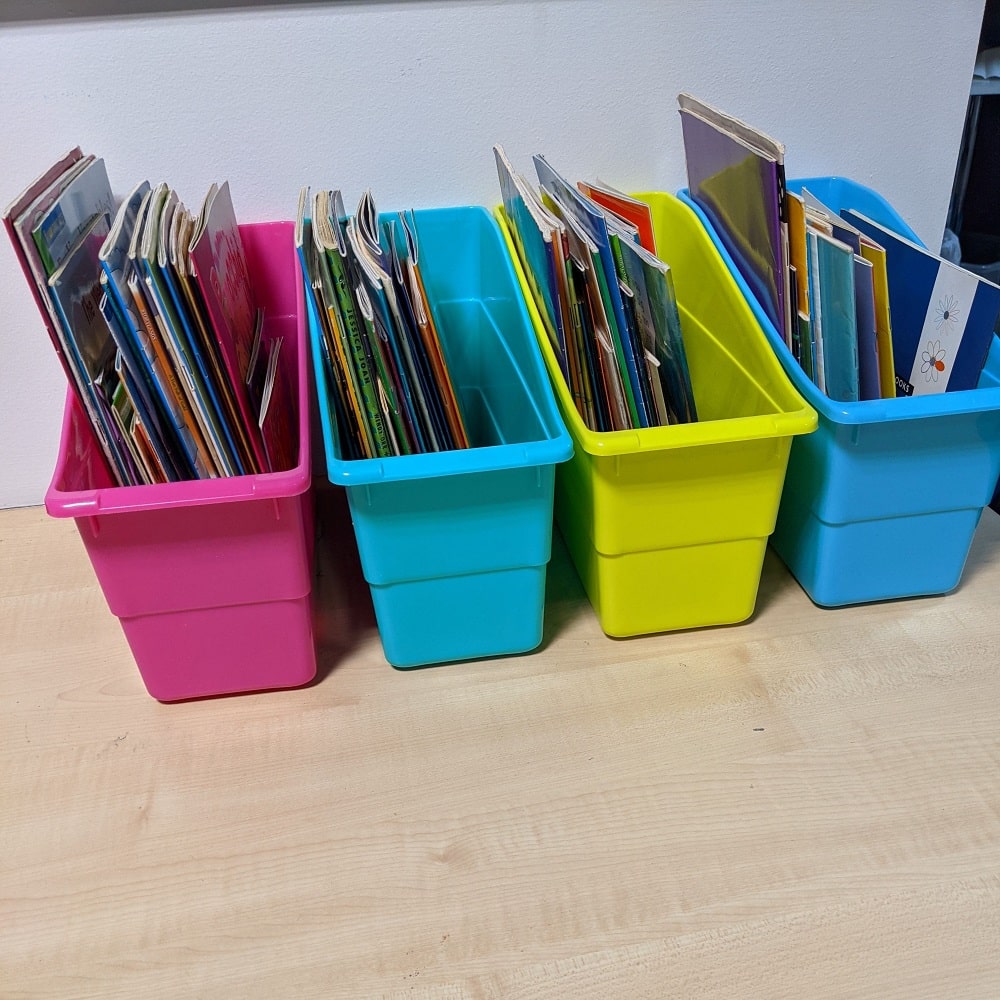
Classroom Book Caddies
These Book Caddies are a great way to store take-home readers and student books. I organise my student books in these Book Caddies and have labels on them for maths, reading, writing and inquiry books. I like having them all together for two reasons; the first being that students do not need to go to their tubs to get their specific book, rather I can either have the class captain hand the books out or I can call out student names to collect, and the second being that at the end of a learning experience students place all their books back into the Book Caddy and then I can easily view and assess their learning rather than searching through each student’s tub for their book.


Book caddies filled with books on desk


Classroom Caddies
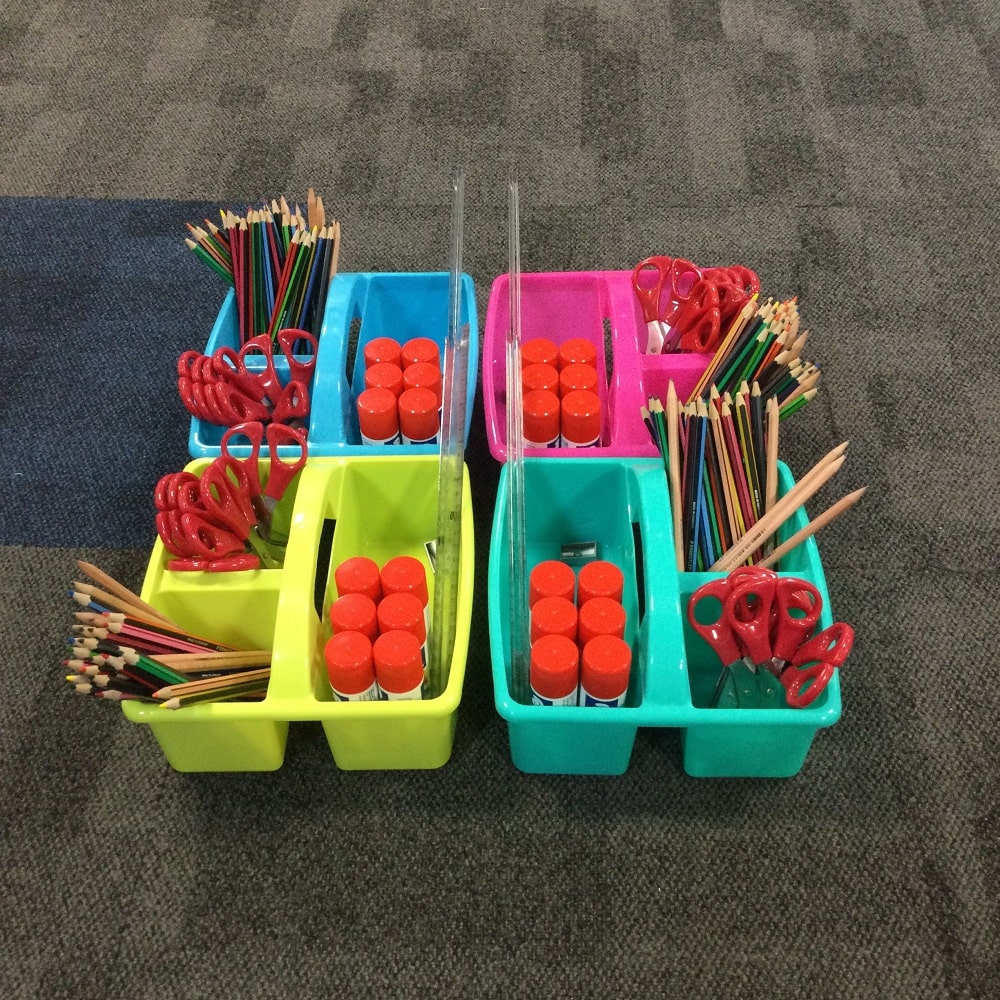
These Classroom Caddies are perfect for shared stationery and the vibrant colours stand out when placed on classroom tables. The compartments in the Classroom Caddies allow for pencils, pens, scissors, glue, rulers to be stored neatly, making them easily accessible for student use.

Classroom Caddies are also a great resource for sharing required activity materials. During STEM and Inquiry Learning activities I use the Classroom Caddies to provide each group or table with the resources they need for the specific activity. I can organise the materials prior to the lesson and, upon completion, students can return the materials in an orderly way making clean up a lot more efficient.

Filled Classroom Caddies on classroom floor


Chair Bags
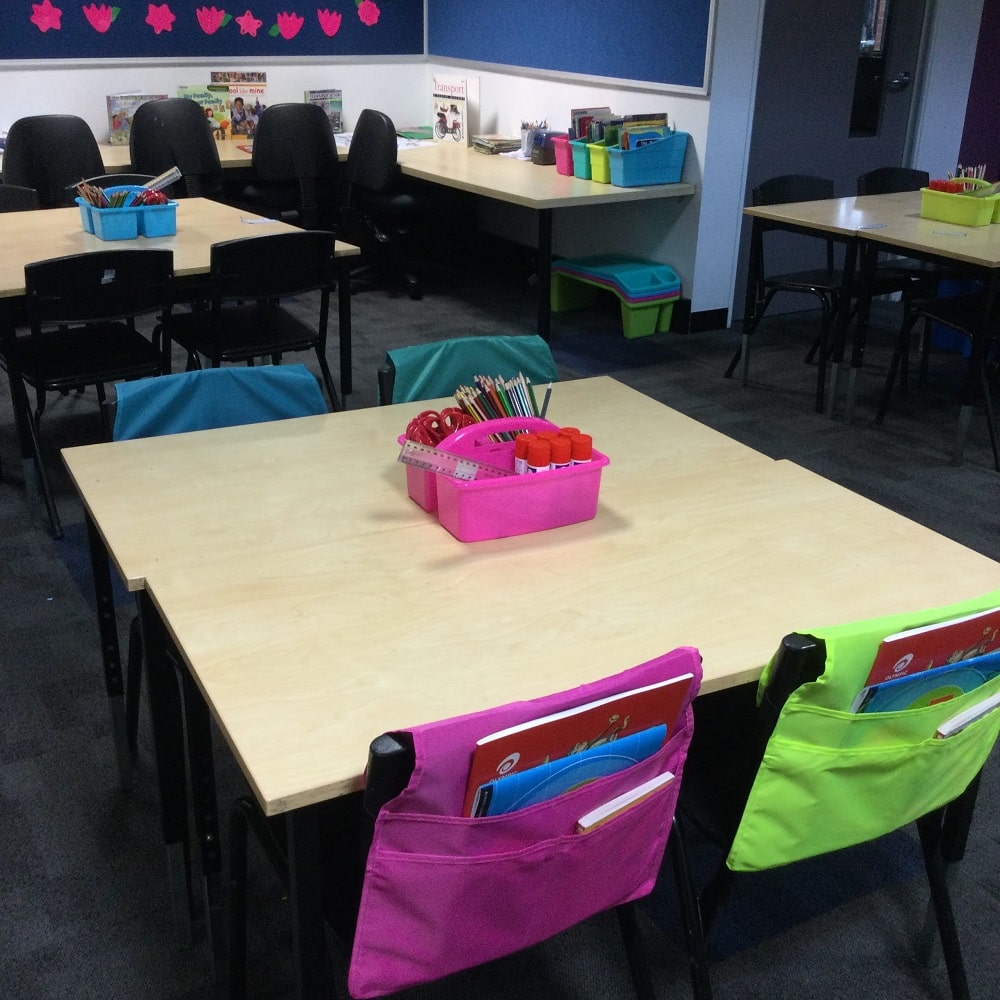
These beautiful Chair Bags provide students with a place to store their essentials without the hassle of a tub. I love the various pocket sizes which allow for students to store their device, exercise books and the book they are reading, along with their essential classroom resources like a ruler, pencil case etc.

Filled Chairbags and Classroom Caddies on Desk in classroom


Beginning-of-the-Year Activities:
At the beginning of the school year the priority should be on developing relationships with your students and getting to know what they each like and are interested in. Spending time undertaking activities that highlight student personalities will support you as the teacher but also allow students to get to know each other and begin to develop new friendships. These activities also provide teachers with an insight to see how students work together, interact and complete tasks.

These are my favourite activities to get to know your students:

Jigsaw Activity:

Jigdraw DIY jigsaw activity

Materials
Jigdraw – 20 Pack 
– Snap-lock bags

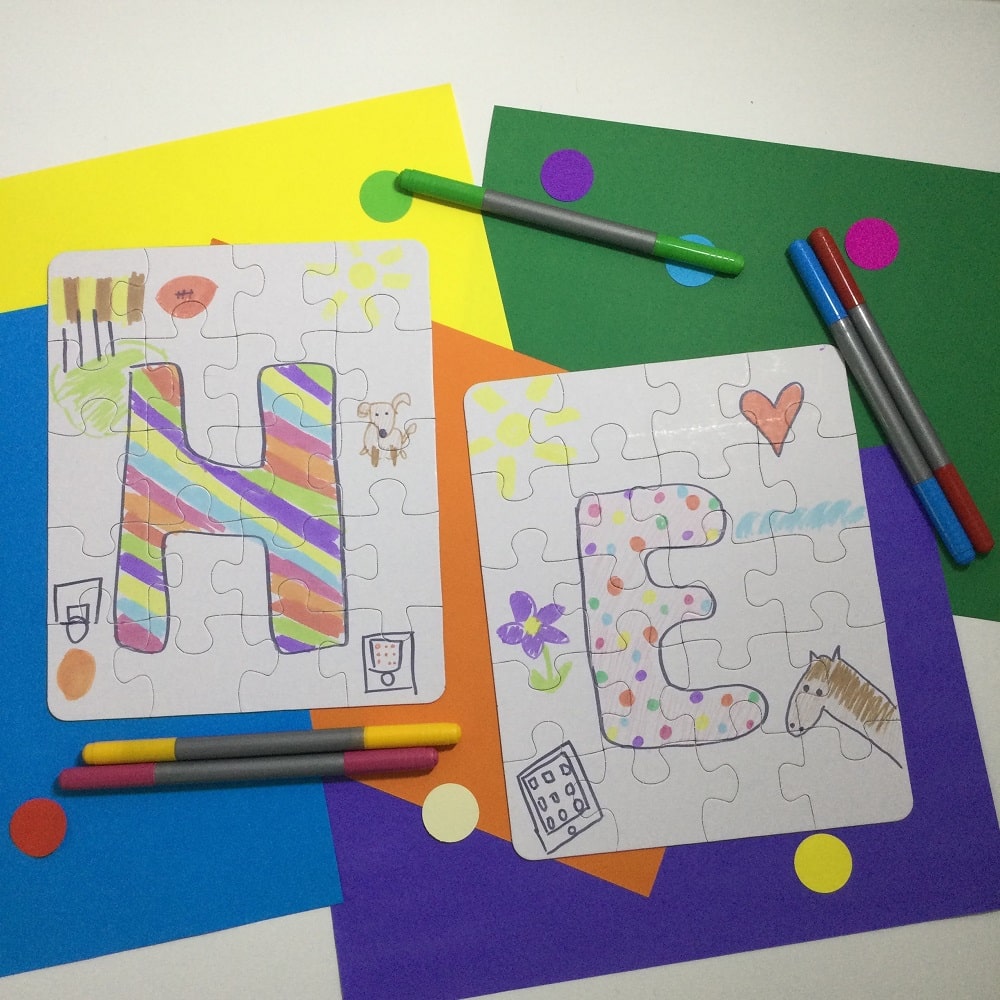
Each student receives a blank Jigdraw template with 20 pieces. Students draw a different image on each puzzle piece that represents something about themselves. Some ideas for images can be family, pets, hobbies, favourite food, favourite places etc.

Students place their completed Jigdraw pieces into a snap lock bag.

The snap lock bags are then randomly handed out to students who need to put the puzzle pieces together and then try to guess which student is represented by the images.

These Jigdraw blocks are also a great resource to use for students to share their learning during inquiry learning. They can then build upon their ideas and knowledge as the learning continues throughout the year.


Chalk Mindmaps

DIY Chalkboard Signs activity

Materials – Sidewalk Chalk 

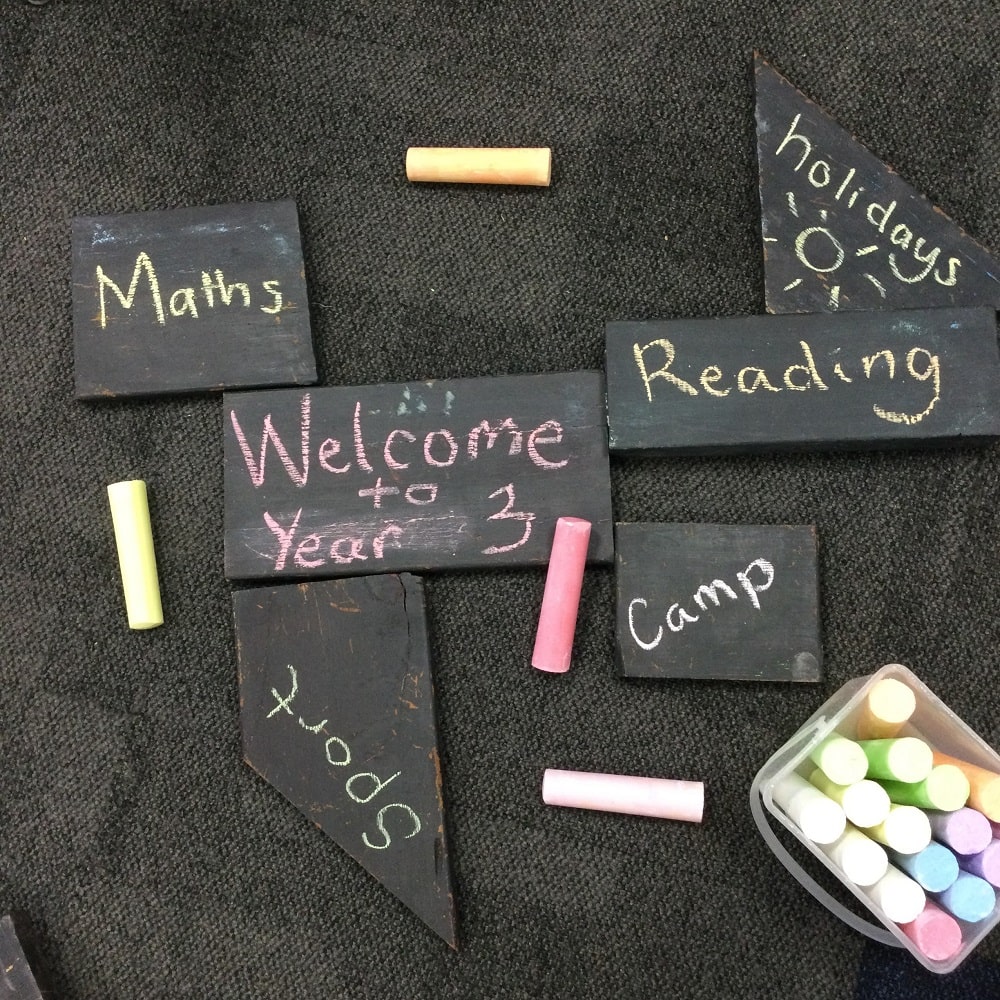
Chalk is a great resource to have in any classroom. I have found the Sidewalk Chalk to be the perfect size and thickness for student use and it comes in great colours. Students can use the Sidewalk Chalk to draw directly onto concrete, but I have created blackboard-painted timber pieces for student use across many learning areas.

Students receive a number of blackboard-painted timber pieces and draw a giant Mindmap to highlight the topic they are given. The topic gets placed in the centre and then students write or draw their ideas and place them around the topic to create their giant mind map. This is a great visualisation too.

Some ideas I like to focus on at different times are;

    • Looking forward to this school year
    • Holiday reflection
    • Inquiry brainstorm, questions, wonderings
    • Spelling words
    • End-of-term reflections


I hope this blog post has provided you with some inspiration to help you set up your classroom or provide you with some beginning-of-the-year activity ideas to get to know your students.


Featured Products:


About the author

Eleni Kyritsis is an award-winning Year 3 teacher and Leader of Curriculum and innovation from Melbourne, Australia. Eleni facilitates professional learning workshops around the world that focus on unleashing creativity and curiosity in classrooms. You can contact her at elenikyritis.com and @misskyritsis


Shop MTA>


Blog Home>

Posted on

Creating Welcoming & Calming Learning Spaces

Creating Welcoming & Calming Learning Text and Plant pot Vector graphic

A positive, nourished mindset is so important to keep the energy high all year round. Our goal is to support and nurture educators when the physical and emotional demands of day-to-day tasks and experiences exceed the amount of energy available! (Over a long period of time, this can lead to feeling overwhelmed and drained.)

In this piece, we’ll look at valuable ways in which learning spaces can be shaped to support and respond to children’s and families’ needs. This ensures everyone feels safe, connected and comfortable in the setting, including all the great educators out there worth their weight in gold!


Comfy & Cosy Spaces

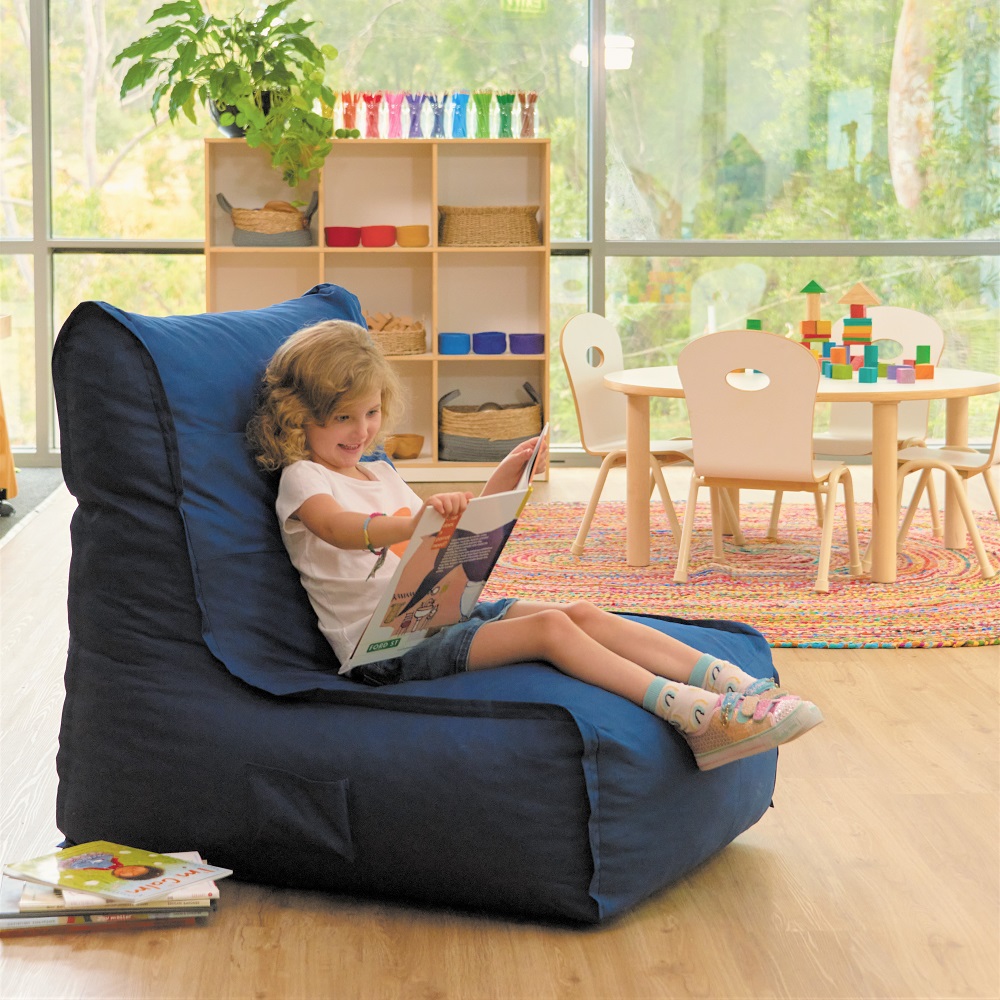
Young girl sat on beanbag chair in childcare learning environment


Soft furnishings ensure children have access to a comfortable learning environment and can include anything from rugs and carpets to cushions, canopies, netting, fabrics and more!

Soft furnishings can transform a loud and busy learning environment by absorbing noise and helping to create pockets of calm where children can, for example, snuggle into a big cushion to read a book, or lie down and have a rest in a cosy and comfy spot. Soft furnishings can modify a rustic cubby house into an inviting and comfortable cave or create a welcoming area for the class to sit together to yarn, share stories and plan out the day’s events.


Featured Product:

MTA Spaces –  Navy Foam-Filled Lounger 


Calming & Reflective Spaces

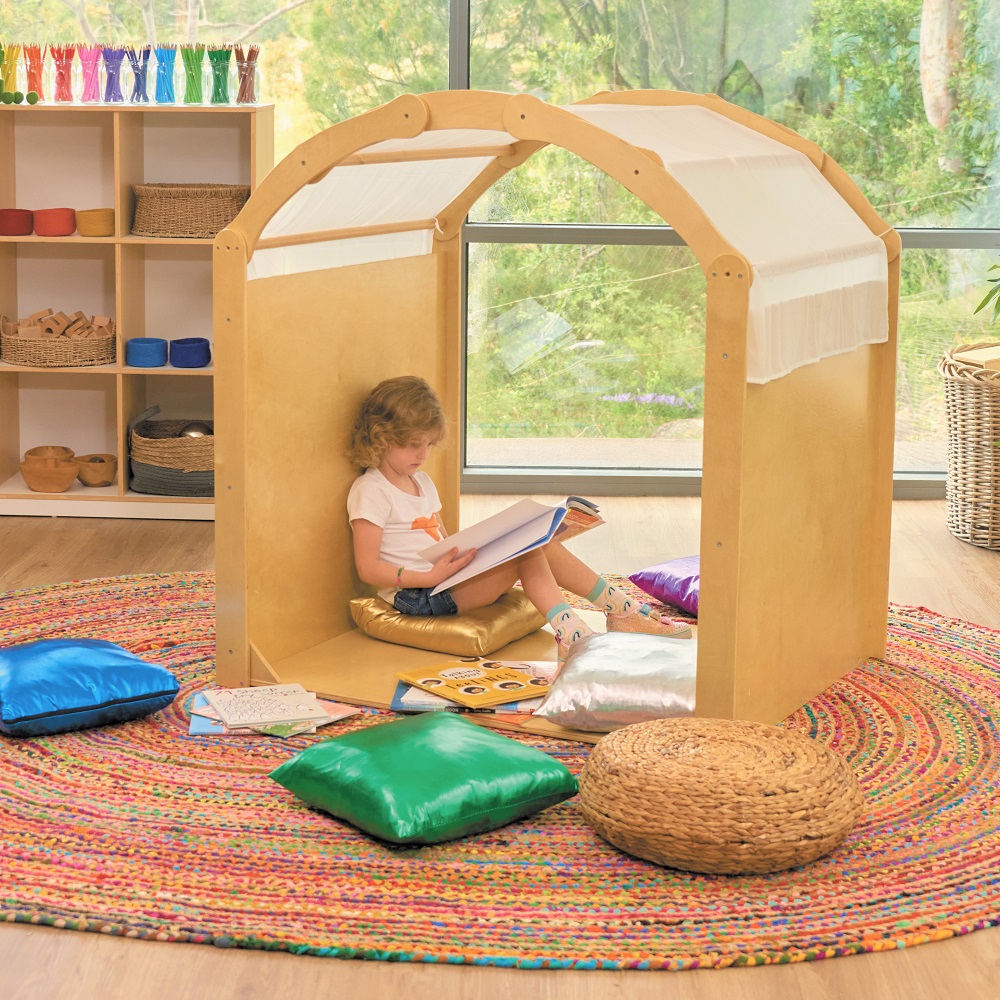
Young girl sat in cosy nook reading


Calming and reflective spaces offer a peaceful learning setting in which children can embrace quiet. Here, children can spend time relaxing and reflecting away from the hustle and bustle of a busy classroom.

Cushions, fabrics, tents and dens can all contribute to quiet and reflective spaces, making cosy and comfortable spots for children to explore and make their own.

Combine these spaces with books, puzzles, soft toys, tea parties or anything else that children would like to add to their retreat. A calming and reflective space can be just the thing to refuel children’s energy.


Featured Product:

Stockholm Spaces – Cosy Retreat 


Spaces of Belonging

Peg People of the world on table


The way children and their families are welcomed into the learning environment makes an incredible difference to their sense of belonging. Belonging is all about feeling connected and secure, valued and accepted with the community’s people and place. A deep sense of belonging ensures the emotional wellbeing of children and their families can thrive, including their self-worth, confidence, capability and adaptability, to name a few.

Feeling secure and connected within their social and physical learning environments will also ensure that these settings become places of safety and refuge for children and families to work through the challenges and difficulties they might be experiencing.

Educators are in an excellent position to build a sense of belonging, not only with their words and actions but also with the physical settings too. Seeing welcoming resources such as wall hangings or displays or children’s names on parent communication pockets will invite families into the settings. Classroom journals will also empower children and their families to contribute to the program and the day’s happenings.

A place where everyone belongs.


Featured Product:

Peg People of the World


Mindful Spaces

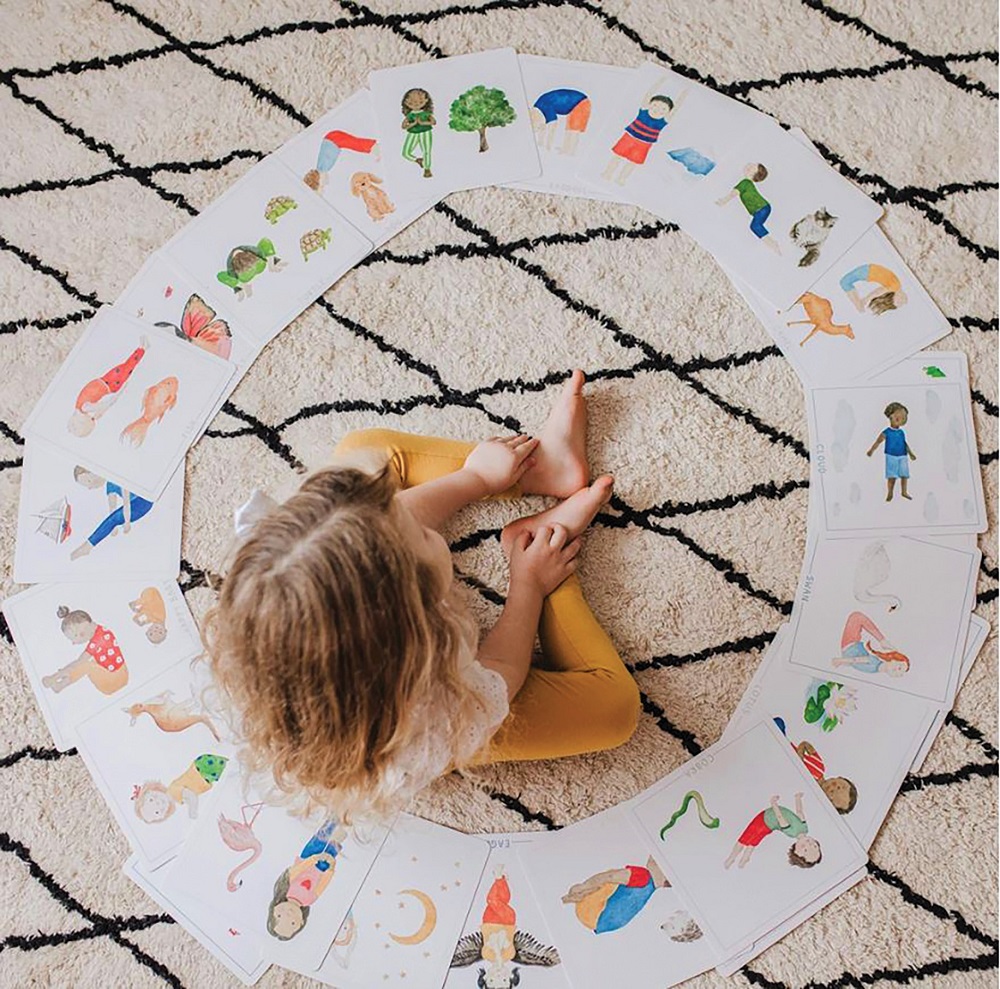
Birds eye view of young girl surrounded by mindful picture cards


Affirmations, mindfulness and restful breathing activities, including yoga, can all help ‘cultivate calm’ while fostering a peaceful and positive mindset. Creating a daily ritual with affirmations and yoga
or meditation and breathing will empower young children to nurture their self-awareness, set positive intentions and work through emotional regulation in healthy and helpful ways.

Focusing on gratitude – the feeling of appreciation – is also a powerful way to see the silver lining when everything seems gloomy. These Positive Mindset Affirmation Cards and I Am Me Affirmation Cards can enable the building of confidence, resilience and self-esteem by helping children to find the sunny side of any situation.


Featured Product:

Mindful & Co Kids Yoga Flash Cards


Engaging & Inspiring Spaces

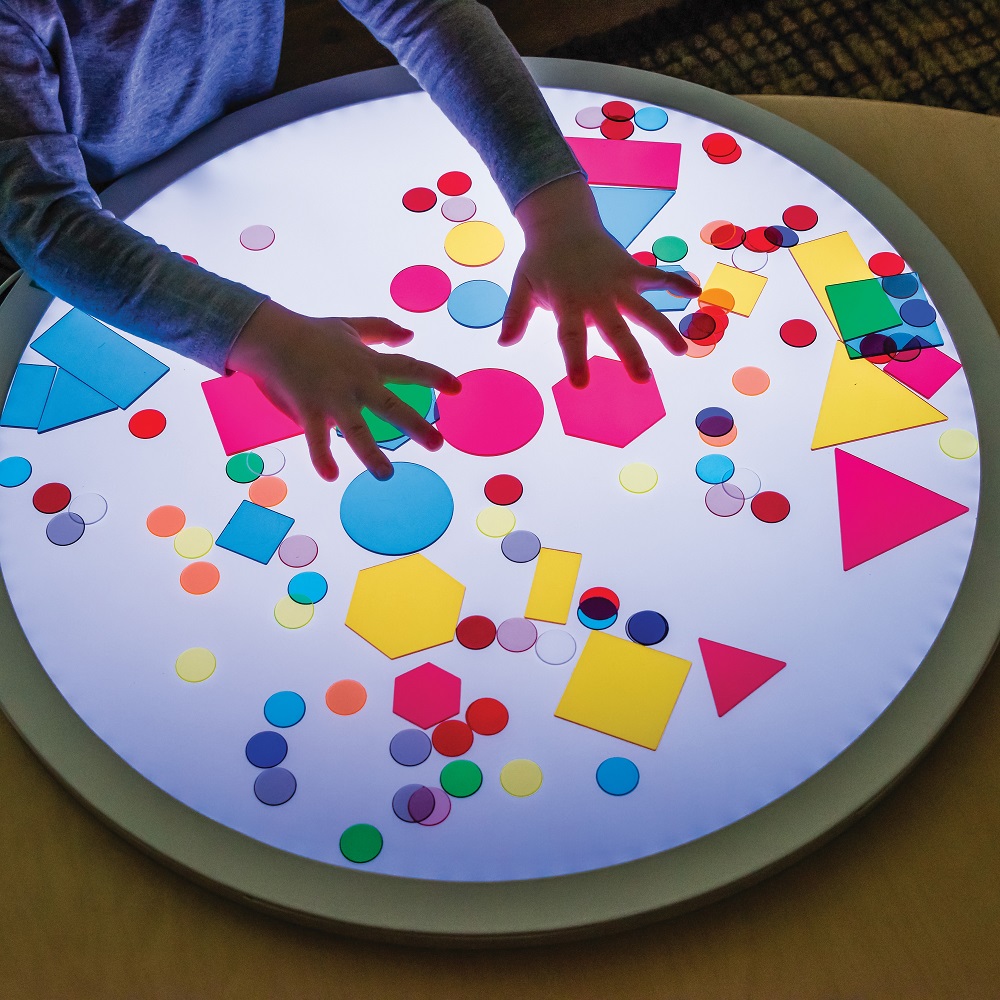
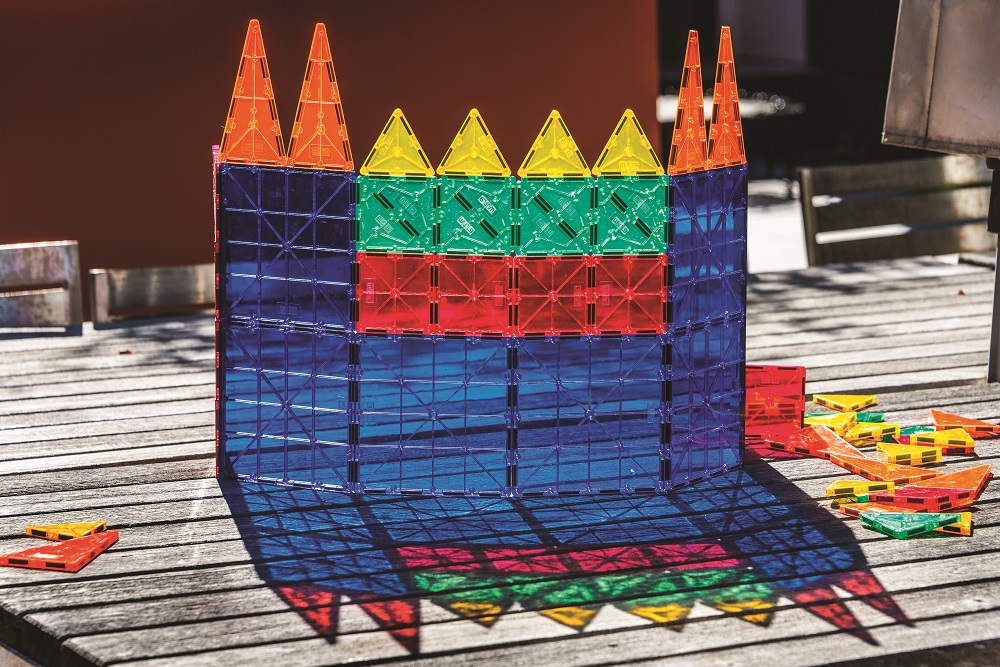
MTA Light table with chids hands and coloured shapes on top


It’s hard to feel motivated when you’re burnt out.

Refreshing your learning environment with a new and exciting project can go a long way in helping to reignite energy and enthusiasm. Light boxes and panels along with light box resources are wonderful tools to drive children’s motivation to explore and investigate with energy and enthusiasm. They light up the room in the most magical of ways, in turn bringing delight and wonder to learning curriculums.

Creating an engaging and inspiring learning environment ensures everyone wants to come back for more. What will happen today? The possibilities for discovery are endless!


Featured Product:

Stockholm Spaces – Round Table & Light Panel


Culturally Meaningful Spaces

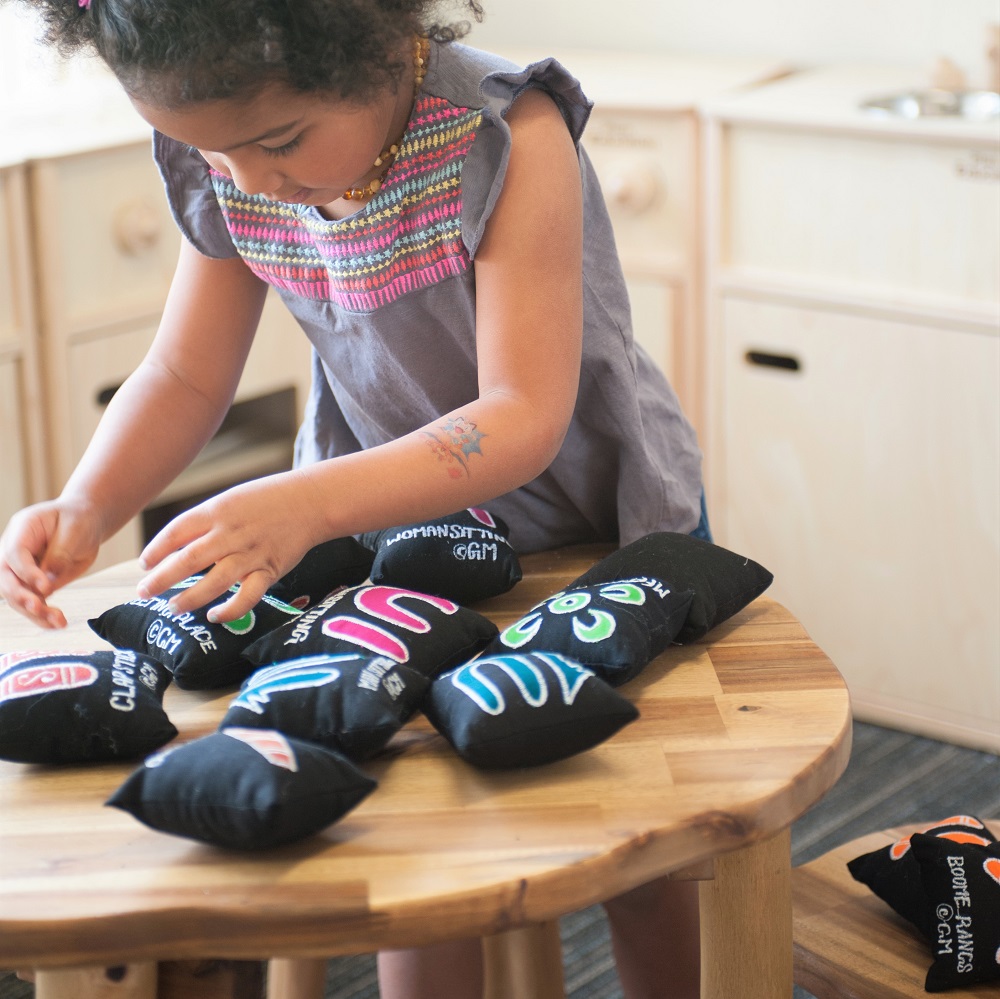
Young girl playing with culturally meaningful resources on table


Culturally meaningful curriculums in early childhood settings increase opportunities for its community members to feel connected – a place to feel safe and secure, to feel loved, appreciated and valued. A place to belong.

If you’re thinking, ‘This sounds great, but where do I begin?’, a good starting point is to have a wander through your setting. Does everything in your setting reflect the diverse backgrounds of its community members (the children and their families, the educators and service staff, as well as the wider community at large)?

There’s no end to the items that you can meaningfully interweave throughout your environment. Include dolls, figurines, pretend food, dress-ups and props from around the world. Ensure children’s books portray the diversity of the world’s peoples, perspectives, cultures and abilities in a positive light. Make sure there are truly authentic cultural and Indigenous resources for children to connect with on a daily basis. Invite educators and families to share their cultural backgrounds – learn some keywords and phrases from different languages, learn a song or dance, cook foods from around the world or engage in traditional storytelling.


Featured Product:

Fair Trade Aboriginal Ceremony Matching Game


Purposeful Spaces

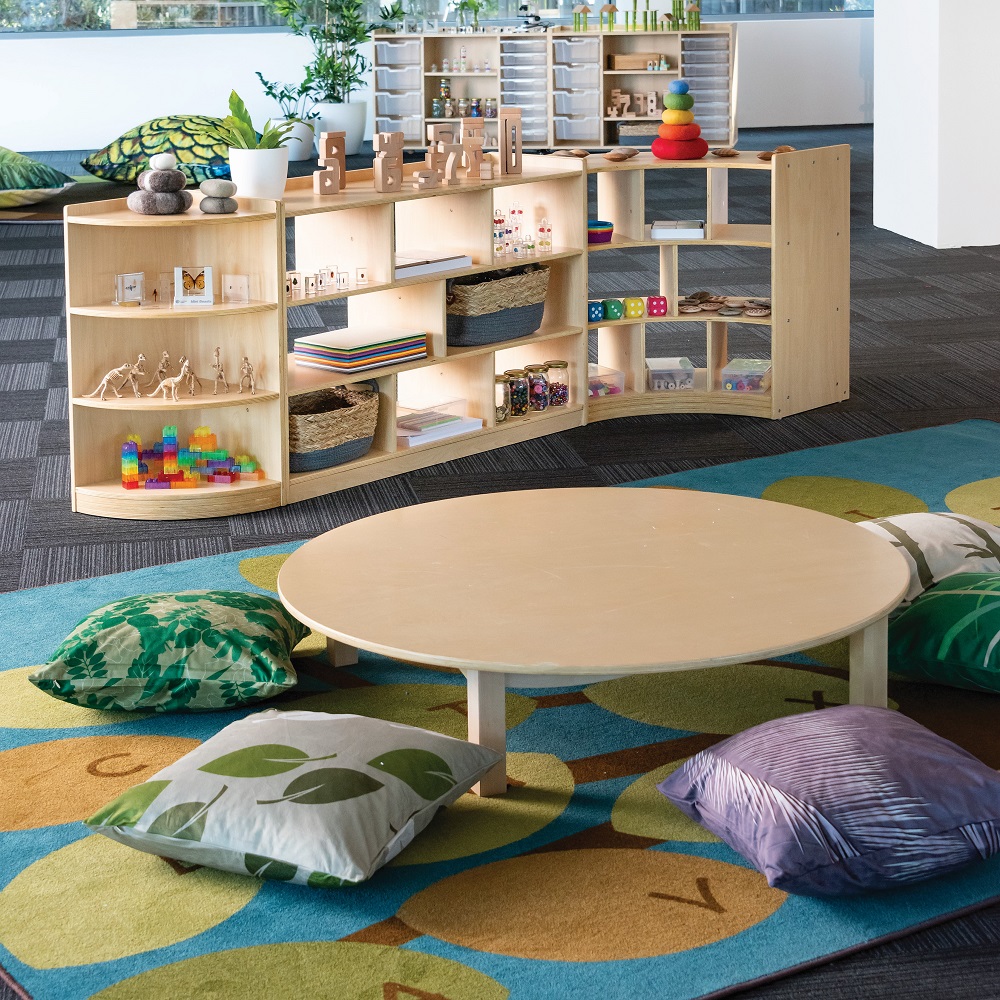
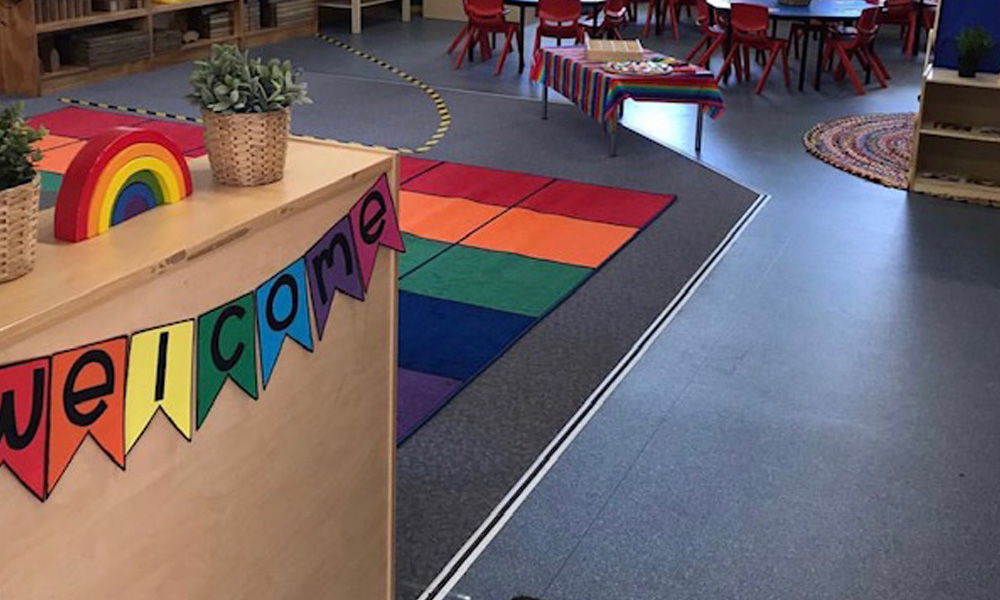
Childcare centre furniture


Learning spaces that are set up purposefully can bring safety and comfort and a sense of calm to the environment. The physicality of the space (the size, furniture placement etc.) communicates what is to happen, providing clear boundaries and fostering behaviours of motivated and engaged learners. Create breakaway areas, book corners and home corners or simply direct foot traffic in safe and effective ways.

How can a purposeful space be created? It might be through using non-fixed furniture pieces that can be easily moved around the room to create and define predictable play spaces. Open-backed shelving also acts as a barrier while allowing for maximum supervision. Rugs and carpets define a learning space, while the number of chairs, cushions and pillows communicate how many children the area is suitable for at any one time.

The resources chosen to join the space will also encourage positive behaviours. Organised and uncluttered spaces with a considered selection of materials will invite children to develop their skills and interests while interacting in positive ways and achieving learning goals.


Featured Product:

Stockholm Spaces – Circular Low Table


Creative Spaces

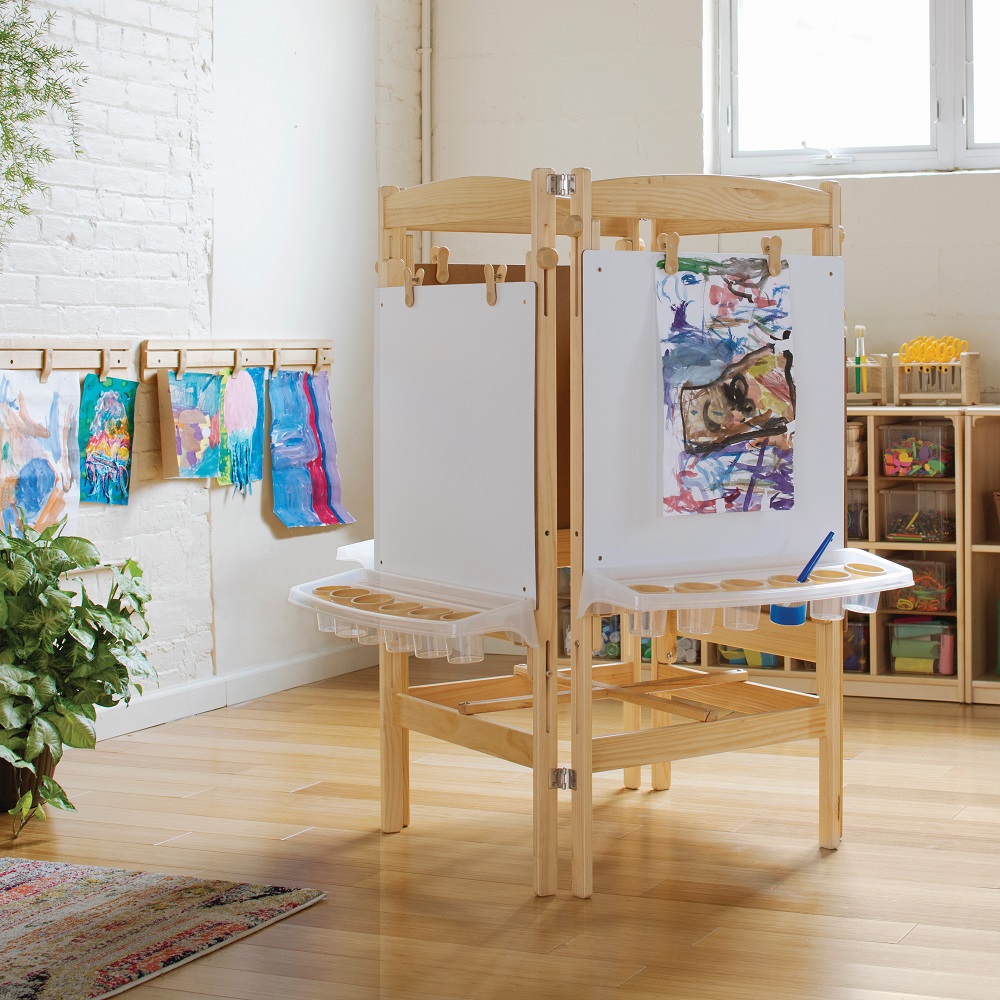
Paining easel with paintings hanging in childcare learning environment


With all those big feelings and emotions children are experiencing, spaces in which children can express themselves with art become even more important. The creative and expressive arts (including painting and drawing, dance, drama, music and movement) all allow children to work through their feelings and emotions by creatively expressing themselves, which is especially important when the words can’t be found.

Providing a space that includes a wide variety of creative materials ensures children have endless opportunities to process what’s happening in their world and come to terms with their experiences. A space where children’s voices and perspectives are seen and heard.

Creative spaces aren’t just for children though! A selection of art materials in the staff room can provide a creative strategy for educators to relieve stress. Drawing or colouring-in for adults can help boost positive feelings or simply take your mind off things.


Featured Product:

Premium Wooden 4-Sided Easel


Storytelling Spaces

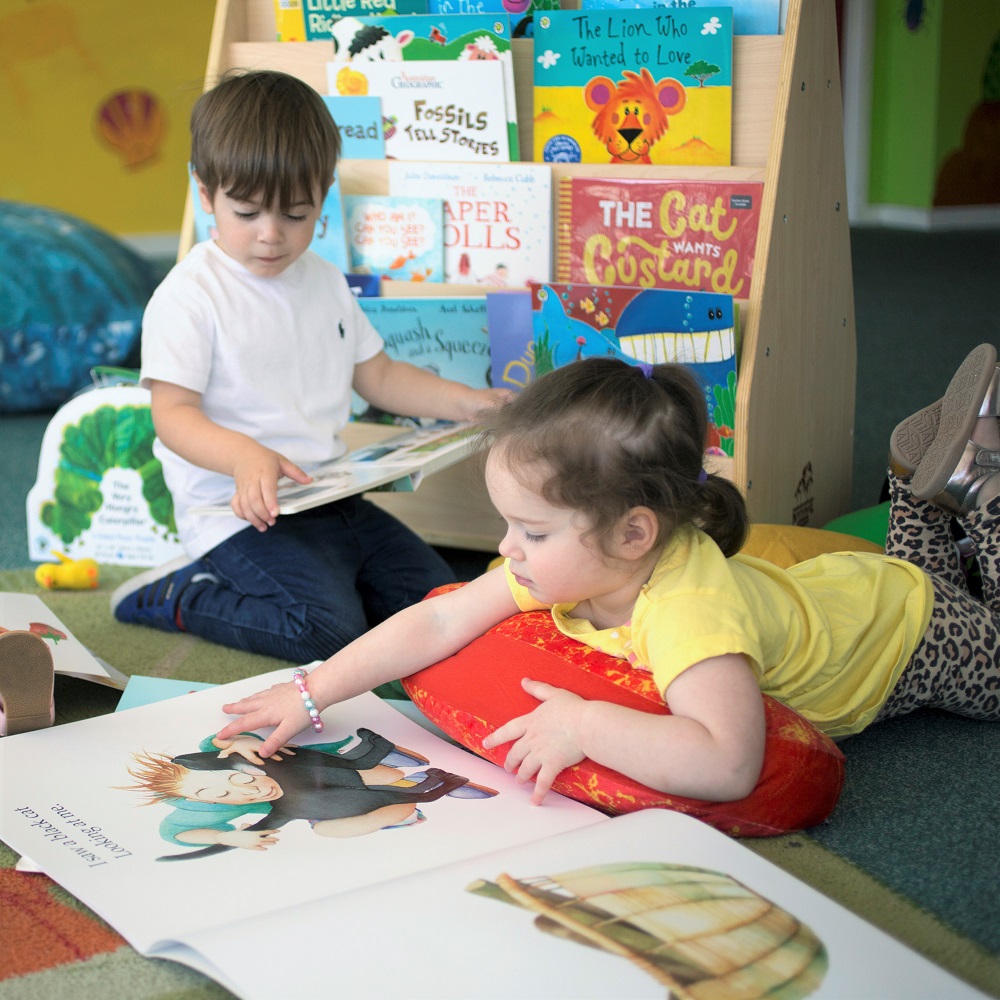
Young girl and boy reading large storybooks in earlychildhood centre classroom


Grab a comfy cushion – it’s storytime!

Books that gently and sensitively capture the lived experience of lockdown, such as While We Can’t Hug, Share Your Rainbow and Windows are invaluable in helping children make sense of an ever-changing ‘new normal’ during the current pandemic. The Fun & Humour Book Pack is guaranteed to make children laugh with continuous joy and entertainment, while the Emotional Development Book Pack celebrates some important milestones in young children’s emotional development with just the right touch of imagination.

Whether it’s everyday shared reading with the Big Books Mixed Carton or storybooks that delve into specific topics, books are a powerful way for children to explore and process their feelings and emotions, supporting and empowering them to identify and articulate the things they are experiencing.


Multigenerational Spaces

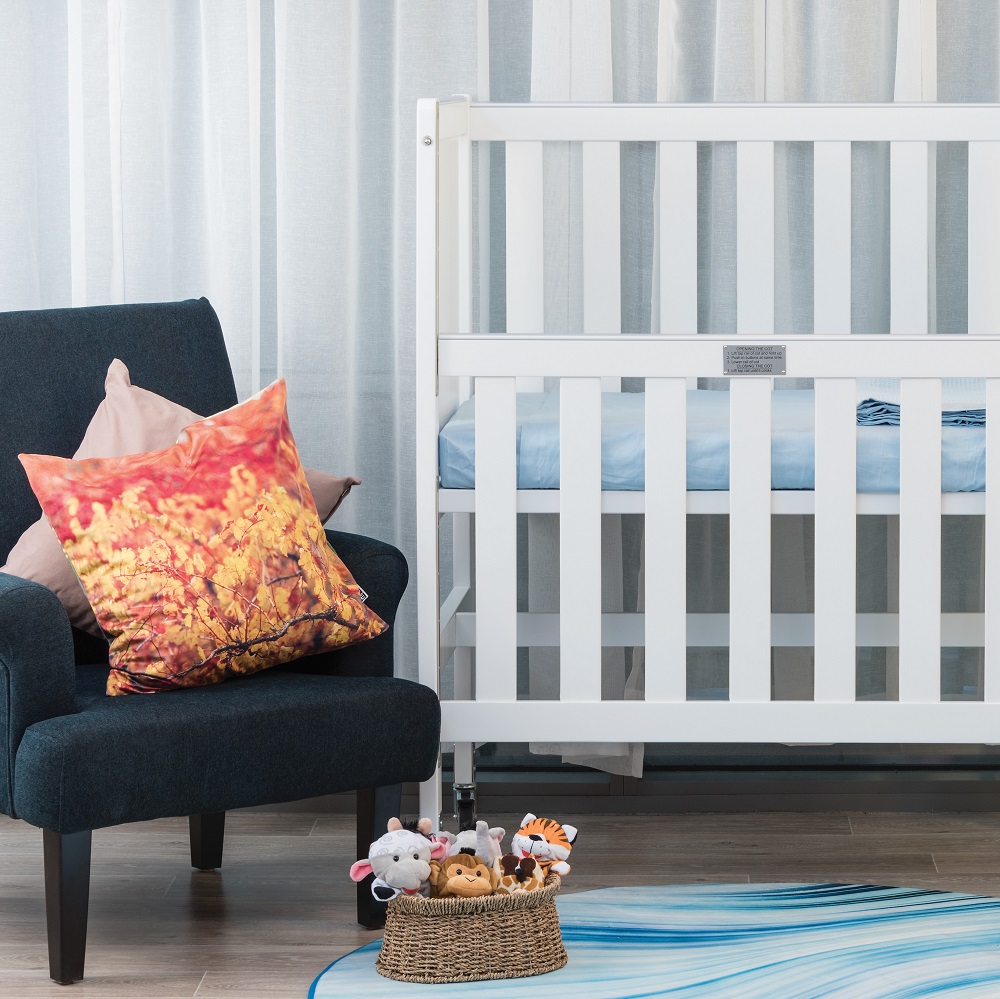
White cots and blue armchair & cushions


Adult-sized furniture pieces ensure educators have places to sit safely and comfortably throughout the day, as well as provide welcoming statements for families to participate. Whether it’s reading a story from the Intergenerational Shared Reading Pack or providing a space for carers to feed their little ones before setting off, adult-sized armchairs, sofas, chairs and cushions will ensure a homelike setting where all the members of the learning community feel comfortable and welcome.

Featured Product:

Aalto – Full-Size High Back Armchair


A well thought out learning environment has the power to support the wellbeing of children & their families – and educators too! It can encourage exploration, enquiry and discovery – and can include open spaces to move about, cosy nooks to hide away and everything in between. It can respond to individuals needs and interests, provide stimulation and excitement, security and comfort, demonstrate cultural diversity and perhaps most importantly- a deep sense of belonging for all.


Thanks for joining us over here at the Modern Teaching Blog today!


About the Author
Penny Groen is an Early Childhood Teacher who has been working in Early Childhood Education and Care settings around Sydney for 17 years. She has a passion for working in meaningful partnerships with families and communities, providing a responsive and engaging curriculum where everyone feels welcome to contribute. You can see Penny’s interest in the natural world with all the weird and wonderful experiments growing both inside and outside the classroom. Penny is also known for equipping children with the tools to explore their interests and celebrate the discoveries each day brings.


Blog Home>

Shop MTA>

Posted on

Explicit Instruction – What Does This Mean?

Children reading in classroom

I started my career as an occupational therapist. My job was to help people relearn how to do things in their everyday life after experiencing an illness or disability. To do this I had to do two things: firstly, I had to analyse the task to establish exactly what the person needed in order to be able to carry out the task and secondly I had to find out what they could and could not do. Only then could I develop a plan to help them master the task. I have applied this same approach – task analysis and assessment of skills and knowledge – to the process of teaching and learning literacy skills.

Mastering a skill of any sort usually involves learning strategies and techniques with lots of practice to hone the skill so that it can be used in different situations. Think about how we teach young children to play a sport. Children who want to play football for example, spend a lot of time learning the skills of ball handling, working with others and understanding the rules of the game. With those skills in place, they are then ready to start playing a game of football.

Whether children start playing football as pre-schoolers or come to the game later, they still have to master these skills and learn the rules of the game. Practice sessions continue to teach and refine these skills and budding footballers spend a lot of time honing their skills so that they can use them automatically and efficiently in a game.

This approach to teaching a sport works well when teaching literacy. Writing and reading are complex processes. Just like a game of football, they require the ‘player’ to master a range of skills and knowledge and to understand how to use them. Just like in football, some children pick up the skills effortlessly and master them with only a small amount of practice. Others take longer, and some decide that football is not for them because the skills required seem too hard to master. Being able to read and write is not like football – playing football is optional, learning to read and write is not. The way we teach children to read and write has to be successful. We need to explicitly teach the skills and knowledge they need to learn if they are to become successful readers and writers.


So what does explicit instruction mean for literacy?

It means understanding what is involved in learning to read and write. It means finding out what skills and knowledge students already have and where they have gaps. It means using assessment to drive instruction – to teach the skills and knowledge students have not mastered but need to learn. Sometimes this means whole class instruction and sometimes it means giving students the extra instruction and practice they need in small groups or individually.


Explicit instruction to close the gaps

I wrote Catch Up Your Code’ and Sort Out Your Syllables’ to address gaps in literacy knowledge for students in upper primary and secondary classrooms. From Year 5 and beyond, students are required to read more and more complex texts in subject areas that are often new to them. The language is more formal, and many words are multisyllabic, abstract and technical. Students who have not mastered the ability to decode automatically and efficiently will struggle. It is estimated that the average fifth year student encounters about ten thousand new words – described as an “orthographic avalanche” that overwhelms most of those without adequate decoding skills.


Teach decoding explicitly

If decoding is not automatic, the skills and knowledge needed must be taught explicitly. First and foremost, students need an in-depth knowledge of how the alphabetic code of English works. ‘Catch Up Your Code teaches this. To decode efficiently, students must recognise graphemes and be able to pronounce them in different ways. Once they have a conscious understanding of the diverse nature of grapheme-phoneme relationships, they can use this knowledge as a foundation for learning to decode unfamiliar multisyllabic words.

That’s where Sort Out Your Syllables’ comes in. Students use their knowledge of the code for the vowel sounds of English, to find and pronounce syllables in unfamiliar words. These two areas of knowledge and skill – alphabetic code knowledge and strategies for decoding multisyllabic words – will dramatically improve decoding skills in the upper years. If decoding isn’t efficient by Year 5, it will not become so, without explicit instruction that targets gaps in knowledge and skills.


Sorting vowel spelling patterns – the key to finding syllables in words

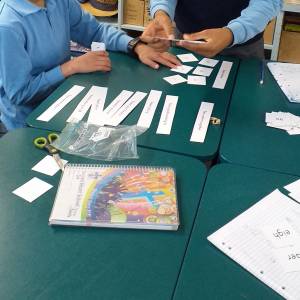
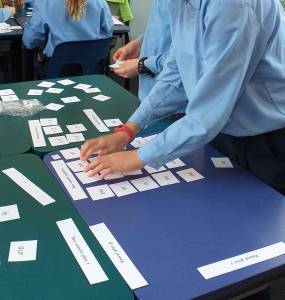
These Year 7 and 8 students are working collaboratively to learn about the nine types of vowel spelling patterns they will find in syllables.

Sorting spelling patterns activity on classroom deskSorting vowel patterns activity on classroom desk


Teach the skills for writing explicitly

From Year 5 onwards, students are required to write longer, more complex scripts in different writing genres. The expectation is that they should have mastered the foundation skills for writing: to write speedily and legibly, to spell most high-frequency words correctly, to use spelling strategies to spell most words close to correctly, to write in paragraphs, to use punctuation correctly, to proofread their writing for spelling and punctuation errors, to revise and edit their work to improve the content. Unfortunately, many students who find handwriting and correct spelling a challenge will struggle to master the other higher-order skills of writing, regardless of their potential to write as well as they can speak.

The way to improve writing skills is to explicitly target the areas that need improvement, starting with the foundation skills. If handwriting is a major challenge by Year 5, students may be best to use a digital device to avoid illegible handwriting hindering their writing progress.

If they struggle to spell words correctly, a range of strategies are needed. Firstly, students need to be able to write every sound of English in at least one way and they also need knowledge of the diversity of the code. ‘Catch Up Your Code’ teaches this. They need to know how to write multisyllabic words they can say but not spell. Sort Out Your Syllables’ teaches this.

They then need to learn about the spelling system of English – the rules and conventions that affect why words are written the way they are. Once they are fluent in getting words on the page in a form that can easily be read – even if they are not all spelt correctly – they can then be taught strategies for punctuation and paragraphing, authorship, proofreading and editing. All the skills for writing need to be taught explicitly, starting with those that build the foundation for authorship.


Summary

Explicit instruction for literacy is simply targeting the knowledge and skills that research has shown to be essential for students to learn to read and write, and ensuring they are taught in a logical, sequential and direct way. It doesn’t matter whether students have just started school or have been at school for a while – everyone benefits from explicit instruction.

Use assessments to find out what students know and can do. Teach what they need to learn.
Check they have learned it. Leave nothing to chance.


The way we teach has to ensure all students become successful readers and writers. Teaching skills and knowledge explicitly is the best way to ensure this happens.


Featured Products:

Catch Up Your Code

Sort Out Your Syllables


About the Author
Joy Allcock (M.Ed). Independent Literacy consultant, facilitator of teacher professional
development throughout New Zealand and internationally. Presenter at NZ and international literacy conferences (IRA, ASCD/ACEL). Author of a range of literacy resources for teachers and students (
www.joyallcock.co.nz). Leader of Shine Literacy Research Project (designed and evaluated by Massey University – www.literacysuccess.org.nz)


Blog Home>

Shop MTA>